This tutorial explains how to set graphics performance settings for individual applications in Windows 10. This is a built-in feature of Windows 10, similar to graphics control panels of Nvidia and AMD. You can set graphics performance settings to high performance, power saving, or system default for an application. The best part is this feature works for Microsoft Store apps as well as applications installed on your PC.
If you have set graphics performance settings for an app to high performance, then it will use the external GPU (if installed) and setting the graphics performance preference to power saving mode will use integrated GPU. Do note this feature is currently available with preview build 17093 or higher of Windows 10. To try this feature now, you should use this or higher preview build. Or you can simply wait for the next stable release of Windows 10 to use this feature.
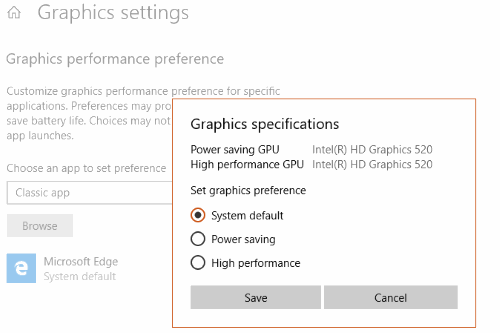
Above you can see Graphics specifications pop-up which shows graphics preference options for a particular application added by me.
How To Set Graphics Performance Settings for Individual Applications In Windows 10?
Step 1: Click the Start button and then click on ‘Settings‘ button in Start menu.

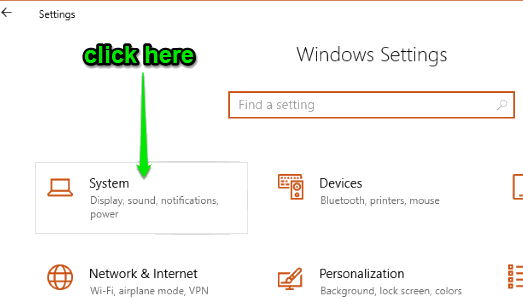
Step 2: When Settings window is launched, select “System” menu.
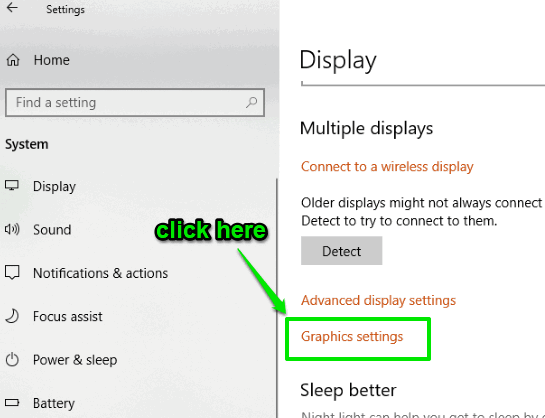
Step 3: System menu will open with “Display” page and you can see options available under this page on the right section. Now scroll down that page and you will see a new “Graphics settings” option. Select that particular option.
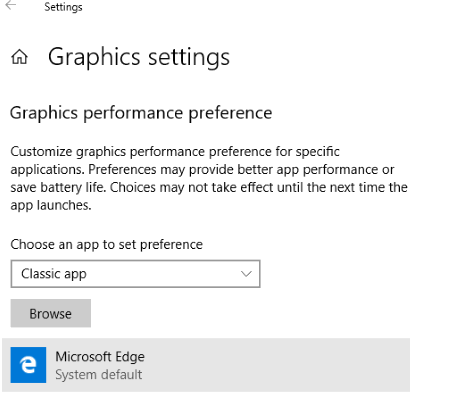
Step 4: Graphics settings has two options: Classic app and Universal app. Classic app helps to select an application installed on your PC and Universal app helps to select a Microsoft Store app installed on your PC. So, select any option as per your requirements. After selecting an option, you can use “Browse” button and add an application of your choice to set Graphics performance settings.
Step 5: Select the application added by you and then click “Options” button, just before Remove button. It will open a pop-up. That pop-up provides three options to set graphics performance settings: System (default), High performance, and Power saving. Select an option and press Save button.
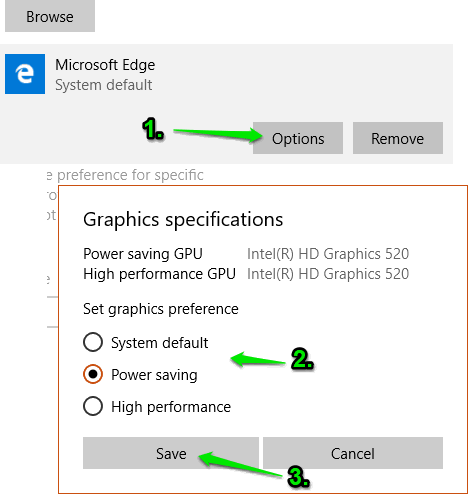
That’s it! You have set graphics performance setting for that particular application. You need to restart that application (if opened already) to apply the changes to that application.
In this way, you can set graphics performance preference for other applications also.
We have also covered features to restrict background data for WiFi and delete diagnostic data in Windows 10.
The Conclusion:
This built-in feature of Windows 10 to set graphics performance settings for individual applications is going to help a lot of users. You have the choice which application should work with high performance or power saving mode. The good thing is this feature works for Store apps and installed programs. Try it.