TimelineJS is a free online timeline generator that lets you create visually rich and interactive digital timelines. You can then use them on your own website or blog. TimelineJS uses Google Spreadsheet to create timelines. With built-in support for media sources like Flickr, Twitter, Google Map, YouTube, Dailymotion, SoundCloud, etc., you can extract media from almost everywhere. All you have to do is use the Spreadsheet Generator Form and fill in the necessary fields given. If you have knowledge of JSON (JavaScript Object Notation), then you can also use your skills to create custom installations. TimelineJS works on any site or blog and is available in more than 40 languages.
How to Create Visually Rich and Interactive Timelines Using This Free Online Timeline Generator
Timeline, in the digital world, is a way of narrating a story in the chronological order. And what more can one ask if you can do it in an intuitive, visually rich and easy manner! With TimelineJS Embed Generator, you can create an attractive timeline in just minutes. Given below is a step by step on how to create a timeline:
Step 1: First of all, go to the TimelineJS website and click on the Green tab “Make a Timeline Now”. Else, you can scroll down the page to the section where you can get the Google Spreadsheet Template. When the template opens, you will see that certain headers have been named already. Click on “Use this template” and clear the Spreadsheet.

Note: DO NOT delete any column or remove/rename the Headers. DO Not leave any blank rows in between your events.
Step 2: It is ideal to keep all the events or contents to be added in one place before filling up the Spreadsheet. Now you can start adding your events in the chronological order. This is the easy part! All you have to do is drop the dates, texts, and links (of videos, Google Map, images, etc) into the appropriate columns. That’s it!

Also see: Create Timelines Easily with Office Timeline
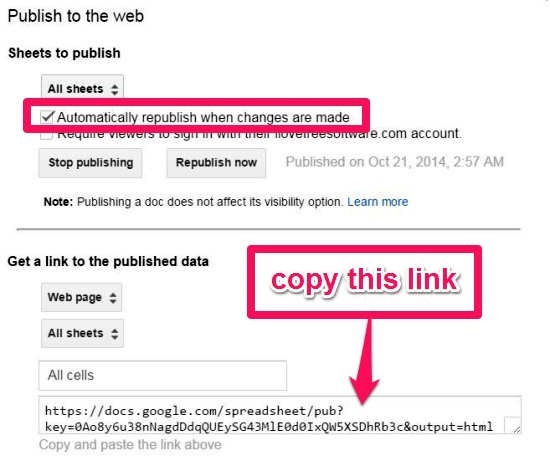
Step 3: TimelineJS is ideal for timelining 20-30 events/entries. If you add more entries than that, it may take time to load. Once you are done adding your entries, go to the File Menu and click “Publish to the Web”. In the next Window, check the “Automatically republish when changes are made” and uncheck everything else. Click on “Start Publishing” to get a link to the published data. Copy the link and head back to the TimelineJS Embed Generator!
Step 4: Go to the third step in the Embed Generator and paste the Google Spreadsheet link to get the URL to embed in your HTML file. You can also optionally customize the timeline.
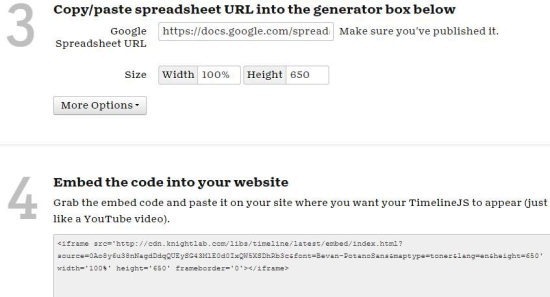
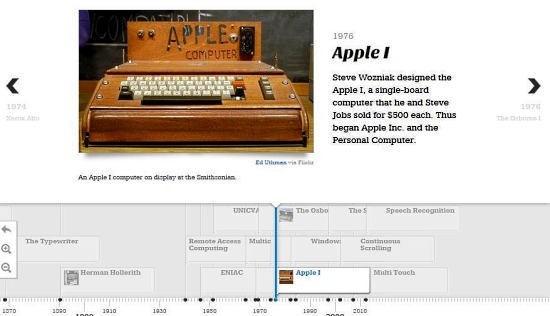
You can preview the timeline you have just created. Once you are satisfied with the way it looks, copy the timeline URL and embed it on your site or blog, just like you do with YouTube video URL. Below is a screenshot of the timeline I created earlier:
Conclusion:
Timeline JS is a very useful and free timeline generator for creating attractive and interactive digital timelines for your website or blog. It is compatible with any site (for WordPress, you might need to install the Knight Lab Timeline plugin) and supports all modern browsers. The use of Google Spreadsheet to create for creating timelines makes it really easy to use, even for first time users. Moreover, with an intuitive UI, and a set of useful tools to customize your timeline, it lets you create a visually appealing and interactive timelines.
