This tutorial explains how to disable Mobile hotspot feature in Windows 10. This built-in feature of Windows 10 helps to share your Ethernet or WiFi data with other devices (such as smartphones, tablets, etc.). Anyone can turn on Mobile hotspot by accessing Network & Internet menu in Settings app. But when you are not interested in sharing your WiFi data with other devices, then disabling Mobile hotspot is a good option to try. For this, you can take the help of LGPO or Local Group Policy window. You have the choice if you want to permanently disable Mobile hotspot or disable in temporarily.
Before moving, do note this Group Policy is actually a native feature of Pro, Education, and Enterprise edition of Windows 10. It doesn’t come with the Home version of Windows 10. That doesn’t mean you can’t use Group Policy if you are running Home edition. With a simple trick, you can install Group Policy Editor in Windows 10 Home and then use this feature to disable mobile hotspot in Windows 10. I was also searching for some way to disable Mobile hotspot in Windows 10 using Registry method, but I didn’t find any solution. I will share that method also as soon as I am able to figure it out. For now, let’s use Group Policy method.
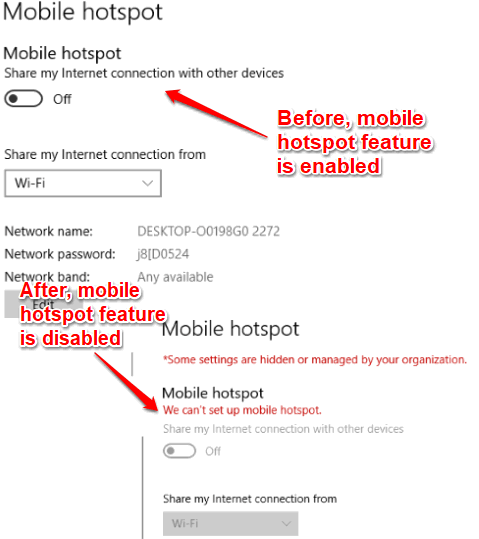
In the screenshot visible above, you can clearly see that earlier Mobile hotspot feature was active, but later it is disabled. That simply means that turn on/off button of Mobile hotspot won’t work.
How To Disable Mobile Hotspot In Windows 10?
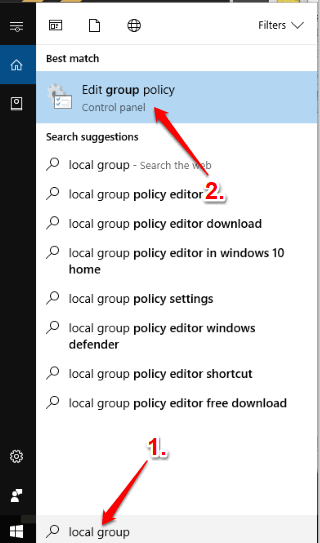
Step 1: Open LGPO (Local Group Policy Editor). Type ‘local group‘ in Search and then click Edit group policy in Search result. It will open group policy window.
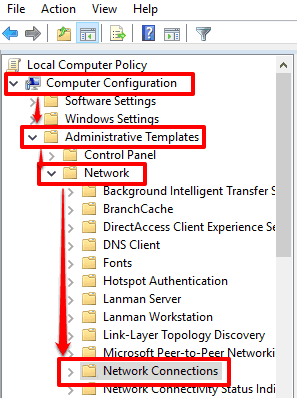
Step 2: Now follow this path: Computer Configuration → then expand the Administrative Templates folder → double-click Network folder → and access Network Connections.
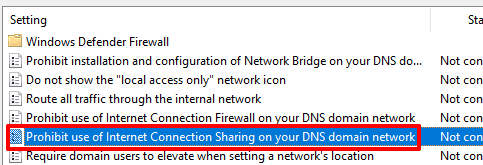
Step 3: On the right side, you will see some options, including “Prohibit use of Internet Connection Sharing on your DNS domain network“. Double-click that option.
Step 4: A new and big window will open related to the same option. In that window, ‘Enabled‘, ‘Not Configured‘, and ‘Disabled‘ options are present. To disable Mobile hotspot, check Enabled option and then save this new setting.
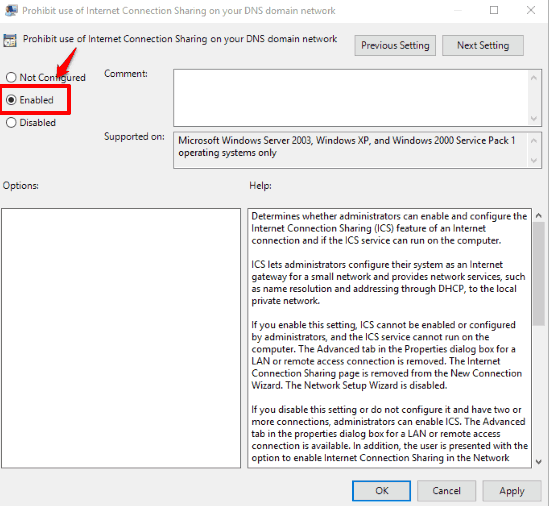
That’s it! You have successfully disabled Mobile hotspot in your Windows 10 PC. Now it is your choice if you want to keep these changes permanently.
To enable Mobile hotspot again, you can check Not Configured option and then save your new settings.
Here is a video demonstrating this feature to disable and enable mobile hotspot in Windows 10:
You can also try How To Set Total Number of Failed Login Attempts In Windows 10 and How To Turn off All Background Apps In Windows 10.
The Verdict:
Mobile Hotspot in Windows 10 is actually a nice feature as it will help you share internet data with other devices. But this feature can also be misused. Therefore, whenever you want, you can disable this feature, and enable it again later.