mDesktop is a free virtual desktop utility which you can use to create virtual desktops on Windows OS. Features that mDesktop offers is practically the same thing that can be found on Mac and majority of GNU/Linux distributions by default. With mDesktop you can create a virtual desktop for each one of your activities, like for example watching video or playing music, working, playing games, browsing and you can easily switch between them.
You may also try BlackSmith and NSpaces reviewed by us.
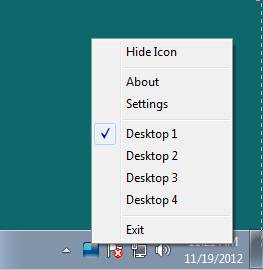
This free virtual desktop creator for Windows can be seen in action in the above screenshot. If nothing happens when you first run it, it’s probably because of the fact that mDesktop starts minimized to system tray. Make sure to check there before running the application again. Each Virtual desktops can have its own name, instead of the default ones.
Key Features of this Free Virtual Desktop Utility:
- Create and manage virtual desktops on Windows OS.
- User can create up to 10 virtual desktops.
- Switch between virtual desktops by clicking on the system tray icon or using the keyboard.
- Changeable names for the created virtual desktops.
By default, each new application that you open with this free Windows virtual desktop creator will only be available on the desktop where it was opened. Settings are managed by opening the setting menu. Here’s a few tips to help you get started with mDesktop.
How to Create Virtual Desktops in Windows Using mDeskop?
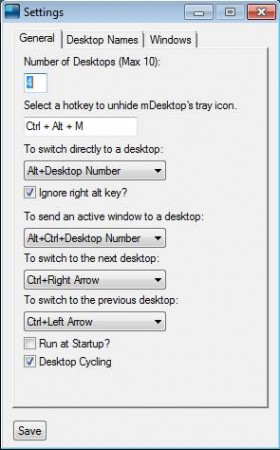
Like we said after installation, mDesktop will start working right away. Look at your system tray and there right-click on its icon. You should see the menu which can be seen in the image above. Select Settings to fine tune you virtual desktops.
To change the number of virtual desktops enter a different number in the Number of Desktops input box. You can set up 10 virtual desktops. Down below you can adjust various different keyboard combinations for switching between desktop or sending the active windows to a certain virtual desktop. Names of the virtual desktops can be changed by clicking on the Desktop Names tab.
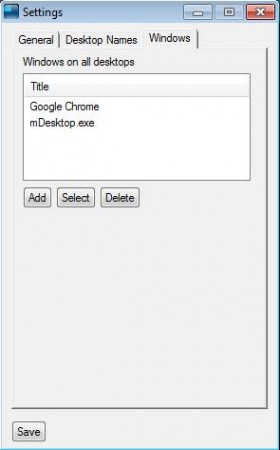
Last tab called Windows is where you will be able to add applications that you want to be persistent, in other words visible on all virtual desktops. Click Add and simply write the application names. The application names which are located on the list are gonna be there no mater which virtual desktop you open.
Conclusion
mDesktop does everything as advertised. When you switch through desktops either by right clicking on the system tray icon or by using the key combination, you’ll be able to change between workspaces, if you’ve decided to use virtual desktops as workspaces. Alternatively, you can run several different instances of the same application on one computer, as long as the application isn’t set to appear on all virtual desktops via the persistence trick that we showed above. mDesktop is very small and very lightweight, less than a megabyte in size. If you don’t want virtual desktop, simply exit the app. Free download.


