Phatch is a free batch image processor for Windows that lets you add shadows, effects, round corner of images, rotate, add transparence mask, and more to multiple photos all together. It saves a lot of your precious time by applying changes to all of your desired images at once. That’s why it is very crucial software which is available free of cost for you.
You can put your images in batch and this software will help you for editing and customizing your photos in short-range of time. This software supports plenty of image file formats like jpg, bmp, png, mng, psd, tif, ttf and lot more, which is the best part in this. Apart from this, this software provides multiple changes to take place on photos. That’s why this batch processor is a bit different from other similar software.
Similar software: Digital Image Tool, ImBatch, and MODI.
Phatch is very helpful in case you need to edit dozens of photos in less time. See below how it works!
How To Use Phatch?
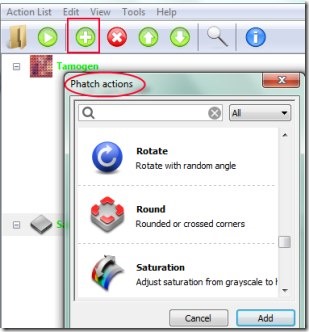
It gives a completely user-friendly interface that anyone can use easily. However, for the first time, you might find it a bit typical to use. However, this article will help you for that. Once after installing this software to your PC, you can use its interface from where you can add Phatch actions (using Edit option or plus icon) of your choice (which you want to add to your photos). Multiple Phatch actions you can add such as solarize, shadows, round (round or crossed corners for image), rename, text, saturation, watermark etc. You can choose any desired action or all actions one by one. After adding them, you can customize each action’s settings. For example, if you choose watermark action, then you can change opacity and other available settings in watermark easily.
This way you can add Phatch actions and can customize their settings. After adding all the desired actions, don’t forget to add save action as it is very necessary for storing your processed images to location of your choice. However, Phatch automatically adds save action for you, and you can move further.
Add Images For Batch Processing:
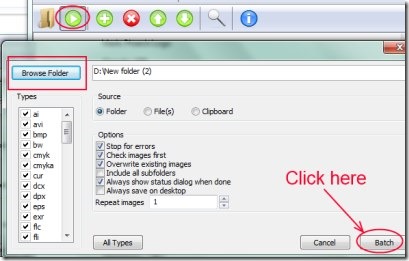
Now when you have desired actions with you, then you can execute all those actions using Execute action icon which is available just before to plus button. Hit that button and it will open a small window from where you can add desired images for batch processing. Use Browser option on that window as it is visible in below screenshot. You can either browse files or the whole folder in which you have stored your images. Add them and hit the Batch button.
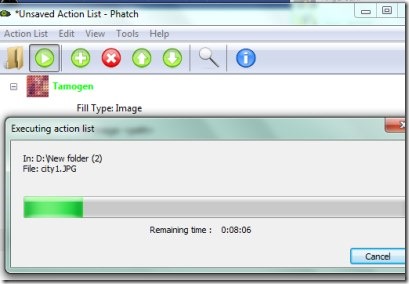
This action will start processing and executing actions added by you, and your images will processed after completion of processing. What after this? There is nothing to do then, you can view all your processed images and can use them wherever you want. Isn’t it great saving of time and energy!
What’s More You Can do?
- You can use Droplet option for drag-n-drop images to Phatch for batch processing.
- You can create multiple actions lists and can save them easily.
- You can use Image Inspector available in Tools option that will help you to know about the details of your images such as: interface, file size, format description, path, root, compression (if any) and much more.
How To Download & Install it?
Phatch is a bit different in case of installation process. As you can download it easily, but for using it, you need to do some extra work. Therefore, first you need to download and install these:
Python (an object oriented programming language), wxpython, and PIL (Python Imaging Library). After this, you can get Phatch with this given link. Download it and extract its files. Then after, double-click on phatch.py file that will be available in Phatch folder (present in extracted files of Phatch). Open it and start using it!
In brief, Phatch having a simple and straightforward procedure for batch processing of images with valuable options. It’s an easy solution to apply multiple changes to multiple images in a single shot.


