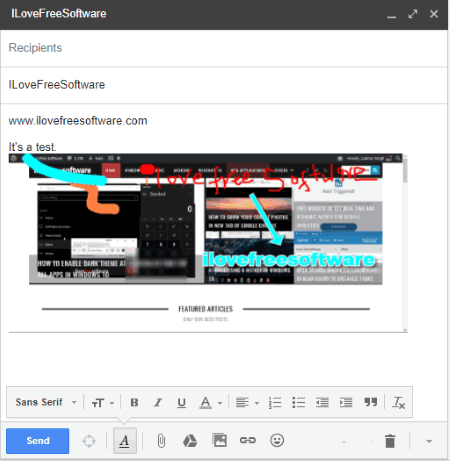
Gmail Screenshot is a free Chrome extension to capture screenshot using Gmail, annotate it, and send screenshot directly from Gmail. You can capture the full desktop screen, a Chrome tab, and an opened application. After that, you can annotate it using rectangle, text, pixelate, and other tools, and finally, send the screenshot to the recipient. It lets you capture multiple screenshots (one after another) and send all those screenshots in email. Before sending the screenshot, when entire desktop screen is captured, you can also crop it so that you will be able to send only a specific part of your desktop screen.
There are many other Chrome extensions to capture screenshots also available, but taking screenshots directly using Gmail is something different and interesting. Instead of first capturing the screenshot, annotating it separately, and then adding it as an attachment in the email, this extension lets you do all these things directly from your Gmail account.

Above you can see a screenshot captured, annotated and attached in Gmail email using this handy extension.
How To Capture Screenshots Directly Using Gmail, Annotate Them, and Share With Others?
Step 1: First of all, open homepage of Gmail Screenshot extension and install it. After installation, it will open a new tab using which you need to sign in to your Gmail account (if not signed in already) and permit this extension to access your account. You also have to create a free cloudHQ account so that this extension can serve you.
Step 2: Now the extension is ready to capture screenshots using Gmail. Open Compose Mail window of Gmail and you will see a new Attach Screenshot icon, just next to the Send button. Click that button.
![]()
Step 3: Now a pop-up will open that contains three different tabs:
- Your Entire Screen: Using this tab, you can capture the full desktop screen.
- Application Window: This tab helps to take the screenshot of a desktop application which is currently opened on your desktop. You can see the thumbnails of all the opened applications and select any thumbnail to automatically take screenshot of that particular application. Do note that if some application is minimized to system tray, then it won’t be able to take screenshot of that application. So, make sure all the applications are opened in full or resized mode.

- Chrome tab: This tab shows the list of all opened tabs of your Chrome browser. You can select any tab to capture its screenshot.
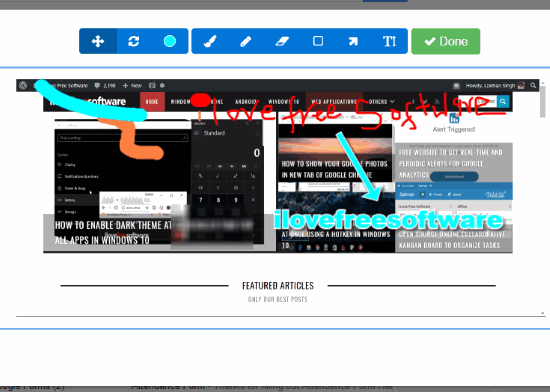
Step 4: Use any option to capture the screenshot and then it will help you annotate the captured screenshot. You can use a custom color, brush, pencil, pixelate, rectangle, arrow, and text tools for annotation. There is no Eraser or Undo option, so you need to be careful while annotating the screenshot. Also, you can’t adjust the width of brush, pencil, arrow, or rectangle tool, but you have the choice to select any of your favorite colors for the annotation to make screenshot look good.

Step 5: When the screenshot is ready, press Done button. That’s it! Now screenshot is ready, it will be added to your email.
You can take more screenshots if you want. After that, enter the subject and recipients, and send your screenshot(s).
The Conclusion:
Taking screenshots directly from Gmail is a unique idea and Gmail Screenshot Chrome extension has served it very well. Its features like different options for capturing the screenshots and annotation tools are quite useful. Also, you don’t have to manually attach screenshots in your email. Once the screenshot is ready, it is attached automatically, and then you can send it from your Gmail account. You should try this extension.