In this post, I have mentioned a couple of free software for Windows for pixel anti-aliasing. If you work with 2D pixel art or sprites for developing games or puzzles then you will find this software useful. With these, you can make your graphics or characters look smooth around the edges.
![]()
What is Pixel Anti-Aliasing?
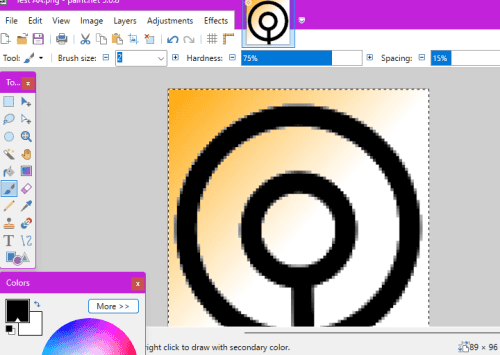
When drawing something on a grid of pixels, the edges often don’t line up perfectly. This leads to a jagged, stairstep look as you can see in the image above. The process to fix this stairstep effect is called pixel anti-aliasing.
Pixel anti-aliasing is basically a technique to smooth out the jagged edges that can happen when drawing text or images on a digital display. I am sure you must have seen these edges in raster graphics software such as MS Paint. Pixel anti-aliasing helps combat this effect and makes the edges smooth.
There are various anti-aliasing algorithms but not so many free tools for artists or game designers. But in this post below, I have added 2 simple free tools that you can use on any image.
Pixel Art Anti-Aliaser
![]()
This is one of the best free pixel anti-aliasing tools that you can use on Windows. And not just Windows but it works on Linux and macOS as well. Here it supports pixel art images in JPG and PNG like formats among other features. It offers a simple interface where you can open any pixel art that you want to anti alias and then you can save the changes.
Pixel Art Anti-Aliaser has a comparison window where you can compare the input and output image visually after applying the pixel anti-aliasing. In addition, there is a color replacement tool as well. It extracts all the colors from the image and you can replace them and view the entire color palette as well. This is fully open-source software and you can find its source code on GitHub.
Download this tool from the link below and then just open it. It runs in portable mode and you can just launch the binary. The same thing you can do on macOS and Linux. The interface will show up in which you can import images and then there are the anti-aliasing tools in the left sidebar. Add the outline color and then select the darken amount to apply the changes.
![]()
In the end when you are done, you can analyze the changes by comparing the input and output image comparison that it shows. If you are not satisfied with the results then you can simply adjust the parameters again and then generate the final image.
Download Pixel Art Anti-Aliaser
Paint.net
Paint.net is a well-known image editor that I am sure you might have used. It comes built in with a pixel anti aliaser that you can use in your work. No matter what kind of image you are working on, if it is a raster graphic then Paint.net has an automatic anti-aliasing mode that you can turn on to activate the pixel anti aliaser in the background automatically. However, it does work but a little downside is that it doesn’t allow you to control it. It applies a fixed amount of anti-aliasing that may be or may not be completely perfect.
Install Paint.net from the Microsoft Store or you can download it from its website, the link is given below. Load your pixel art in it. Since it is a full featured image editor, so you can zoom into the image to pixel level and analyze the existing edges and staircase effect.

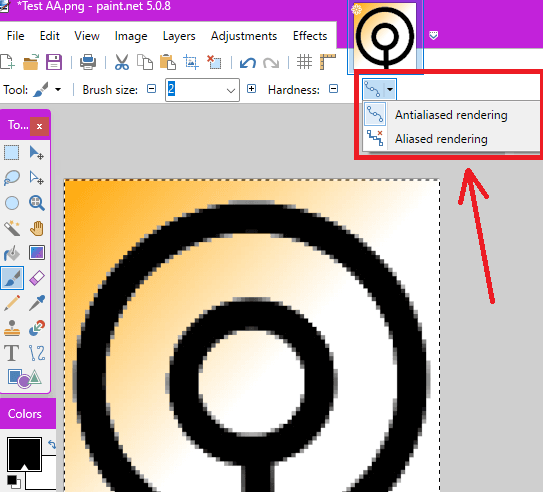
After the image has opened, simply select the antialiasing mode from the toolbar above. There are two rendering modes available, namely Antialiased rendering and Aliased rendering. You can see this in the screenshot below.

Since we are talking about pixel antialiasing so, simply choose the first option and then you will notice it will fix the art for you automatically. If you don’t see the full changes then you can simply open the image again and fix it.
Closing thoughts:
These are the only free tools that I could find which you can use for pixel antialiasing for free. All the tools I have mentioned here work on Windows and one of them also works on other operating systems as well. So, try any of these tools and then see which one works out the best for your use case.