This tutorial explains how to disable password change for a user account in Windows 10. By default, if you have added a user account in Windows 10 PC, then that particular user can easily change the password for its account by accessing Settings app and selecting Sign-in options. But, if you don’t want a user to change the password set by you, then it can be done easily without any third-party tool.
You can prevent PC users from changing the password in Windows 10 using two different ways. Steps for each method are covered separately in this tutorial. You can also undo changes and enable password change option for any user account anytime.
Do note that for applying this trick, you must be signed in to your administration account. Also, this trick works only when you want to disable password change for a standard user account. If you will try to use it on the administrative account, then it won’t work.
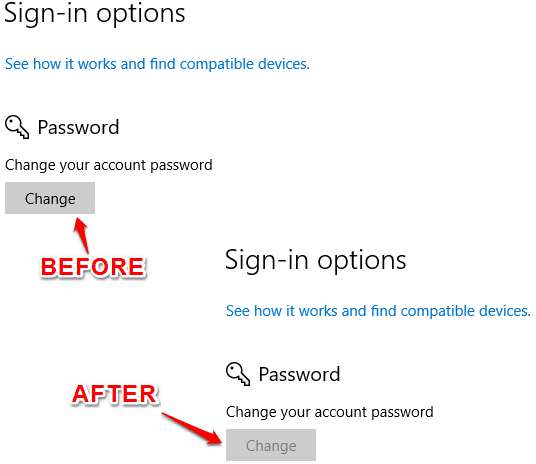
Let’s see the first method.
Method 1: How To Disable Password Change for A User Account In Windows 10 Using Local Users and Groups
Local Users and Groups is not present in Home edition of Windows 10. This method can be used in Windows 10 Enterprise, Pro, and Education edition only. For Windows 10 Home, jump to the next method.
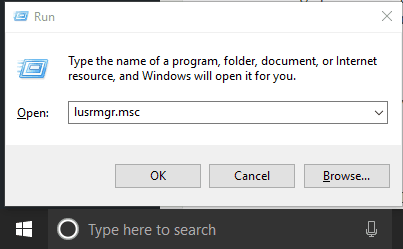
Step 1: Use the Run Command (Win+R), enter “lusrmgr.msc” in Run box. It will help you open Local Users and Groups window.
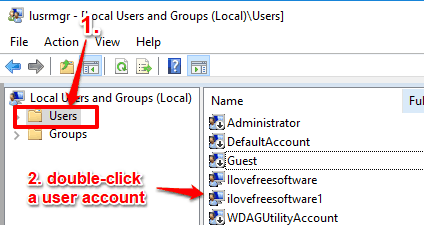
Step 2: When Local Users and Groups window is launched, click “Users” folder. This will show all the user accounts available in your Windows 10 PC. Now double-click on the user account for which you want to disable password change.
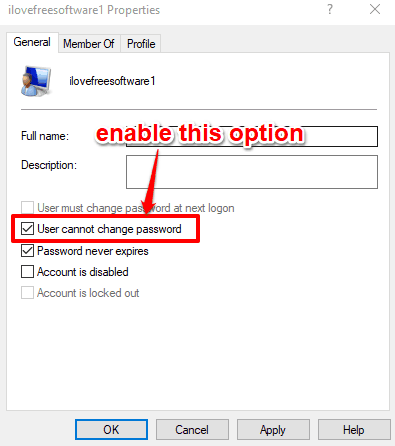
Step 3: Properties window of that particular user account will open. Here, you will see “User cannot change password” option. Enable it and then save this new setting.
Change password option is disabled for that particular user account.
To enable change password option for the same user account again in Windows 10, you can use Remove Change Password window and then set Disabled/Not Configured radio button. Save new setting.
Method 2: How To Prevent Changing Password for A User Account In Windows 10 Using Command Prompt Window
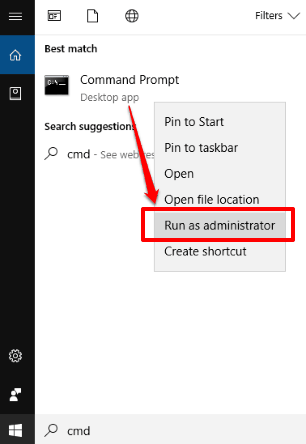
Step 1: Run Command Prompt window as administrative. For that, type cmd in Search box, right-click on Command Prompt option visible in results and click “Run as administrator” option.
Step 2: When Command Prompt window is launched as administrator, type this command: “net user “user account name” /PasswordChg:No“. Here, replace “user account name” with the actual user account name. Press Enter to execute the command.
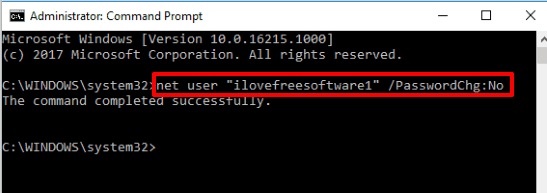
This will disable change password for that user account.
Step 3: To enable password change option for that user account, you have to execute the similar command as above. Just replace ‘No’ with ‘Yes’. Here is the command: “net user “user account name” /PasswordChg:Yes“.
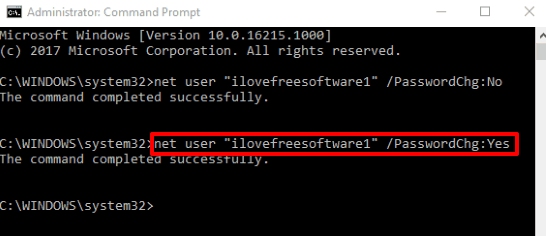
After executing the command, it will successfully enable password change option for that user again.
You can also check How To Set Time Limit For A Local User Account In Windows 10 and How To Unlock A Locked Account in Windows 10.
The Verdict:
If you share your Windows 10 PC with others by creating different user accounts and don’t want them to change the password set by you, this trick is really useful. You will have full control when users can change their user account password and when not. Among these two methods, Command Prompt method is simpler and works on all versions of Windows 10.