This tutorial explains how to share files with other PC in Windows 10 without any tool. You can share any file or folder with any other Windows 10 PC which has Bluetooth or connected to same WiFi network. No Store app, software, or some tool is needed. So, instead of sending emails, using a flash drive or third-party file sharing service, you can try this simple option which works well.
This has been made possible with a new “Nearby Sharing” feature of Windows 10. It has come with April Update of Windows 10, version 1803. The sender and receiver Windows 10 devices have to enable Nearby Sharing option and connect to the same WiFi or Bluetooth. After that, you can share any file by right-clicking and then using “Share” option of Windows 10 context menu. This tutorial will help you how to do it.
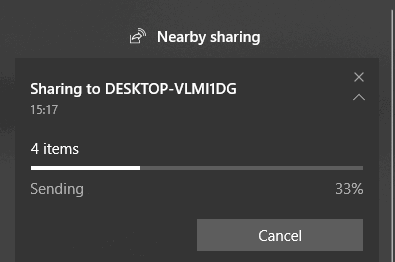
In the screenshot above, you can see the sharing process in progress for 4 files and folders that I sent to other Windows 10 PC using this Nearby Sharing feature.
How To Share Files With Other PC In Windows 10 Without Any Tool?
Step 1: Make sure both the PCs are updated to version 1803 and WiFi (same WiFi network) or Bluetooth is turned on. After that, enable Nearby Sharing option on both the PCs. To enable this feature, open the Action Center, expand it and then click on “Nearby sharing” option.

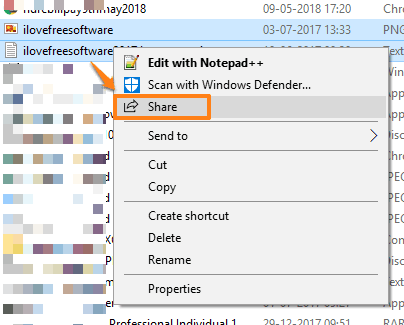
Step 2: Select a file or folder or multiple files and then right-click. You will see “Share” option. Use that option.
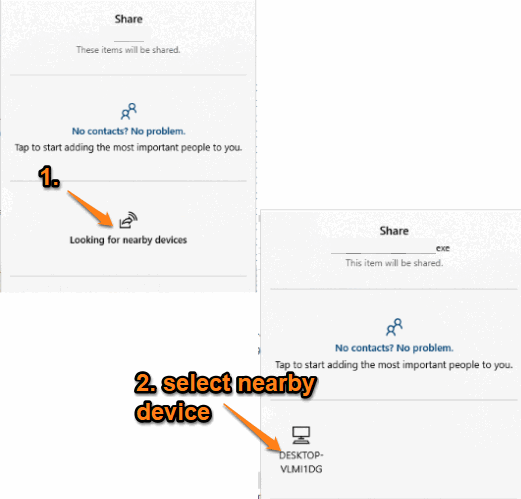
Step 3: Share window will open where you will see that it is Looking for nearby devices. When the scanning is completed, it will show the name of all the devices which has turned on this nearby sharing option. Click on a particular device name.
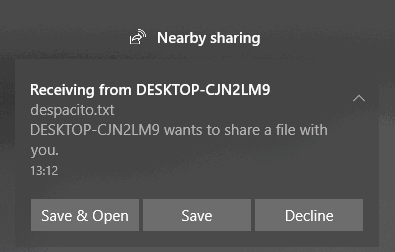
The receiver device will receive a notification about the incoming file(s). There are three different options: Save, Decline, and Save & Open. Use Save option to start receiving the incoming file(s), decline to reject the sharing, and Save & Open option to save items and then open them after that.
That’s it! The sharing process will start and files are saved to the default folder.
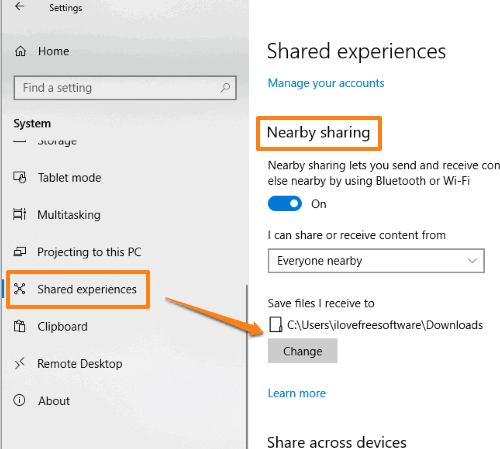
Step 4: This step is handy to change the destination folder to save the files. All you have to do is open Settings, access System menu, and then select “Shared experiences” option. On the right side, you will see Nearby sharing option where you can set the destination folder. This section also helps to turn on/off nearby sharing as well as set whether you want to send or receive content from “Everyone nearby” or “My devices only“.
Did you know you can also take screenshots in freeform mode in Windows 10 without any tool?
The Conclusion:
This Nearby sharing feature to share files with other PC in Windows 10 without any tool is interesting and useful. Still, I will say the feature is not good when you have to share large files. For small files having size a few MBs, this feature is good to use.