InvoiceOcean is a free invoicing web app with which invoices, estimates and expenses can be recorded. Additionally, users can manage details of products and clients. Invoices, estimates and expenses can be further customized by adding various attachments and their own logos. Users can add attachments to clients and products as well. The invoices you create can be sent via emails too.
If you’re worried about the regional settings, don’t be; InvoiceOcean provides an international experience where languages and currencies can be changed to those of different countries and regions.
At the end, reports can be generated of almost all the dealings that a user has recorded on InvoiceOcean. The reports can be printed directly as well as exported as an XLS file.
However, InvoiceOcean only allows its users to make 3 invoices and expenses per month. You won’t find this limitation with products and clients. Users can add unlimited products and clients with customizable elements. InvoiceOcean is quite secure with its SSL security. Online payment gateways are integrated to make payments and receiving payments quite simple and secure.

If you feel the need of a business accounting manager, you can try out Manager. Manager is an offline accounting software that can manage customizable business accounts.
Let’s take a better look at InvoiceOcean.
How to Add Products and Clients on InvoiceOcean

The first step of using InvoiceOcean is to add clients and products. Invoices can be properly generated only when you have a well managed database of products and clients. Click on Products at the menu bar on the top. Enter the details of the product. Right below the details form, you can add a quantity restriction and gross/net purchase price of the whole block of product.

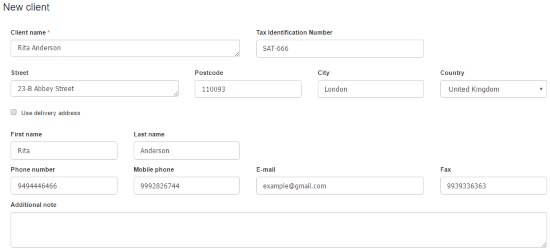
Similarly, click on Clients on the menu bar and enter the details of clients you want to add. The details also include VAT ID of the client.
How to Generate an Invoice on InvoiceOcean

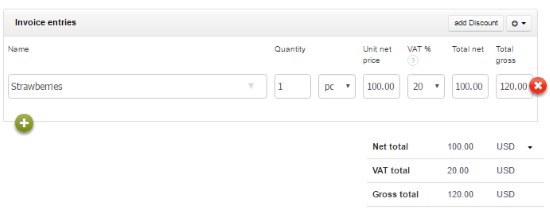
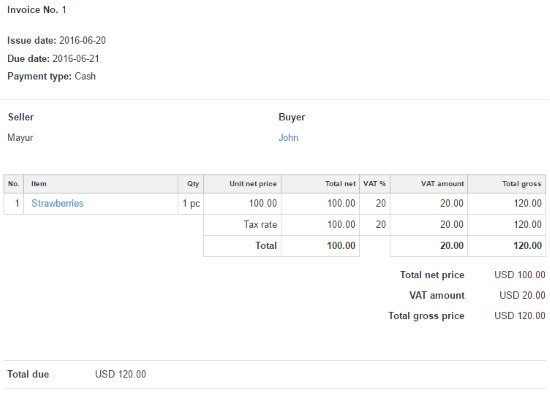
On the dashboard, click on Invoice. Since you’ve already filled up your client and product database, you can easily select them from their respective drop-down fields. Below it, use the drop down form to add products in the invoice entries. Moreover, the user can add discounts in case of discount drives. Finally at the end of the page, payment options can be changed. If it’s international shipping, conversions can also be made in different currencies. Here is what the invoice will look like:

On preview of the bill, you can set the logo and also email it to the buyer. Apart from invoices, users can generate bills, Performa, receipts from add more documents option on the dashboard.
How to View and Generate Reports

The Reports drop down menu on the top allows you to generate reports of different types. These include revenue and expenses, invoice list, clients, etc. You’ll just have to set the date range or you can select the report of a specific date. A bar chart will be generated which can be printed with the ‘Send do Printer’ button. To keep an XLS file, click on Export to XLS.
Final Words
InvoiceOcean has tons of options you can set to make your work way easier. The only thing that holds me back from using it is the extremely low amount of invoices allowed in the free version. Everything else is awesome. I give it 4.4 stars.
Try InvoiceOcean here.