This tutorial explains how to add “This PC” to Windows 10 Taskbar. There is no direct option to add This PC to Taskbar. However, 2 simple methods are there using which you can pin This PC to your Windows 10 taskbar. I have covered both the methods. The first method takes the help of Windows 10 Start menu and second method lets you add This PC to Taskbar using a shortcut.
In the screenshot below, you can see This PC icon visible on my Windows 10 Taskbar. You can also pin and unpin This PC anytime from Windows 10 Taskbar. If you use Windows 10 taskbar to access your daily use programs and also want This PC to be a part of those programs in the taskbar, then this tutorial is really handy for you.
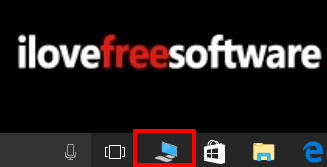
Let’s start the first method.
Method 1: How To Add “This PC” To Windows 10 Taskbar Using Start Menu
Step 1: Open File Explorer using Win+E hotkey. Quick Access will open in This PC. If you have removed Quick Access or set File Explorer to open This PC to instead of Quick Access, then This PC will open directly on pressing Win+E hotkey.
Step 2: On the navigation pane, you will see “This PC” and other icons. Right-click on This PC and tap on Pin to Start option.
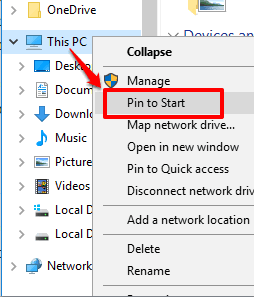
This will add This PC to Windows 10 Start menu.
Step 3: Click on Start button to open Start menu. There you will see This PC tile is added. To add This PC to taskbar, right-click on it→ More→ Pin to taskbar.
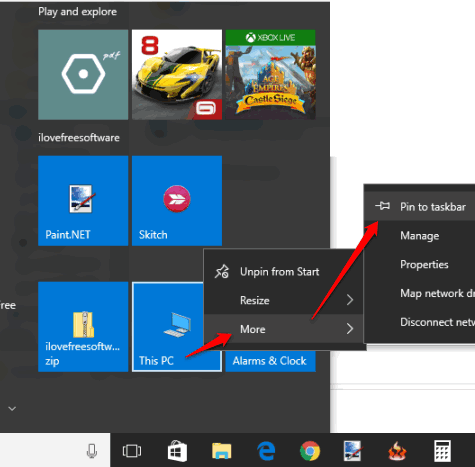
That’s it! This PC is added to your Windows 10 Taskbar. After adding it to Taskbar, you can remove This PC tile from Start menu.
Method 2: How To Add “This PC” To Windows 10 Taskbar Using A Shortcut?
Step 1: Right-click on desktop→ New→ Shortcut. It will open Create shortcut window.
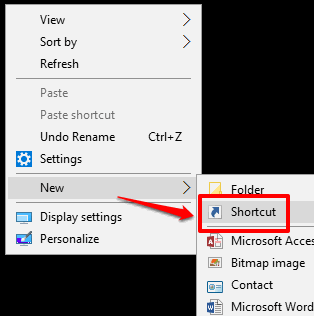
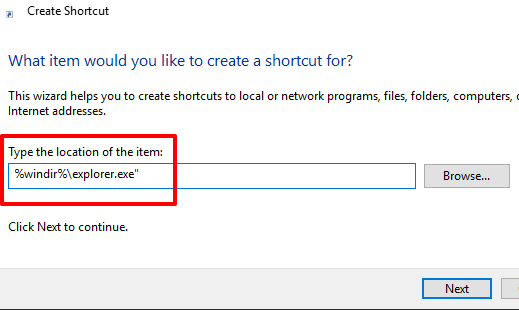
Step 2: You will see “Type the location of the item" box. In that box, paste “%windir%\explorer.exe” and press Next button:
Step 3: In this step, you need to set a name for the shortcut. You can set This PC, My Computer or any other name.
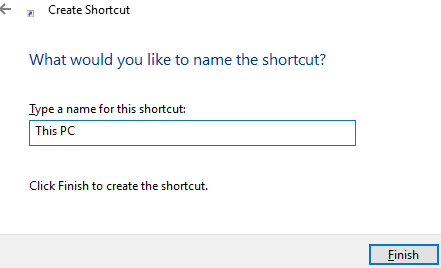
Enter the name to complete Create shortcut wizard.
Step 4: You will see This PC shortcut is added to the desktop. After creating the shortcut, you need to change its icon. By default, it shows File Explorer icon. You can change it to show This PC icon. Although this step is optional, but useful when you want to see This PC icon instead of File Explorer icon in the Taskbar. Right-click the shortcut and access Properties window. In that window, go to the Shortcut tab, and click on Change Icon button. Another window will open. In that window, paste “%windir%\System32\imageres.dll” in the available box and press Enter.
![]()
You will see a lot of icons. Select This PC icon and save changes.
Step 5: Now right-click on the shortcut and click “Pin to taskbar” option.
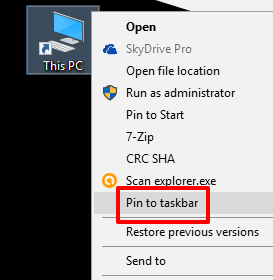
It will add This PC to taskbar. When This PC is added to taskbar, you can delete the shortcut.
Closing Words:
Almost all of us access This PC multiple times a day to access folders, files, etc. So if you quickly want to open This PC using Taskbar, these two methods are handy. Method 1 is easier and short so I prefer that method.