This tutorial details how to use snap assist in Windows 10. There’s no doubting the fact that Windows 10 is the most comprehensively reworked Windows version ever. Consequently, it packs in a whole barrage of radical new features and enhancements, ranging from visual refreshes to under the hood performance overhauls. Out of these, there’s one feature that’s sure to please productivity nerds, and that’s Snap Assist.
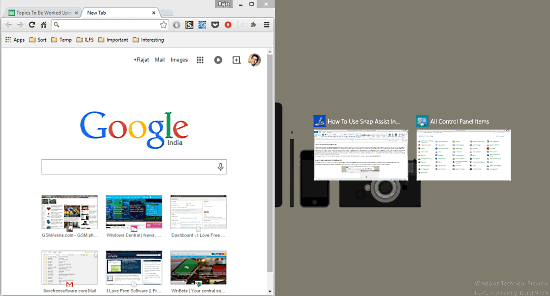
A vastly improved version of the Aero Snap functionality introduced in Windows 7, Snap Assist lets you snap (hence the name) multiple program windows together. The windows can be snapped both horizontally and vertically. You can either snap two or even four windows (using the new 2×2 quadrant layout). And even that’s not the best part. When you Snap a program window to an edge of your screen, Snap Assist intelligently displays the rest of the open applications in the leftover space, so that the application that you choose can be instantly used to accommodate the rest of the screen area. Thus, Snap Assist ensures that you utilize your desktop space to its maximum potential.
That being said, I’m sure you’re already getting impatient to see this thing in action. Head past the jump to see how you can use snap assist in Windows 10.

How To Use Snap Assist In Windows 10?
It’s extremely easy to use Windows 10’s snap assist functionality. Read on the following detailed walkthrough (of course, with the screenshots), more than sufficient to see you through the finish line:
Step 1: Head over to the Windows 10 desktop. It goes without saying that you need to have at least 3-4 active applications running on the desktop, to see how Snap Assist works.

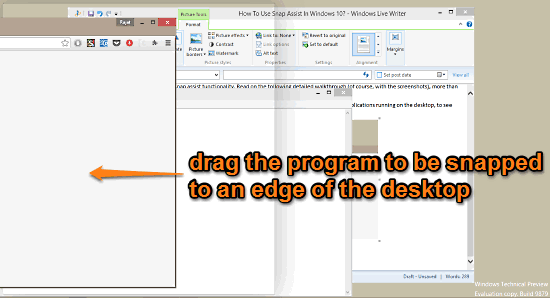
Step 2: Now, click and hold the title bar of the application that you want to snap, and drag it to any edge of the screen (To use the 2×2 snap, move the application to a corner of a screen). Once the transparent boundary indicator appears, release the mouse button.

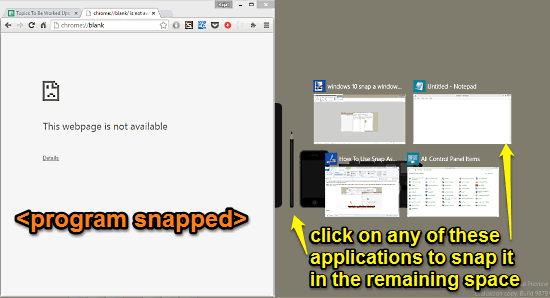
Step 3: That’s pretty much it. As soon as you release the mouse button, Snap Assist will be triggered, and the application will be snapped to an edge (or corner) of the desktop. Snap Assist will also fill up the remaining screen area with the thumbnails of the applications available for snapping. Simply click on an application, and it’ll be snapped with the previously snapped application. Here’s a screenshot:

Do Check Out: Switch Between Applications Running On Multiple Desktops In Windows 10
Wrapping It Up
Snap Assist is an insanely useful feature of Windows 10. Ridiculously easy to use yet powerful, Snap Assist makes sure you utilize your screen space to its maximum capacity and can work wonders towards overall user productivity. Take it for a spin, you’ll absolutely love it.