In this tutorial, I will explain how to apply Group Policy Editor for specific user or for all users in your Windows 8 PC.
Group Policy Editor is a feature of Windows that lets you make changes in configuration of Operating System, application settings, and various user settings quite easily. When you make changes in Local Group Policy Editor for all users, then the changes are applied for all the users, even for the Administrator group of users.
Sometimes, we need to make some restrictions for some specific users only, not for every user, especially not for administrator, like: disabling PC settings and Control Panel, prevent users from customizing Start Screen in Windows 8, etc.
To make changes for specific users only, you need to open the Group Policy Editor only for that user only. Although, Windows doesn’t provide any such feature, but you can use Microsoft Management Console to do that. You just need to choose the user for whom you want to make changes.
Microsoft Management Console basically provides an interface, which lets you configure the system as per the Administrator’s preference.
Note: Group Policy Editor is not available in Home Edition version of Windows 8.
Apply Group Policy In Windows 8 For Various Users:
Apply Group Policy for all users:
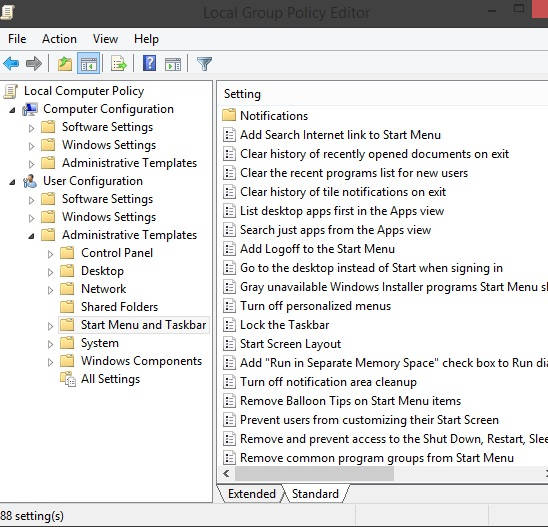
To open Group Policy Editor for all users, open Run by using Windows Key + R. In the Run, type gpedit, and then click on Edit.
It will open Group Policy Editor. If you make changes in any setting or configuration, then it will be applied for all the users including the Administrator.
Apply Group Policy for Specific users:
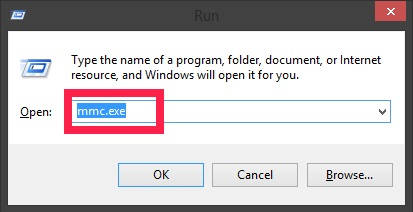
Step 1: To open Group Policy Editor for specific users, open Run and use mmc.exe in the Run box.
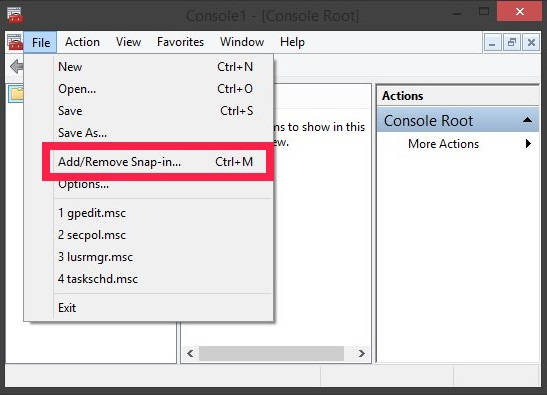
Step 2: Now, click on File button. From the drop-down list tap on “Add/Remove Snap-in” option from the drop-down list.
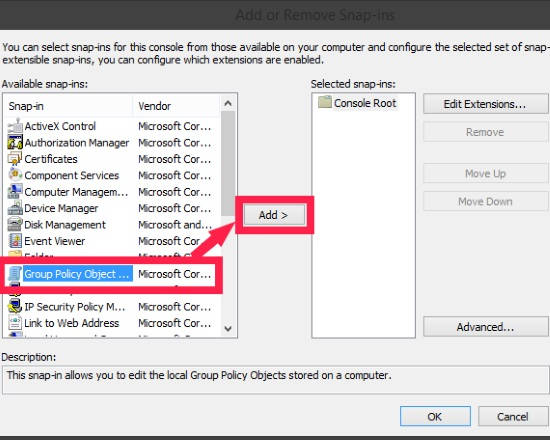
Step 3: In the Available Snap-ins box, click on “Group Policy Object”. After that, click on “Add” button. It will open a new window.
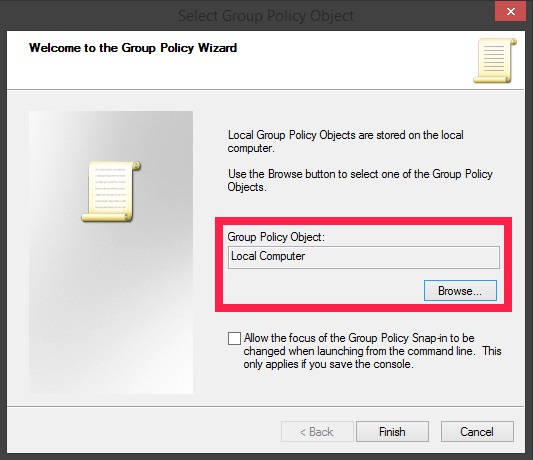
Step 4: Then click on “Browse” button to add users.
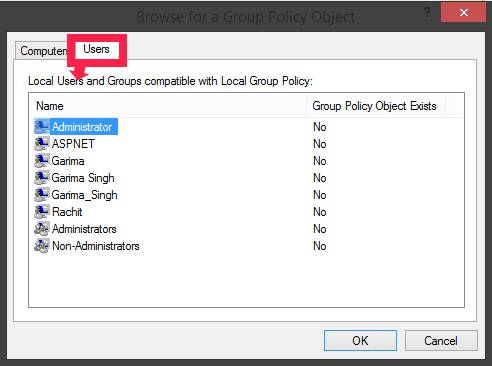
Step 5: It will open “Browse for Group Policy Object” window. Click on “Users” button at the top. It will show the various users. Click on any user, as per your preference.
Along with the users list, you will also find Non-administrators. It lets you make changes for various setting for all users except for the users of administrator group. You can add more than one user.
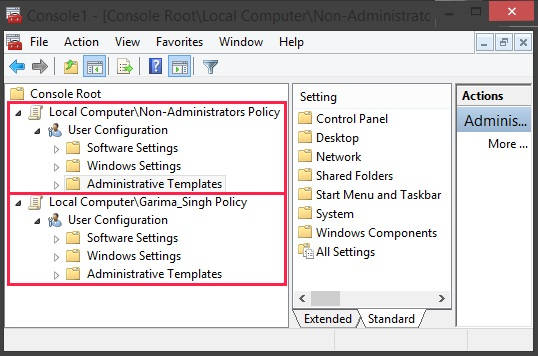
Now, to make changes in the settings, open the Microsoft Management Console window. On the left panel, you will see the list of users with their individual policy settings.
Make changes as per your choice. It will apply the changes for that particular user only.
