In this post, you will learn about free and open-source vulnerability scanner for AWS, known as Trivy. It uses the configuration of AWS CLI to connect to your account and generates a full report after scanning all the services. It lists all vulnerabilities according to their severity type. You can further expand the details and see what the errors actually are. It generates the report in tabular form in the command line but you can save that report by piping the command output.
Trivy is basically a vulnerability scanner for Git repository, Docker containers, and more. But from the recent update, it now supports scanning AWS as well. And that is what I will be explaining here. I will walk you through a step by guide to install this Trivy and use it to scan all the services in your AWS account. After finding out the vulnerabilities, you can simply fix them manually. For now, Trivy runs on macOS and Linux and Windows support is coming soon.
Installing Trivy to Scan AWS:
Installation of Trivy is easy. However, in order to function, it requires that you already have AWS CLI set up. If you don’t know how to setup AWS CLI then you can go through the process mentioned on AWS Docs.
If you are on Linux, then you can just run these commands one after another to install Trivy. After that, you will be able to use it with ease.
sudo apt-get install wget apt-transport-https gnupg lsb-release

wget -qO - https://aquasecurity.github.io/trivy-repo/deb/public.key | gpg --dearmor | sudo tee /usr/share/keyrings/trivy.gpg > /dev/null

echo "deb [signed-by=/usr/share/keyrings/trivy.gpg] https://aquasecurity.github.io/trivy-repo/deb $(lsb_release -sc) main" | sudo tee -a /etc/apt/sources.list.d/trivy.list

sudo apt-get update

sudo apt-get install trivy
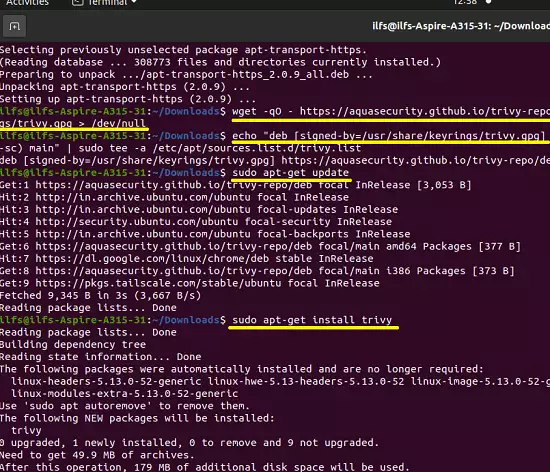
Check the Trivy installation by running this command.
trivy -v
Now, at this point, you have successfully installed Trivy and it is ready to scan your AWS account. Refer to the next section to see how it works.
Using Trivy to Scan all the AWS Services for Vulnerabilities:
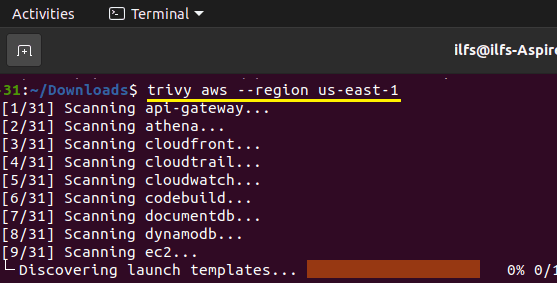
Just open up the terminal and then you can simply start the scan by running the following command. It will start going through all the services one by one and will scan them for you. Just be patient and let it finish the scan.
trivy aws --region us-east-1
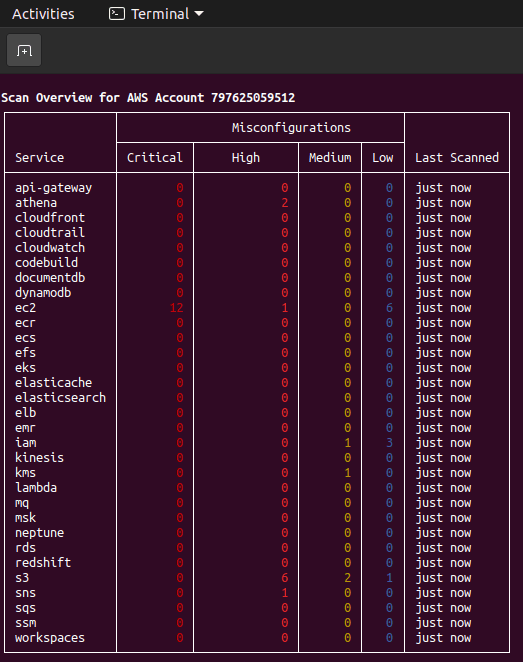
After the vulnerability scan is completed, it will show you the stats like below. It is a table and for each service scanned, you can see the number of vulnerabilities. It also shows the severity of a specific vulnerability.
Now, if you want to see details about the vulnerability in a specific service then you just run the command like this. It will list all the resources from the specified services which have some vulnerability.
trivy aws --region us-east-1 --service ec2
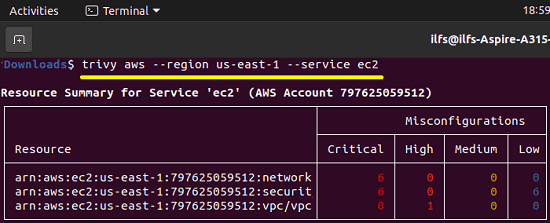
To see the actually causing the vulnerability, you can simply the resource name from the above command and then supply it to this command. Just make sure that you copy all the content of the resource name including the “arn”. It will now list the warnings and errors in more detail.
trivy aws --service ec2 --arn arn:aws:s3:::example-bucketsdjkfgsiugnfsak
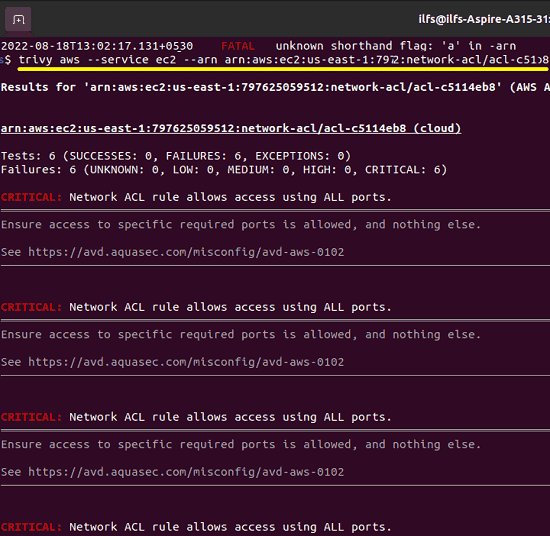
This is how you can use this tool to scan your AWS account for free. You can use it in the same way on macOS as well and find out things that are wrong with some or many AWS services in your account. Also, while using the tool, I will recommend you to use the read only access-based AWS authentication.
Final thoughts:
If you are an AWS user then you will find this tool here very useful. It can help you quickly identify what vulnerabilities are there in your account which need to be fixed. Common issues like ACL allowing all ports, ingress from public internet can be identified. You will however need to have knowledge of how to fix this. Or, if you don’t know how to fix certain issues then you will have to find someone who can. And besides scanning AWS account, I will urge you to give try to the core functionality of Trivy to scan Docker containers and GitHub repositories.