This tutorial explains how to get an email whenever someone logs into your PC.
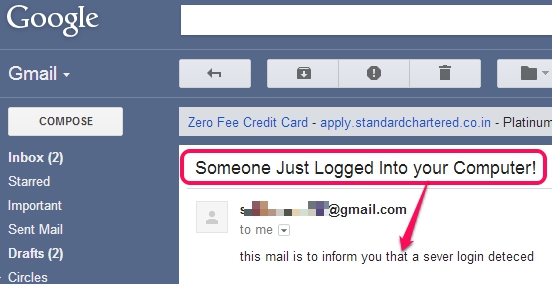
Whenever someone will open your PC by logging into Windows, you can get an email notification. It is possible with the help of a SendSMTP program and Windows task scheduler. You will be required a sender and a receiver email address. So you need 2 accounts of your’s. Whenever a server login attempt will be performed, you will get the email to target Gmail account immediately.
Although, you can lock Windows by setting a password or using pattern lock, or you can even can set password protection to folders with some folder protection software. But your password can be compromised easily or there are other ways to do so. In that case, you won’t come to know that someone logged in to your Windows at a particular time.
You need to configure a task using Windows Task Scheduler and SendSMTP program. An active Internet connection is also required in PC. This SendSMTP program will run automatically on PC (when log in will be made to Windows) and will send an email to email address you have specified.
Here are The Steps To Get Email Whenever Someone Logs Into Windows:
Step 1: First you need to download the SendSMTP program which helps to send SMTP (simple mail transfer protocol) mails or you can say send email alerts. It can be downloaded from this link. After downloading it, extract it into a folder. It is recommended to extract the files in ‘C’ drive where usually Windows is installed.
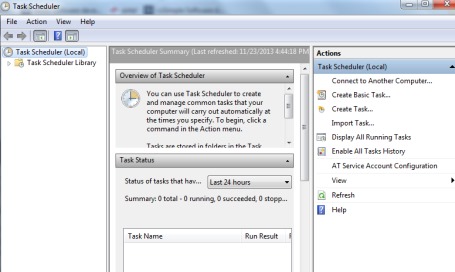
Step 2: Now you have to open Windows task scheduler. Click on start menu and in run box, simply type task scheduler, and open it. You can also open it via command prompt window by typing ‘taskschd.msc’ and then executing the command. It will open task scheduler window, just like visible in screenshot below:
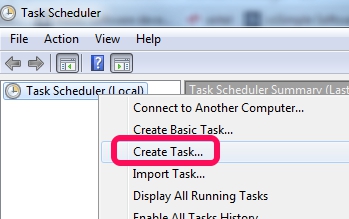
Step 3: On task scheduler window, you will find Task Scheduler (Local) option. Right-click on it and then tap on Create task option.
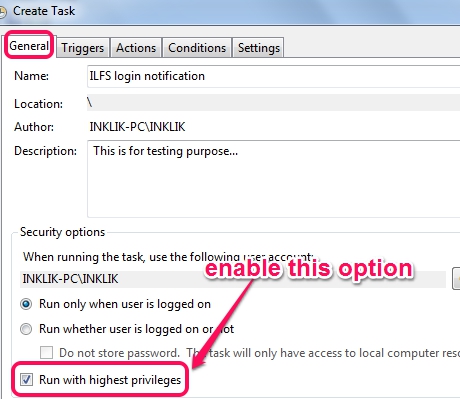
Step 4: Clicking on this option will open a new window. Here you will find multiple tabs. This is one of the crucial step of this process where you need to fill some details in each tab. These details are crucial and mandatory. Have a look at these tabs:
- General tab: Access General tab and just type your task name and description. After this, come to the bottom part of this tab and enable ‘Run with highest privileges‘ option. After filling these details, move to triggers tab.
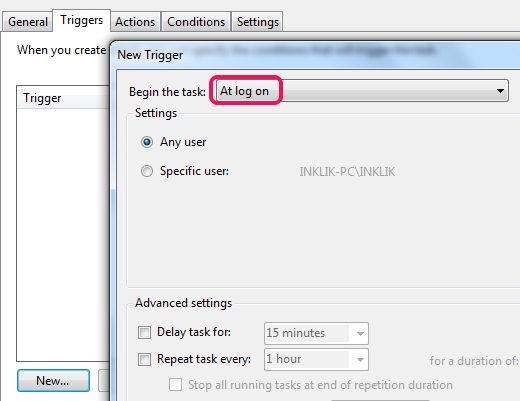
- Triggers tab: In this tab, hit on New button. A new window will open up where you need to select ‘Begin the task: At log on’. Enable it for Any user, tap on OK button, and come to ‘Actions’ tab.
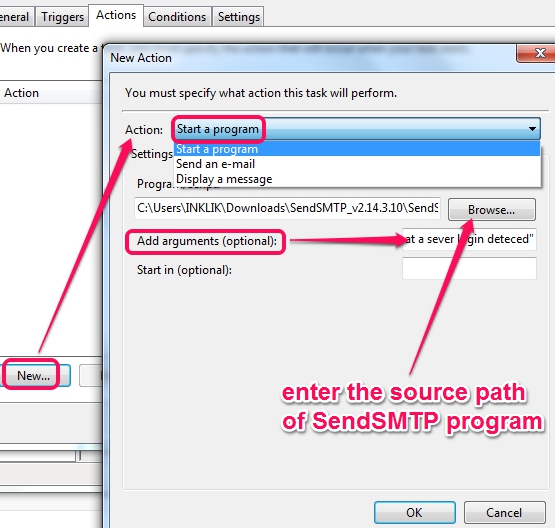
- Actions tab: In this tab, click on new button, and a window will open up. Here, in action option, you need to select ‘Start a Program‘. Although, it provides option to send an-email, but usually it doesn’t work because of the mismatch in authentication details. So select start a program option and browse the extracted application file of SendSMTP program. After this, you need to provide an argument in Add argument option. Although, it shows that this option is optional but it is an important part of this process.
Copy and paste this argument to Add arguments box: /host smtp.gmail.com /auth 2 /userid sender_ID@gmail.com /pass password /from sender_ID@gmail.com /to receiver_ID@gmail.com /subject “Someone Just Logged Into your Computer!” /body “this mail is to inform you that a sever login detected”
Now, simply you have to replace sender id with sender email address, password with original password, and receiver id with receiver email address in arguments box. For example, add sender123@gmail.com in place of sender_ID@gmail.com, replace password with original password, and reciever_ID@gmail.com with original id of your’s, and press OK button. If you want, you can also replace subject message with any customized message, and body part with any other text.
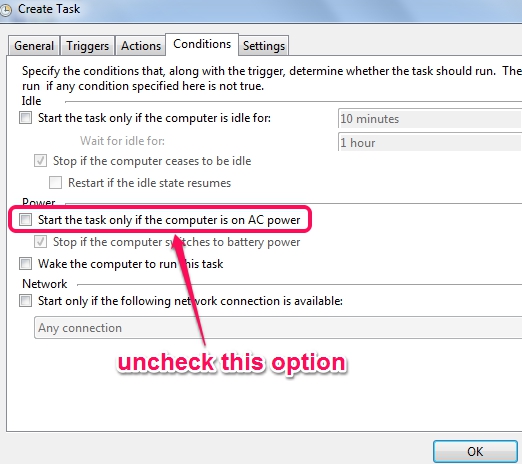
- Conditions tab: In this tab, uncheck the below highlighted option: ‘Start the task only if the computer is on AC power‘. It is necessary otherwise email won’t be sent to receiver email address, if your computer is a laptop and it is not plugged in for charging.
This is the last step to complete the email notification process. After this, hit OK button, and your task will be scheduled. Now, Log Off your PC and login again. You will find an email regarding login to Windows.
Conclusion:
It is really useful for all users to keep an eye on their PC and get noticed whenever someone logs into Windows in their absence. Try it yourself, and if you performed all the steps correctly, then your email id will be registered to notify you and provide an email whenever someone attempt to login to your PC.
