Stashhh.me is a free online service that lets you create virtual online boxes called stashes, and use them for storing different types of digital content. You can use Stashhh to store things like simple textual matter like quotes and conversations, pictures, and even web links. There is no limit on the number of Stashes you can create. Each of the stashes can be customized by adding a different cover image and changing its overall color accent. Apart from that, you can either choose to keep your stash(es) private, or share them with others by making them public. Stash boxes can also be commented on. You can even decide whether others can only view your stashes or edit the content in them as well. Sounds quite amazing, doesn’t it? Head past the break to find out more.

Stashhh: Creating a free account and primary web UI
Creating a free account with Stashhh is a pretty standard affair. Simply hit the Sign Up button on the top right corner of the homepage to access the account creation form. Enter a username, password and a valid email, and you’re good to go. If you want, you can also sign up using your Facebook account credentials. Check out the screenshot below: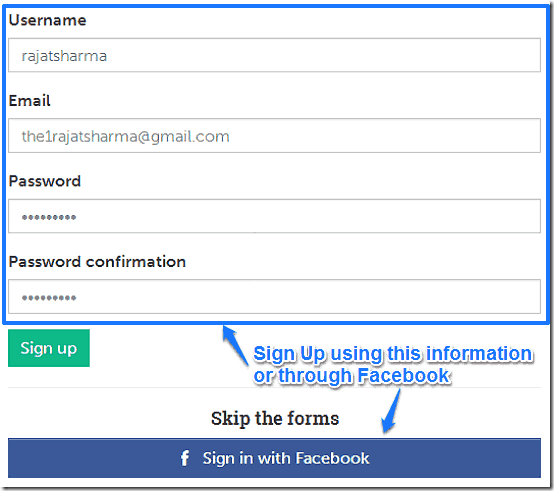
Once the sign up is done, you’re immediately logged in to your brand new Stashhh account. The main web UI is quite a looker. Here’s a screenshot:
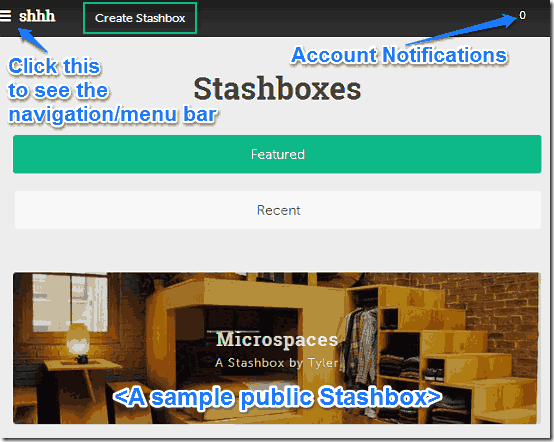
As illustrated by the above screenshot, the homepage lists some featured public Stash boxes by other users, that you can check out to get a better idea of Stashhh. You can switch between most recent and featured Stash boxes as well. Clicking the top left corner reveals a menu/navigation bar that conveniently slides out of view when not required, whereas the top right corner provides a count of your account notifications.
Also see: Clip Any Part of Web Page and Store Online With ScissorsFly.
How to create a Stash box?
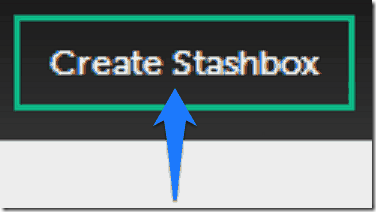
Step 1: On the header, click the button that says Create Stash box.
Step 2: The new Stash box creation page comes up, which lets you define your Stash box’s visual appearance, as well as its content. Since it’s not possible to show all the options available for Stash box creation in one screenshot due to unavoidable constraints, they’re shown in two separate screenshots:
Screenshot 1 of 2:
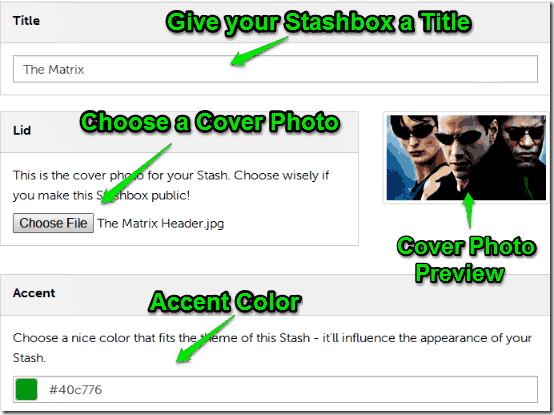
As illustrated by the above screenshot, The Stash box creation page provides you with a couple of customization options:
- Title: Give your Stash box a descriptive title. The title appears over the Cover photo.
- Lid: Choose a Cover Photo for your Stash box to make it visually stand out more.
- Accent Color: The accent color influences the overall visual tone of your Stash box.
Screenshot 2 of 2
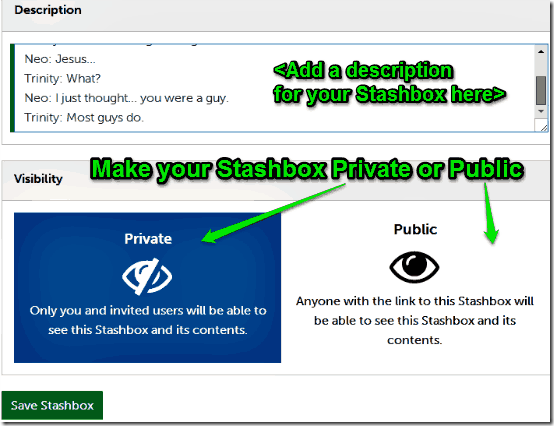
The above screenshot illustrates some other options available while creating a Stash box:
- Description: Provide a little information about your Stash box and its contents.
- Visibility: Choose to make your Stash box private, or viewable by others (Public).
Once you’re done filling up all the details, hit the button that says Save Stash box. Your Stash box will be created, ready to be filled up with stuff.
Also see: Online Text Highlighter To Save Important Text, Read Saved Highlights.
How to add content to your Stash box?
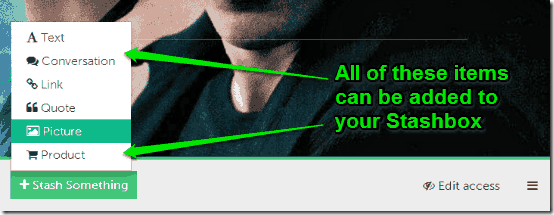
Once your Stash box has been created, you can start adding stuff to it. Click the Stash Something button, which gives you a list of things that you can add to your Stash box. You can add a textual description to all of these things. They are briefly mentioned below:
- Text: Simple textual matter can be added through this option.
- Conversation: Multi-person conversations like IM chats can be added here.
- Link: Any URL(s) that you might want to add, go here.
- Quote: You can add quote(s), as well as their source(s) through this option.
- Picture: This option lets you save your favorite photos, and other digital images.
- Product: If there are any products that you’d like to buy on e-commerce sites (Amazon, Ebay etc.), you can add them through this option. You can also add the specific URL pointing a particular product listing on an e-commerce site.
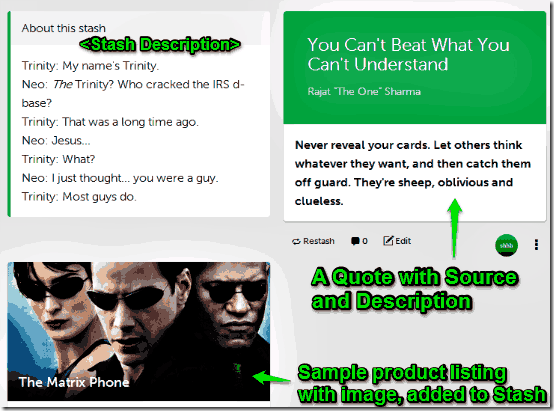
Here’s a screenshot, illustrating a Stash box, with a product listing (with a descriptive picture) and a quote (with the source and description) added to it:
How to change a Stash box’s viewing and editing settings?
Although you can choose to make your Stash box public or private during its creation, you can also customize the privacy settings later. A private Stash box is one that only you can see and edit, whereas a shared Stash box is viewable (and editable) by others as well. Here’s how to do it:
Step 1: On your Stash box’s top right corner, click Edit access.
Step 2: Once you do that, the access settings screen comes up, you can search other Stashhh users by their usernames and add them to your Stash box’s access list. You can specify whether they are only able to view your Stash box’s contents, or edit them (add/delete) too. This also means that in order to view or edit a Stash box, a user needs to have a Stashhh account as well. Here’s a screenshot:
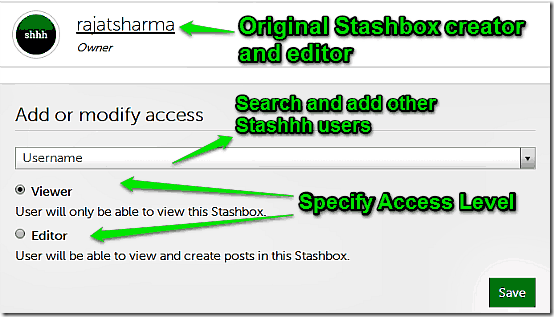
On adding a user(name) to your Stash box’s access list, the concerned users get a notification in their Stashhh accounts, inviting them to view or edit the contents of your Stash box. They can make the changes by acting on the notification itself. As simple as that!
Conclusion
Stashhh is a pretty cool service that lets you share a whole bunch of digital content in virtual Stash boxes. It’s quite simple and functional, yet visually striking. Features like the ability to add products, links, quotes etc. make Stashhh quite amazing. Add to it, the capability to make your Stashes private or public, and allow others to make changes to them, and Stashhh also becomes a little bit of a Collaborative virtual collection box as well. I suggest you give it a try, you’ll love to stashing your things in Stashhh.