This tutorial explains how to have same wallpaper automatically on Lock Screen and desktop in Windows 10. You can easily set any custom wallpaper on Lock Screen and desktop in Windows 10. However, to have the same wallpaper automatically and natively in both the places in Windows 10 is probably not possible. So, you either need to manually set same wallpaper on both the places or try some 3rd party option that can automatically set same wallpaper on Windows 10 Lock Screen and desktop.
In this tutorial, I have used a free software and a Windows 10 app. The software helps to set same wallpaper on Lock Screen and desktop when you are using Windows spotlight feature. On the other hand, when you want to automatically set a custom wallpaper on Lock Screen as well as the desktop in Windows 10, then you can use the Windows 10 app I have covered here.
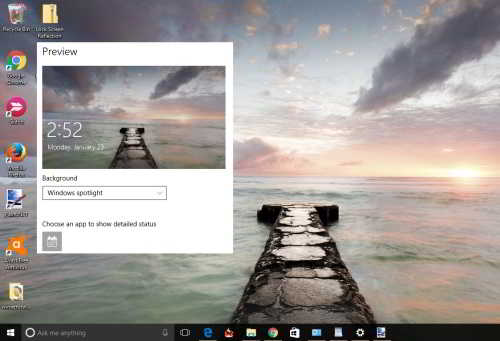
There are so many desktop wallpaper changer software available for Windows 10, but those software can’t help to have the same wallpaper on desktop and Lock Screen. Therefore, these 2 methods are handy. Let’s start with the first method.
Method 1: How To Have Same Wallpaper On Windows 10 Lock Screen and Desktop?
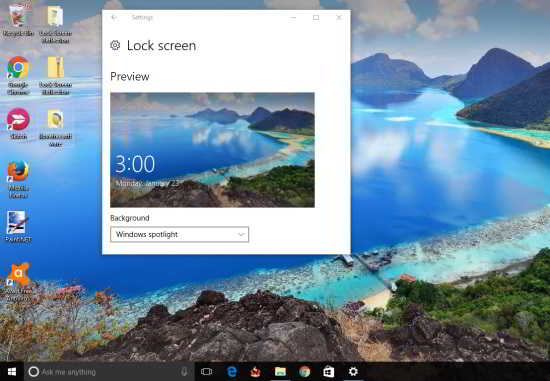
This method works when you have set Windows spotlight feature to display images on the Lock Screen. Whatever the image (using Windows spotlight) is set as lock screen image, the same image can be set as desktop wallpaper in Windows 10. I have used a free software, named Lock Screen Reflection, for this. You can also save spotlight images as JPG images using this software.
Step 1: Download the zip file of Lock Screen Reflection.
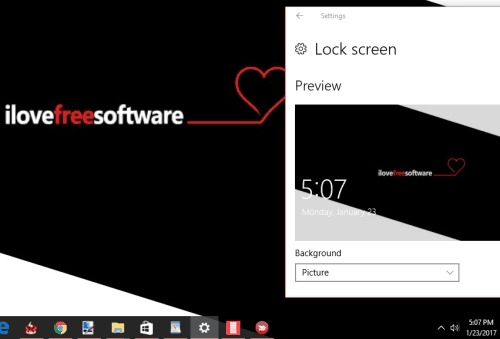
Step 2: Extract that zip file and you will see an application named as “lsr“. Now before using this software, make sure you have set Windows spotlight to show images on Lock Screen. Otherwise, this software won’t work. You can set it by accessing Settings → Personalization → Lock screen → choose Windows spotlight as background for Lock Screen. Now execute the lsr application and see the magic. It will immediately set lock screen image as your desktop wallpaper.
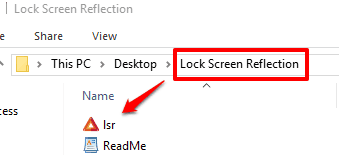
Now you have the same image on your Windows 10 Lock Screen and desktop. The desktop wallpaper is automatically fit to your desktop screen size.
Step 3: This is an optional step. Use this step when you want to set the desktop wallpaper in tile, center, stretched, fit, or fill mode. You need to take the help of CMD. Open Command Prompt window, drag n drop lsr application and choose any number from 0 to 4. So, your command would be: source location of lsr.exe 0/1/2/3/4/5.
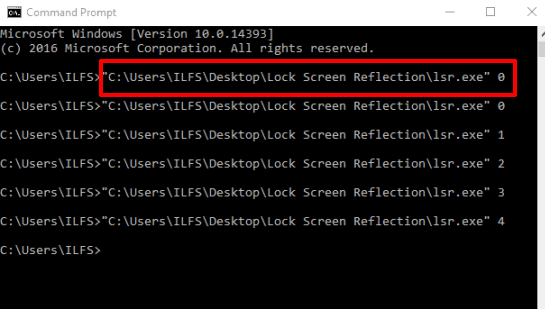
Here:
- 0 is used for tile mode.
- 1 for the center mode.
- 2 for the stretch view mode.
- 3 for fit mode, and
- 4 for fill mode.
Use any option and run the command to set the desktop wallpaper view mode.
Step 4: It is another optional step, but useful when you want to save Windows spotlight image that is currently set as your Lock Screen image. By default, Windows Spotlight images remain hidden (unless you know the location of Windows Spotlight images). To save the current Lock Screen image of Windows spotlight, you need to enter a command using CMD: source location of lsr.exe save and press enter.
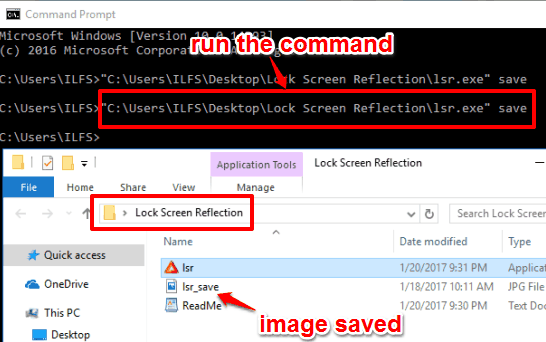
This will save the Lock Screen image to the same extracted folder of lsr application in JPG image.
Method 2: How To Have Same Wallpaper On Lock Screen and Desktop In Windows 10?
The above method doesn’t work when you want to have a custom wallpaper of your choice on Lock Screen and desktop in Windows 10. Therefore, this method is useful in that case. I have used a free Windows 10 app, named as “Brilli Wallpaper Changer“. You can have Bing wallpaper or a custom wallpaper on the lock screen as well as the desktop in Windows 10 at the same time using this app. To have a custom wallpaper on both the places, you first need to create a collection using the interface of this app and then add images available on your PC. However, do note that the free version of this software lets you create only two collections and each individual collection will have only 30 images. One of the useful features of this app is that you can set ‘change interval’ time (15 mins, 30 mins, 1 hour, 2 hours, 6 hours, 12 hours, or 24 hours) for the desktop and Lock Screen wallpaper.
Step 1: Use this link to install Brilli Wallpaper Changer app in your Windows 10 PC.
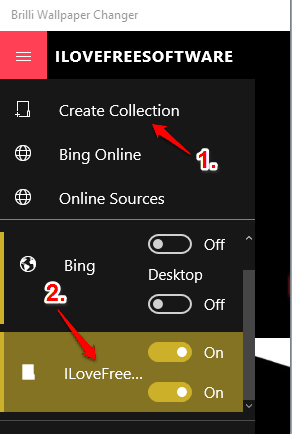
Step 2: Open the app interface and create a new collection. You can give any name to that collection. After creating the collection, you will see two buttons in front of the name of that collection. Those two buttons are used to show wallpaper on Lock Screen and desktop. You need to turn on both the buttons.
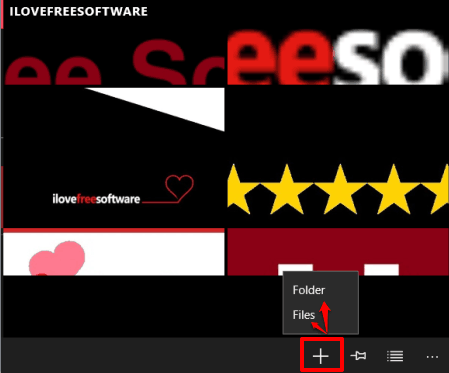
Step 3: After creating the collection, use + button that helps to add images to your collection. You can use Files or Folder option to add the images.
Step 4: When the images are added, select any image of your choice. After that, you will see two options: Wallpaper and Lockscreen. You need to select both the options. This ensures that the selected image is set as Lock Screen and desktop wallpaper in Windows 10.
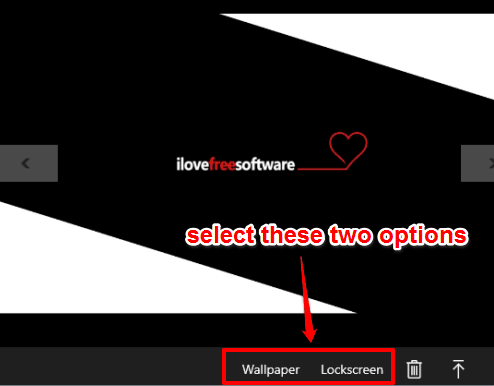
Step 5: This option is useful when you want to have different wallpaper automatically after a regular interval of time on Lock Screen and desktop. For this, access Settings of this app and go to Change Interval section.
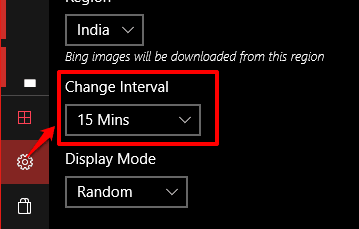
Now you need to set a preset time interval using the drop down menu. Select any time interval and then wallpaper will change automatically and visible on the desktop as well as Lock Screen. You can also set the Display Mode of wallpaper: Random or Sequential.
The Verdict:
I personally like method 2 because I rarely use Windows spotlight feature and use only custom wallpapers to show on Lock Screen and desktop in Windows 10. Also, the feature to change wallpaper automatically makes the app more useful. Method 1 is perfect when your Lock Screen shows Windows spotlight images and you want to have same images on your Windows 10 desktop and Lock Screen.