This tutorial explains how to store voice note with any website. For this, I have used a free Chrome extension. Talk and Comment is a free Chrome extension to post voice notes to Facebook, Twitter, GitHub, Pinterest, Google+, YouTube, and other supported platforms. Basically what this extension does is it first lets you record voice and then generates a unique link for that audio clip. After that, you only need to place the link anywhere you want and you and other users will be able to play that audio in a single click. The recorded clip is stored on the server and you only have to take care of the link of the clip.
The best part of this extension is that you can record and share the audio note from the active webpage. You don’t have to manually open a particular page, record audio, and then grab the link to share. Everything can be done from the active webpage. You and others can listen to the audio without installing the extension. Also, the extension is available for Android devices.

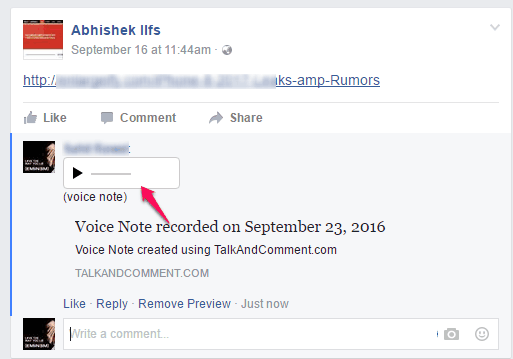
Above you can see a voice note shared by me in a comment on Facebook using this Chrome extension. You can clearly see a built-in audio player has been generated automatically so that users can play and listen to the audio.
Note: The extension works well on many websites like Facebook, but for some other supported sites like WordPress, instead of adding the built-in audio player, it only shows audio link. In that case, you need to manually copy the link and paste in the address bar to access and play audio. I hope developers fix this bug.
How to Store Voice Note with any website?
Step 1: Go to the extension homepage and install this extension. Make sure Mic is connected to your PC. Otherwise, the extension won’t work.
Step 2: When you have connected the mic, the extension will be ready to serve you. You will notice that a Mic icon is visible at the middle right corner of your browser.
![]()
Pressing that icon will start the recording automatically. You should record for at least 4-5 seconds to generate a voice note.

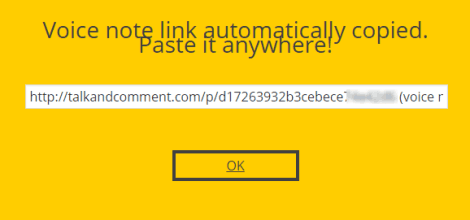
Step 3: When you are done, stop the recording. After that, the recording will be saved to the server and recording link is generated automatically. You will see the confirmation pop-up shortly when the link is generated. That pop-up also provides recording link. However, you don’t have to manually copy the link as it is copied to the clipboard automatically.

That’s it! Now the recording link is in your hand, you can paste and post it to Facebook or any other supported site.
The Verdict:
Talk and Comment is indeed a nice extension. Many times you might have also felt that you should share voice notes with others. However, then you have to open a special web application or extension that can help you record the audio. After that, you have to upload the audio to receive the sharing link, and then finally you can share the audio note. This is a lengthy process but this extension trims this whole process. You can record from any active page and the link is copied to clipboard automatically. You should definitely try it.