[yasr_overall_rating] [yasr_visitor_votes]
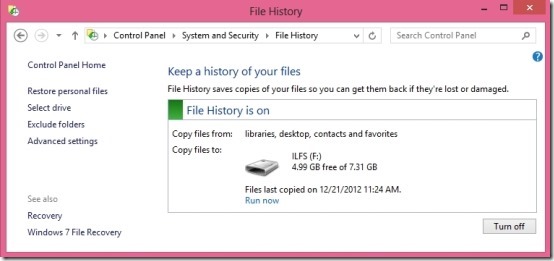
Here is a simple tutorial that will enable you to backup files in Windows 8. This is a brand new feature that has been introduced in Windows 8. The feature is called File History; which is quite similar to Apples’ Time Machine.
File History in Windows 8 provide you with the means to automatically backup files to an external drive or a network drive.
The backed up data can be restored by following some simple steps. This is different from Windows recovery because this only backs up your files that are present in your Libraries.
This tutorial will guide you in a step-by-step manner, so that you can backup files in Windows 8 using Files History feature of Windows.
Steps to Backup Files In Windows 8 using file history:
- First thing to do here is open up the control panel in Windows 8, to do so just start typing control panel while you are on the start screen. When control panel shows up as seen in the screenshot below just click on it to open the control panel in Windows 8.

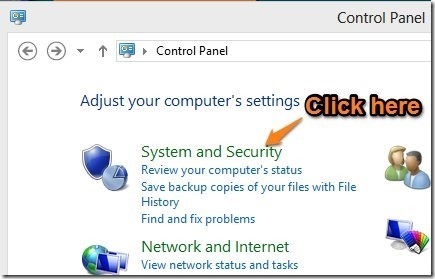
- After that, just click on the System and Security option as pointed out.
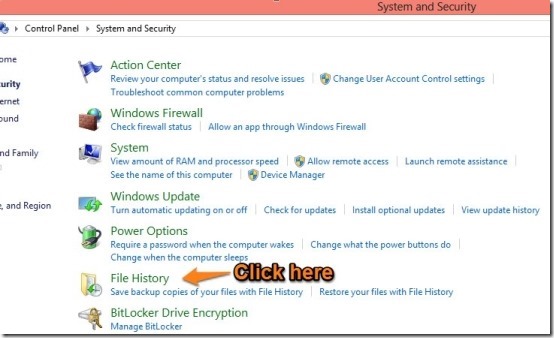
- After you have complete the above steps system and security windows will open up as shown below; now just click on the File History option as pointed out by orange.
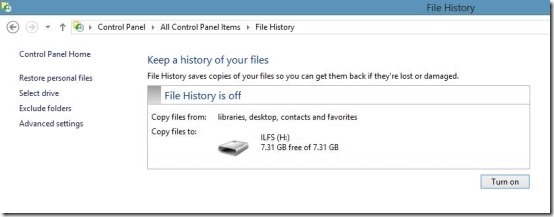
- Now a window will open up. The devices which can be used to backup files in Window 8 will show up, here I have just added a flash drive to the computer so only it is the only device that is showing up. Now all you need to do is click on the Turn on button to start backing up the data.
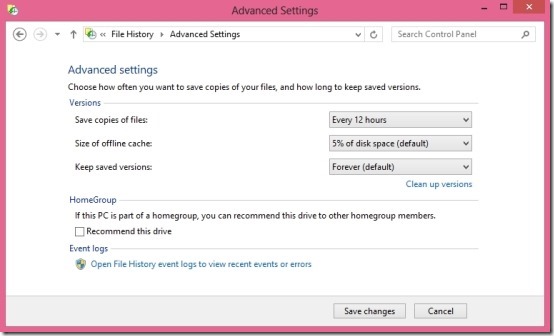
- Also this app provides you with the method to customize the ways backups are handled on the system, this can be done by clicking on the advanced settings which is located in right corner of the File History window as seen above. When you are in the advanced settings, a window will open up as shown below. From here you can customize the way backups are created.
How to restore backup created by file history in Windows 8:
- If you have deleted or lost it and need to restore it, then you can do this by follow these simple steps.
- Just open up the folder were the file was located that you wanted to recover, and click on the history button as pointed out in the screenshot below.

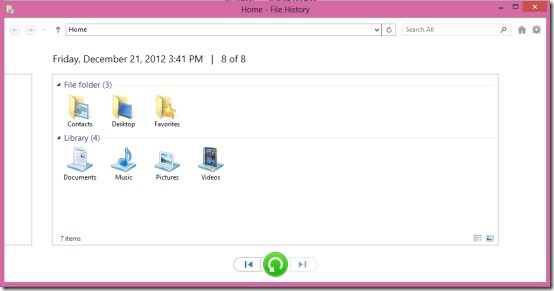
- Now a window as shown below will open up a window will come up. The interface is extremely simple and all you have to do to restore is select the restore point and a then click on the Green refresh button which is located in the bottom part of the Windows. That is it, now your files will the restore to the earlier state, the restoration time taken depends on the amount data to be restore.
Check out these Windows 8 Tutorials as well:
How To Turn Off Sync Settings In Windows 8
How To Group Apps In Windows 8
