Resource Hacker is one of the favourite tools for any developer to tweak, customize and modify the operating system. With Windows 8, Microsoft introduced the Ribbon UI interface in its file explorer (which is similar to Office 2010 UI), which many people feel is a useless addition. Fortunately, there exists a very easy way to disable the Ribbon UI from the Windows 8 file explorer using an easy exploit through Resource Hacker. All you need to do is to follow the steps below, and the Ribbon UI will be gone forever.
So in today’s dojo, Sensei Pranjal will teach you how to disable the Ribbon UI for good from your Windows 8 to make it feel more like the familiar Windows 7/Vista environment.
The Steps Involved…
Step 1: Download Resource Hacker by clicking here.
Step 2: Navigate to C:\Windows\System32, and find the file named ExplorerFrame.dll and copy this file somewhere else. We are going to need this copy.
You can see the dll file that we need highlighted in the above screenshot.
Step 3: Open Resource Hacker. Now, click on File menu, then click on Open and navigate to the location where you created the copy of the ExplorerFrame.dll file and open it up for editing. Once the file has been opened up for editing, you will be presented with a window which looks like the below screenshot.
In the above window on the pane at the left side of the screen, navigate to UIFILE –> EXPLORER RIBBON –> 1033
This can be done easily by clicking on the small plus button next to each folder. Once selected, your window should look like the below screenshot.
Step 4: Right click on the entry 1033 and click on Delete Resource option. (see below screenshot for the illustration of the same).
Click on the Delete Resource [UIFILE : EXPLORER_RIBBON :1033] option in the above context menu. This will disable the Ribbon UI. Now, click on File, and select Save. This will disable Ribbon UI in the copy of the dll file that we just edited. Now, the next task is to replace the original ExplorerFrame.dll file with this edited ExplorerFrame.dll file. To do this, we will need to take ownership of the dll file.
Step 5: Download the registry script to easily take ownership of files by clicking here. As the download is a zip file, extract it. You should now get two files, Take Ownership – Install.reg and Take Ownership – Uninstall.reg. Double click on the former to add the Take Ownership option to the context menu (menu that appears when you right click a folder). The advantage of this registry exploit is that you can easily take ownership of the folder or file by right clicking on it and clicking on the Take Ownership option instead of having to manually change permissions and take ownership.
Double click and click Yes in the popup (if it appears on your screen). This will add the value to your system’s registry.
Step 6: Navigate to C:\Windows\System32 and right click on the original ExplorerFrame.dll file. Select Take Ownership option from the context menu.
Once you have taken ownership of the file, rename it to ExplorerFrame.dll.old so that it can serve as a backup for future. Now, copy and paste the edited ExplorerFrame.dll file into this directory (C:\Windows\System32).
That’s all. Now go ahead and reboot your machine, and it will be rid of the annoying Ribbon UI that is such an eyesore to many Windows 8 users!
The Result?
Before:

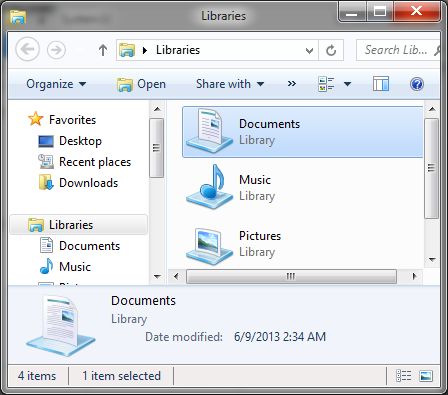
After:
This concludes the tutorial. I hope that you enjoyed the tutorial thoroughly! Do let me know of your experiences with disabling the Ribbon UI if you happen to do the same!!!


