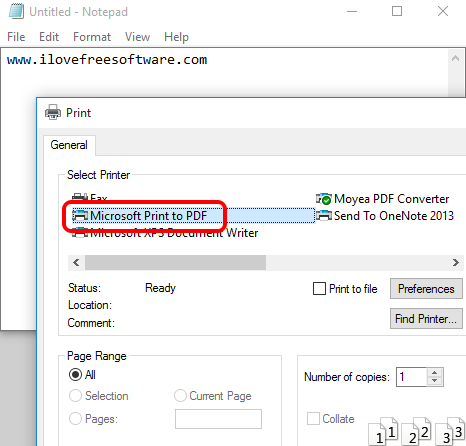
Earlier, we had to use third-party tools to convert a document to PDF in Windows OS; but not anymore. Microsoft has gifted a tool, named “Microsoft Print to PDF“, to users as a native feature in Windows 10 for converting documents to PDF. You can convert any document to PDF using any application, like Notepad, MS Word, etc., which has a Print option.
This was also one of the much-awaited options that users were expecting in Windows 10 before its release. So Microsoft didn’t disappoint its users and made it possible to convert any document to PDF using the built-in PDF Printer of Windows 10.
Above you can see Microsoft Print to PDF option in Print window of Notepad.
You can also check other tutorials covered by us for Windows 10: capture screenshots and automatically save and set default save locations for files.
How To Convert any Document To PDF using Built-in Option in Windows 10?
Following are the basic steps using which you can convert documents to PDF using any application in Windows 10:
Step 1: Open an application or text editor and add a document. For example, you can open MS Word or Word alternative and create/open a document.
Step 2: Access Print option and click it. Don’t worry, we won’t actually print it.
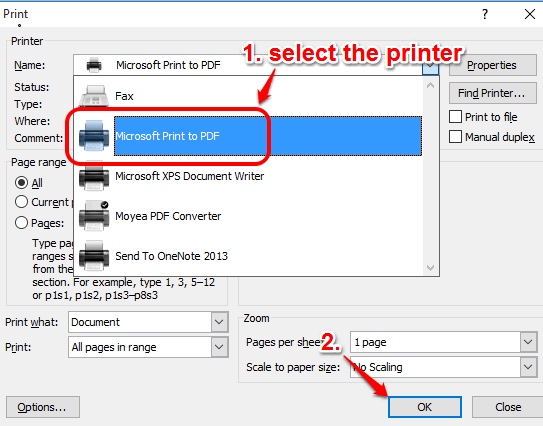
Step 3: In Print window, explore the list of installed printers. You will notice that a Microsoft Print to PDF is also available in that list. This is that built-in PDF Printer of Windows 10. Select it and click OK button. You can also adjust page range and other settings before printing converting the doc to PDF.
Step 4: After pressing the OK button, it will open a window. Use that window to save the output as PDF to the location of your choice.
Those, who want to keep the backup or share their documents as PDF files, this is indeed a fantastic option in Windows 10. Why to use any other third-party software for converting the documents to PDF, when the same can be done with built-in option of Windows 10.


