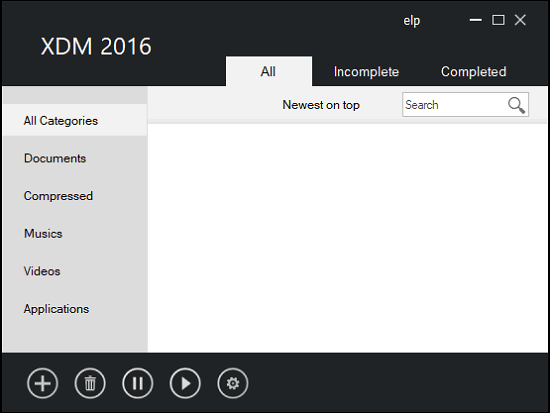
This tutorial explains how to schedule downloading of a file in Windows. Here I will tell you about a free download manager software that can do that easily. The download manager that I will use in the following tutorial is called Xtreme Download Manager and it comes with a download scheduler option. This software lets you schedule download for any file. You can add files in queue and then specify the time when that queue will start processing. And when the software detects the queue start time, it starts downloading the files one by one.
Xtreme Download Manager is not only able to download a file at specific time, but the software also comes with some other features such as fast downloading, browser integration (Chrome, Opera, Firefox, Chromium), resuming a download, proxy support, shut down PC after downloading, etc. This download manager is very powerful and makes it extremely easy to schedule downloads.

Previously, we have reviewed some free download managers, command line download mangers, but scheduling a download option is not supported in most of them. Thankfully, XDM provides that option. Let’s see how to do that.
How to Schedule Download of a File in Windows?
Xtreme Download Manager is a cross-platform software and comes with all the necessary features that a modern download manager should have. Also it comes with an intuitive GUI that you can easily understand to use it. It supports various browsers such as Chrome, Opera, IE, Avant, All Chromium based browsers.
Follow these simple steps to schedule downloading of a file using Xtreme Download Manager.
Step 1: Download Xtreme Download Manager from here. After that, install it on your PC and when done, it will automatically open up.

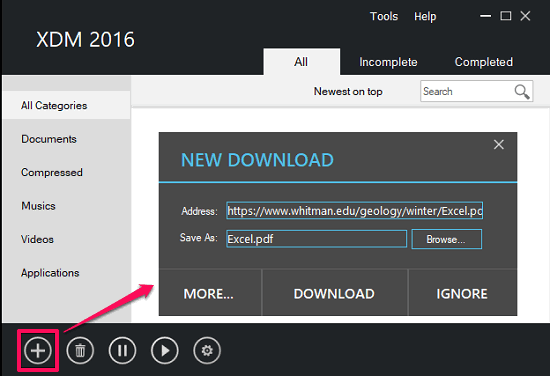
Step 2: Copy the URL of the file that you want to download later. After that, click on the plus icon and it will automatically grab the download link of the file. And then it will show you a small pop-up with options to download the file.

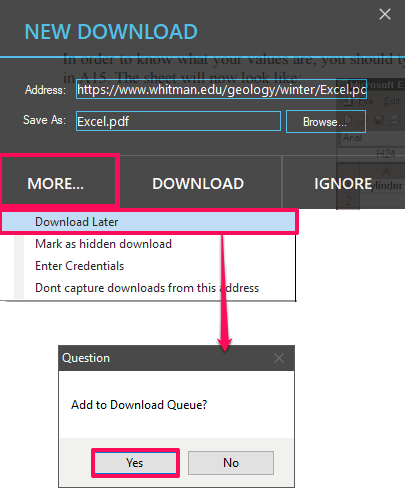
Step 3: Click on the More button and then click on the “Download later” option. After that, it will ask you to add the selected file in the queue. Click on the Yes button and then the file will be added to the queue.

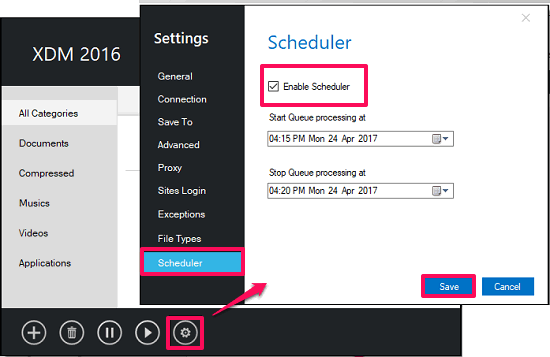
Step 4: Now open the settings of the Xtreme Download Manager by clicking on the gear icon. Next, navigate to the scheduler options and set the start time and end time for the queue to process. Now, finally check the Enable Scheduler option and exit the options window by clicking on the Save button.

Now, the download manager has been configured and when the scheduler time will match with the system time, it will start processing all the queued items that you have added to the list.
Conclusion
In the tutorial above, I have demonstrated how to schedule downloading of a file in windows. And Xtreme Download Manager makes it pretty easy to do that. And I really like the scheduling part of the software and its ability to integrate in the modern browsers to automatically grab the download links. So, if you are looking for a software to download files at a specific time, then this tutorial will help you.