Tiledesk is a free and open-source support ticketing system software that also acts as one of the top free alternatives to Zendesk and Intercom. It offers a multichannel live chat support systems that you can use on your websites and web apps. From a unified interface, you can receive the support request messages and interact with them. You have complete freedom here. Install it on your own server and then manage chats and conversations.
In Tiledesk, you get unlimited projects and agents. Besides, apart from just live chat, you get access to Tiledesk apps which extend the functionality of this software. It gives you Facebook Messenger and WhatsApp integration. So, people can reach you out for support in multiple ways. Also, you get to see all the conversations in one place and mark them as solved when you have resolved the user’s issue.
In various businesses, you need some kind of support system where users can reach you for the issues they are facing. Usually there are paid tools out there, but if you are looking for something that you can self-host, then Tiledesk is one of the best options. The live chat widget that it offers you to install on your website is fully customizable. It also supports bots, where you can automate some messages by creating automated conversation flows visually.
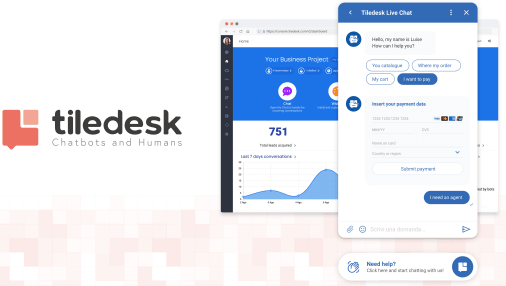
Main Features of Tiledesk:
- Offers multichannel support system: WhatsApp, Telegram, Facebook Messenger, and Email.
- Live chat widget of Tildesk is available on Web and Mobile.
- Tiledesk has AI-powered chatbots to automate customer support and/or to generate more leads for the business.
- Easy integration with DialogFlow and RASA for AI chatbot creation.
- Offers seamless tickets management which is tightly integrated with instant messaging.
- You can create multiple teams using Groups and Departments and add different users in those.
- Tiledesk supports canned responses.
- You can tag your conversations and add internal notes to conversations.
- Send private messages to your colleagues for internal communication.
- Tiledesk can be easily integrated with the E-commerce platforms such as WordPress, Shopify, PrestaShop and many others.
- Smart assignment to manage your queues SLAs.
- It has live chat widget theme customization manager to change the look and feel of the chat widget.
- You can set operating hours.
- Offers a comprehensive dashboard with real time analytics about the live chats and conversations.
- Tiledesk has Mobile Apps for iOS and Android.
- You can create a knowledge base for the customers and for internal teams to solve most of the issues quickly.
Installing Tiledesk:
Tiledesk supports easy installation via Docker Compose. To host it or run it locally for testing, you need to have a capable server or PC with Docker installed. If you already have this setup already, then just fire up the terminal and then run the following command to get the compose file.
curl https://raw.githubusercontent.com/Tiledesk/tiledesk-deployment/master/docker-compose/docker-compose.yml --output docker-compose.yml
It is better to save this compose file in a specific folder where it doesn’t get accidentally deleted. And in the same folder where the compose file, you need to issue the following command in the terminal. After that, just wait for the process to finish.
docker-compose up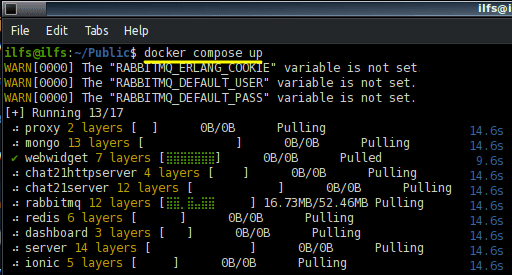
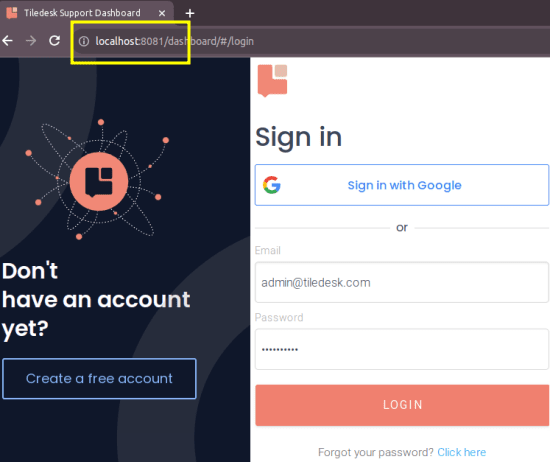
Once it has been installed, you can open your browser and type localhost:8081 in the browser. You will see the sign-up page of Tildesk that looks like this. Sign in using the default email and password that is: admin@tiledesk.com/adminadmin. You can change the login credentials later.
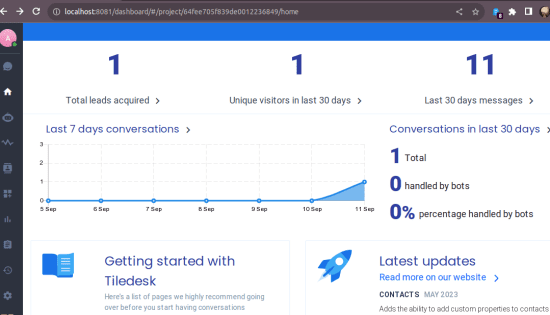
Now, add your first project here by specifying the relevant information. Once you have created the project, just open it and you will see the main dashboard of the project. Here it will show you all the stats of the conversations and leads that happened in this project.
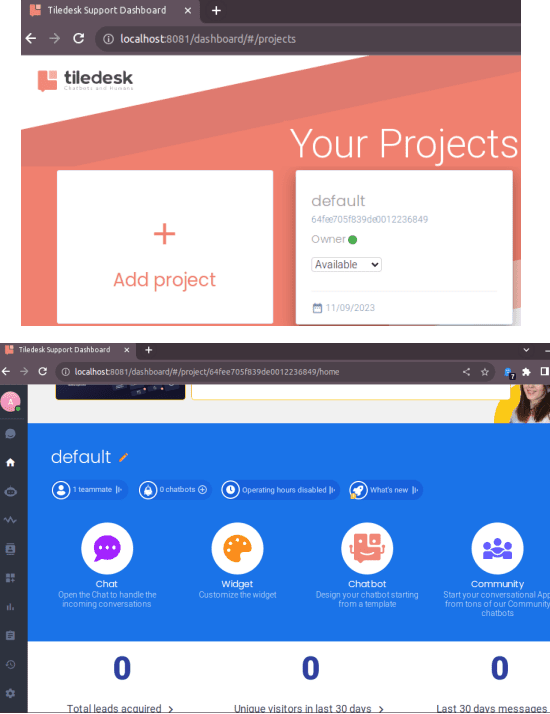
At this point, you have successfully installed and configured Tiledesk. It is now time to use it and see how it works. For that, refer to the next section.
Using Tiledesk for Customer Support and Live Website Chat:
After the successful installation of Tiledesk, the very first thing you have to do is customize the look and feel of the chat widget. So, go to the settings by clicking the gear icon in the sidebar. From here, you can customize things like color theme, primary color, secondary color, logo, widget alignment, and remove the Tiledesk branding if you want to.
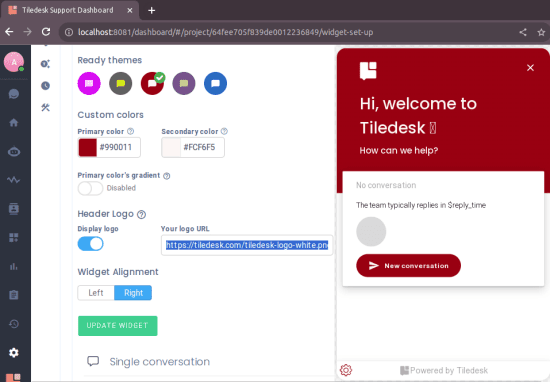
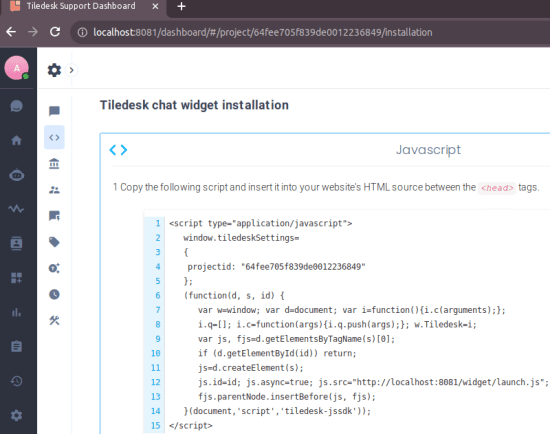
Update the widget to save the changes. The next step is to install it on your website. Go to the code section and copy the JavaScript code snippet it gives. You have to place it in the <head> section of your website. On WordPress, you can take help of Insert Headers and Footers plugin.
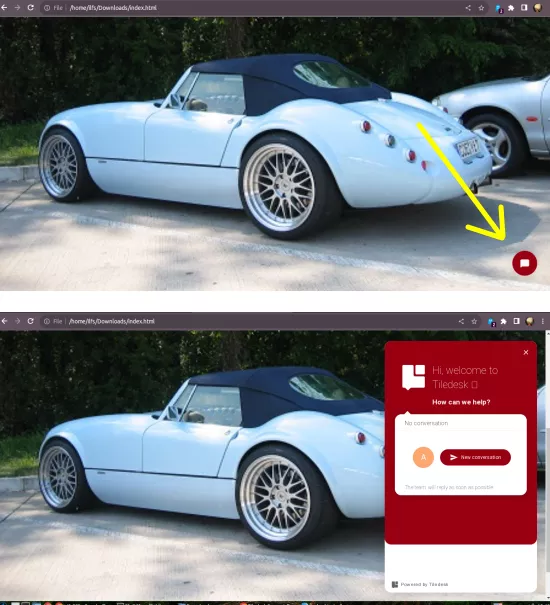
Now, refresh your website and you will see the Tiledesk widget right there at the bottom right side. See the following screenshot. It will appear in the same color as you have specified. Click on the chat icon and the live chat popup will appear where users can start a conversation with an agent.
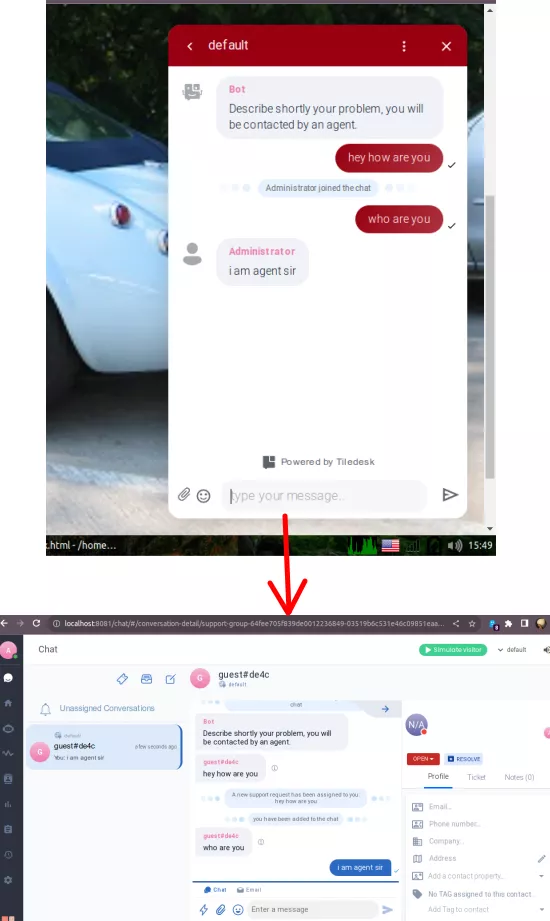
So, to test things, you can simply start the conversation. As soon as you send a message, a desktop notification will be sent to the agent on the backend. They will see your chat in their side and can start interacting with you. All the chats initiated on the widget are stored and categorized separately with a unique ID. Keep chatting with the agent for as long as you want.
Each project has its own dashboard. On this activity dashboard, you can see stats like total chats, visitors, how many were handled and with the help of graphs. You can see this in the screenshot below.
Another cool thing you can do here is add a chatbot to the widget. For that, you can create a chatbot there and give it a name. There are some templates for chatbots already that you can use. Or, you can simply create one from the start. If you choose to build the chatbot from scratch, then it will take you to the flow builder.
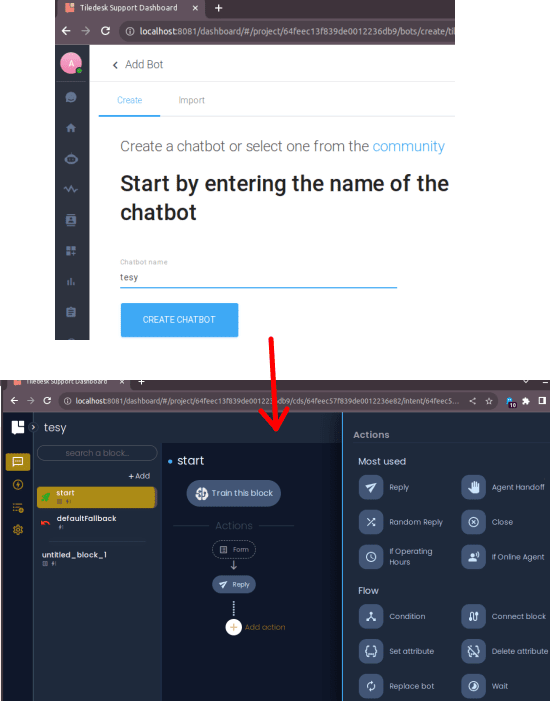
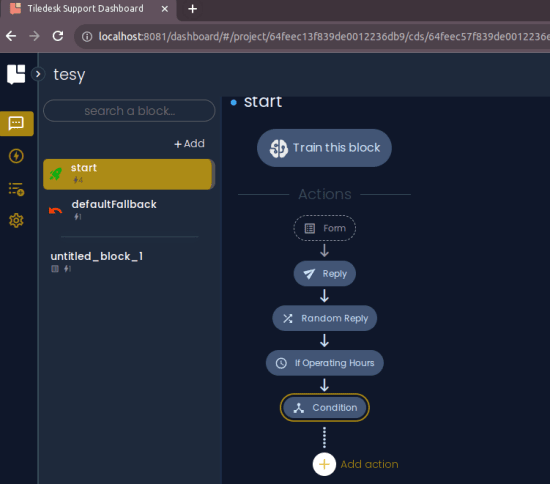
In the flow builder, you can create an automatic conversation flow. There are different blocks that you can use to build the flow. No need of coding as you just have to drag and drop them. Furthermore, if you have an existing knowledge of creating chatbots, then you can integrate AI in it. Tiledesk supports DialogFlow integration. You can connect that and train chatbot blocks.
Adding More Communication Channels in Tiledesk:
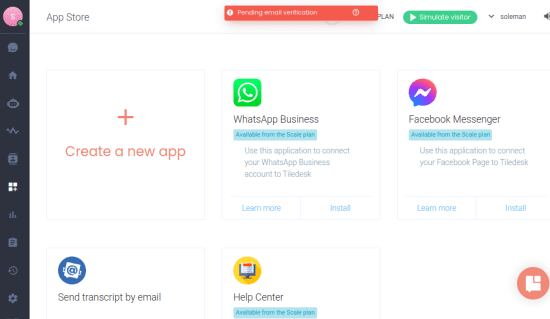
By default, you will get live website chat as a medium to interact with the users of your products and website. But Tiledesk supports other channels as well. For example, you can turn on WhatsApp and Facebook Messenger integration.
Go to the Apps section and from here, you can turn on the WhatsApp and Facebook Messenger integration. You will have to connect a Facebook Developer app for these to work. Also, you will need to generate app tokens to have these channels. You can follow this guide and this guide to see how to do it.
Another way to create supports tickets in Tiledesk is via email. Each project has a support email and you can copy it from the Settings > Email section. You can share this email with the users and they can email it. Later as an agent you can keep the conversation going via email threads.
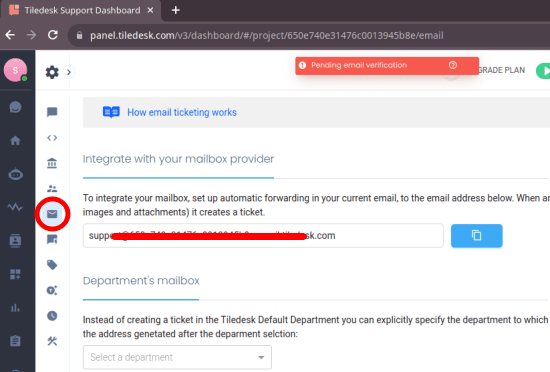
Apart from the default supports email address that it generates for you, you can also add custom email. Not only this but if you have multiple departments with email setup then you can use that email as well. The process to use a custom email is explained here.
Closing words:
If you are looking to host your own support system on your own server, then Tiledesk is indeed a good option. It has everything that a small needs. It is also good option if you are into product business. From multiple communication channels to department and agents management, everything it offers is remarkable. I personally liked it for its simplicity. Also, the ability to create custom colored chat widgets and managing chats with notes is amazing.