Pigeon Mail is a free mail merge for Gmail with attachments, email tracking. It uses your Gmail account to send out emails and offers email analytics as well. You only have to create an email template and columns for the recipients. You can create as many mail merge fields and then use them in your email. It intelligently maps all the fields from the Google Sheets and offers a very simple UI to send out the campaign.
Pigeon Mial is a completely free mail merger tool for Gmail. The only limit that applies is the standard Gmail limit which only lets you send 2000 emails per day. You can track your daily quote and even query about the analytics about the sent campaign. It shows you the open rate and bounce rate which will help you manage your email list. You can use this method to send out emails to anybody inside or outside your organization.
There are mail merge tools for Gmail but they often come with some limitations when it comes to personalized emails. But Pigeon Mail is very simple and straightforward. I will mention a step-by-step guide below which will help you easily get started.
Free Mail Merge for Gmail with Attachments, Email Tracking: Pigeon Mail
Pigeon Mail comes as a Google Workspace Add-on. You can install it from here and then start using it right away. The following steps will help you get started with it.
Step 1: Create a Google Sheets with as many fields as you want but must have one field to store the email addresses of recipients. All the fields that you create here can be used for templating. I will recommend you create an “Email” field in the sheet to store the emails of recipients.
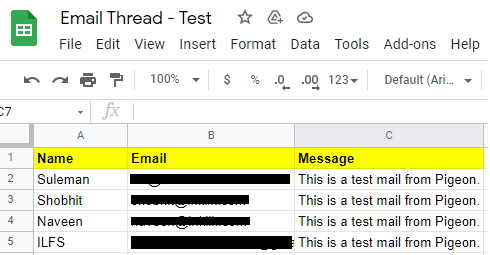
Step 2: Open Gmail and then create an email template. You can use all the fields that you have created in the Sheets. Do nothing, just close the compose email window and Gmail will save it as a draft. Just remember its subject line.

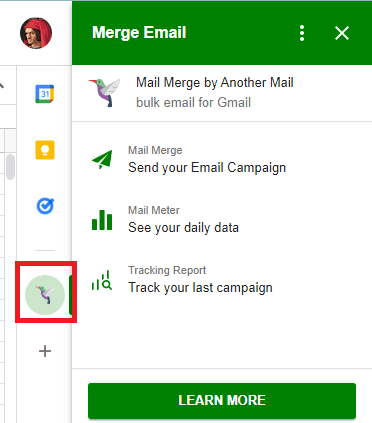
Step 3: Come back to the Google Sheets and then launch the Pigeon Mail from its icon. After that, you can just select the email template you want to use. It will fetch all the drafts from Gmail and you can select the one you just created by selecting a subject from the dropdown.
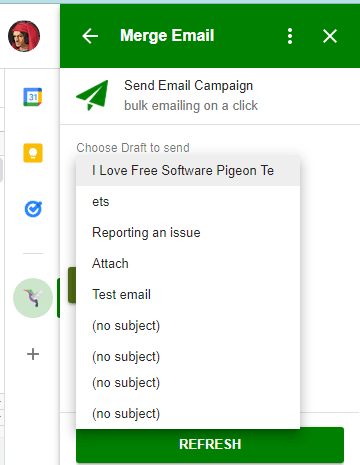
Step 4: Configure the recipient field and specify that in Pigeon Mail.
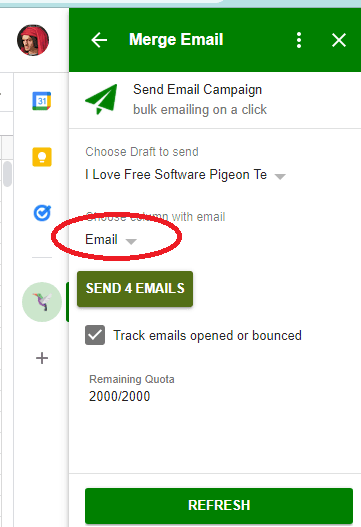
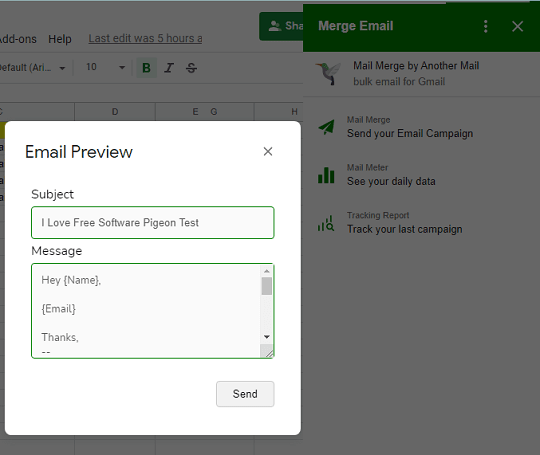
Step 5: Start sending out the campaign now. It will show you the preview of the email being sent. After it has sent the emails, it will show you a sent status in the Google Sheet.
Step 6: After a campaign has been sent, you can see the analytics. It shows you see the open and bounce rate that you can analyze from the Pigeon Mail’s UI.

In this way, you can use Pigeon Mail to send out personalized emails right from Gmail. You can keep track of the remaining quota for the day from its interface. Each day, you can use it to send out 2000 emails. It is very easy to use it and the steps above will help you.
Final thoughts:
If you are looking for a completely free mail merge tool for Gmail then Pigeon Mail is probably the best option. It does what it says in one of the easiest ways possible. Just give it a try on personal as well Google Workspace addresses. And if you have a new personal email then I will suggest you warm it up first using some free tools out there.