This tutorial is all about how to create GitHub issues by email. You can simply send an email by typing anything you want and then it will be added as a GitHub issue automatically. In addition to text emails, you can also attach photos, documents, etc., to your emails such that they will also be added with the issues on a GitHub repository. The email address to which you will send the issues is totally customizable which means you can set the email address as you desire. You can also share the custom email address with your team members and they can also send emails for creating GitHub issues.
This can actually be done using a free web application named “Fire“.
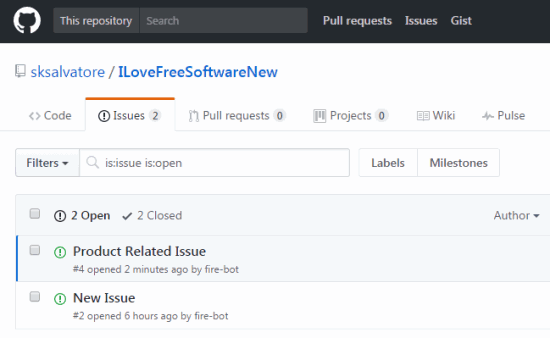
Now, let us see how to use Fire to create GitHub issues by sending emails.
How to Create GitHub Issues by Email:
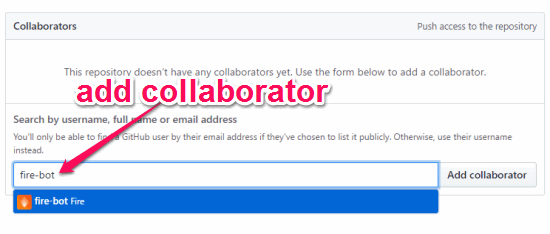
Step 1: To get started, the first thing you would need to do is open up a repository on GitHub on which you want to create issues by sending email. After that, click on the “Settings” tab and browse the “Collaborators” option on the left. Now, you would need to add “Fire (fire-bot)” as a collaborator to the repository.
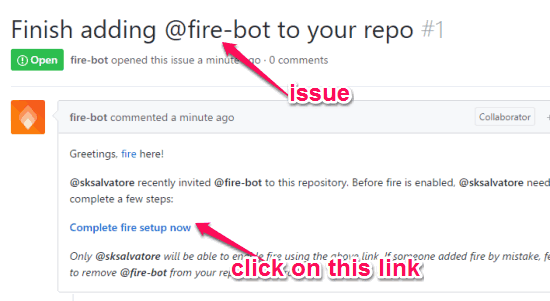
Step 2: When you do that, you will receive an issue on that repository saying “Finish adding @fire-bot to your repo”. Simply, open this issue and then click on the “Complete fire setup now” link to proceed with configuring “Fire”. After you do that, it will first ask you to verify your GitHub account such that you can start using Fire to create GitHub issues by sending email.
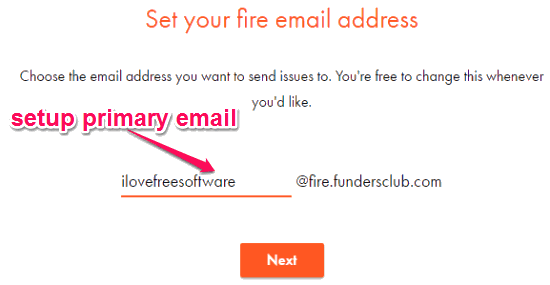
Step 3: Once you’re done with that, it will start a wizard for setting up Fire with three different steps. On the first step, it will ask you to define a custom email address to which you want to send emails for creating GitHub issues. You can set the prefix anything you want but the suffix of the email address will be “@fire.fundersclub.com” always.
Step 4: After that, you will be able to add team members such that they can also send emails and create issues on the GitHub repository they are part of. If you don’t want to add team members, then you can simply enter your GitHub username and email address to proceed.
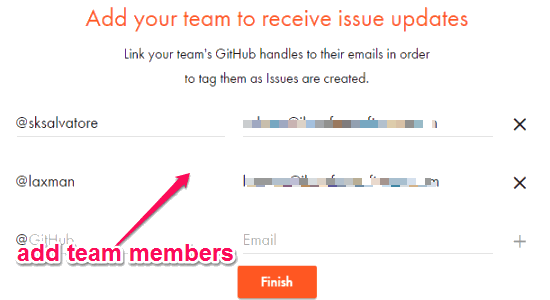
Step 5: In the last step, it will allow you preview the repository and Fire setup, change your Fire email address if required, add or remove team members, etc. When you’re all set, you can go ahead and start sending emails to the custom email address for creating GitHub issues. Apart from sending text emails, you can also add attachments like photos, documents, etc. If you have added any team member then he/she will also be able to send an email to your Fire email address and the email content will become an issue on the assigned GitHub repository.
As an example, you can see that I have composed an email to send to my Fire email address for creating a GitHub issue.
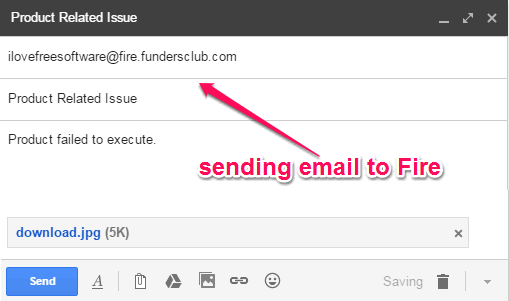
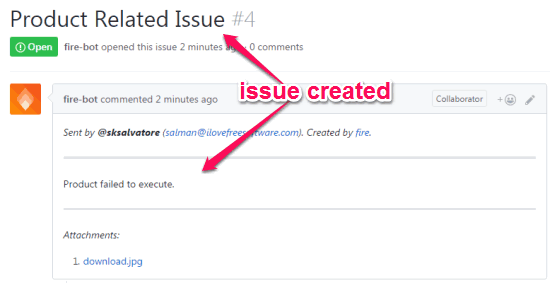
After sending the above email to Fire, it automatically created an issue in the selected GitHub repository, as shown below.
Closing Words:
Fire is a pretty good web application to easily add issues to Github via email. And the fact that it lets you add attachments also to the issues is a cherry on the cake. I like the fact that you can authorize multiple team members so that they can also send issues to the same email address.