This tutorial explains how to share Windows 10 screen using built-in tool. Windows 10 has a built-in “Quick Assist” desktop app for screen sharing. Using that built-in feature, you can access someone else screen or share your own screen remotely on different networks in Windows 10. Once the screen is shared, you can fully control the desktop, files and folders, use browsers, and other stuff of remote user and vice-versa.
Apart from screen sharing, this tool also lets you annotate screen to assist the remote user. You can access or share screen as long as you want. Once you are done with the screen sharing, you and other person can simply close the app to terminate screen sharing.
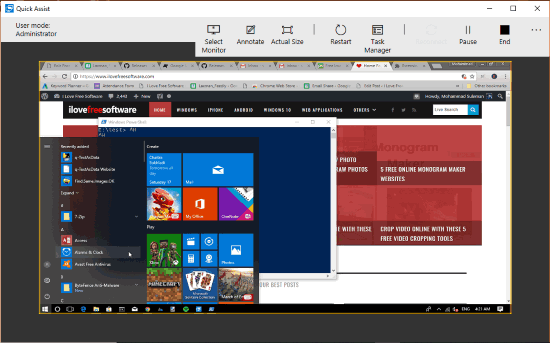
In the screenshot above, you can clearly see that I was able to access other Windows 10 PC screen, which was shared using the built-in feature of Windows 10.
How To Share Windows 10 Screen Using Built-In Tool?
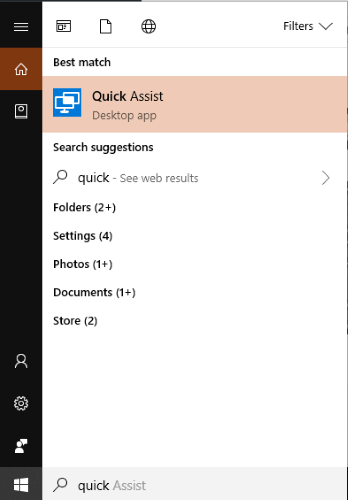
Step 1: Type quick assist on the Search box and then you can launch Quick Assist app. The other person also needs to do the same on remote PC.
Step 2: Now you will have two options: Get assistance and Give assistance. To access remote PC screen, you need to use Give assistance option. Otherwise, use Get assistance option. Let’s say the remote person wants assistance so in that case you need to click Give assistance option and other person will select Get assistance option.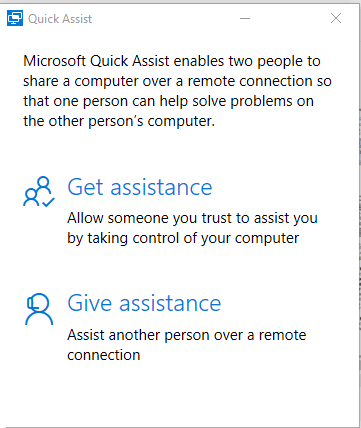
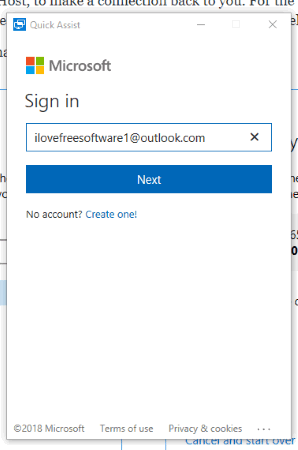
After pressing Give assistance option, you have to login to your Microsoft account. Other person doesn’t need to go through the login process.
Step 3: A security code is generated. You need to give that security code to remote user so that he/she can enter it on the Quick Assist box visible to him/her. The code remains valid for 10 minutes. So, share the code as soon as possible.
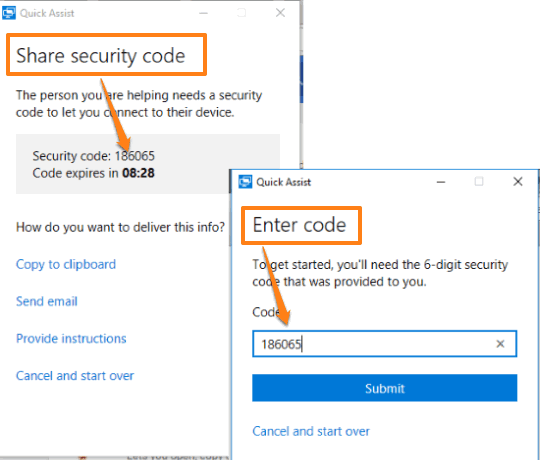
Step 4: The remote person can maximize the Quick Assist window and then start screen sharing is turned on.
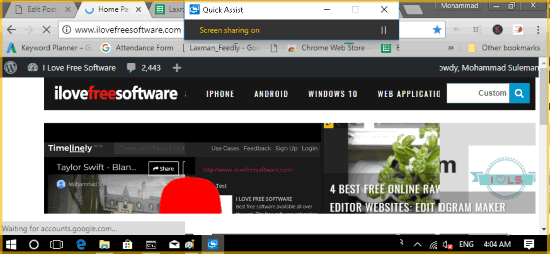
Step 5: Quick Assist interface on your PC will show the screen of other person. You can also maximize Quick Assist window and click on three dots icon available on the top right corner to view the complete screen of other Windows 10 user. Apart from accessing screen of other user, you will also see some options on Quick Assist interface. You can:
- Use annotation option and then start free hand drawing with red or some other available color on the screen. The other user can see the annotation and other activities you will do.
- Open Task Manager.
- Pause and stop the screen sharing session, etc.
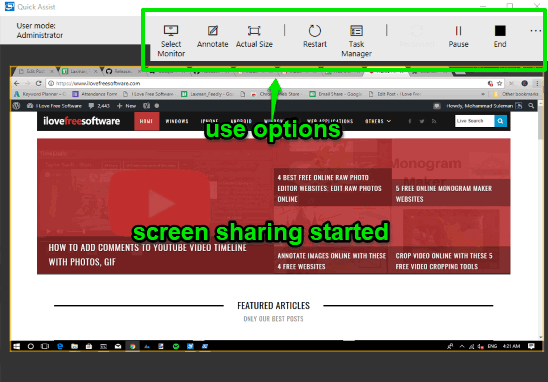
Whenever you want to close screen sharing session, simply close Quick Assist window.
The Conclusion:
There are many useful screen sharing tools like Team Viewer already available, but those who like built-in features over third party products, this is an amazing feature of Windows 10. Just some basic steps and you can share Windows 10 screen using this built-in tool. I like Quick Assist feature a lot. You can also try it.