Freshsales is a free online CRM software to enhance the productivity of your sales team with powerful features like lead scoring, tasks assignment, email tracker (in paid version), deals progress tracker, jot down call logs, and more. Normally, what happens is sales team requires multiple coordinated systems to do their various jobs, for example, creating leads, lead scoring (how much interested your leads are on your deals), account administration, adding and pitching deals, telephone & email integration, client conduct following, and reporting. So, in order to simplify all these activities of the sales team and reduce the need for multiple coordinated systems you can start using Freshsales.
Similar to other CRM software, you can use Freshsales to add leads, create and close deals, track lead activities, communicate with leads, jot down & maintain call logs, manage accounts, create and assign tasks, generate custom reports, schedule appointments, etc.
Note: The free version of Freshsales is limited to 10 users, no real-time email tracking, no in-app/website event tracking, etc. To overcome these limitations, you can choose paid version of Freshsales.
How to Setup Freshsales CRM and Add Team Members:
Step 1: Go to the Freshsales homepage and register for your free account. Once you’re in the Freshsales dashboard, click the “Settings” icon on the left navigation pane and scroll down to the “General Settings” section. After that, click the “Users” option and hit the “Add User” button on the right.
Step 2: As soon as you do that, the “Add user” window will appear where you have to enter the user details like full name, email id, job title, work, mobile number, and time zone. Below the “User Details” section, there will be the “Roles and Scope” section where you can choose the team member scope either as global, territory or restricted access and assign the work role as a user, manager, administrator, or account admin.
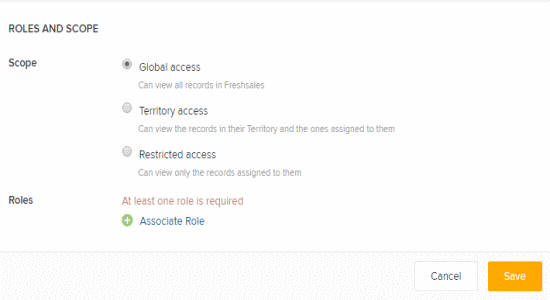
Step 3: When you’re done defining the scope and role, click the Save button to add the user to your sales team. Remember, adding a user means you’re adding a team member (limited up to 10 users in free version) to your sales team who will access client’s data, work on them and close deals.
How to Add and Track Lead Details using Freshsales:
Step 1: To add a new lead, click the “Arrow” icon adjacent to the Feedback button at the top and select “Lead”. After that, the “Add Lead” windows will appear where you can enter the basic information of the lead such as first name, last name, company name, job title, email, department, work, mobile number, address, social links, company address, etc.
Step 2: At the bottom of the basic information section, you’ll be able to define the lead’s business type, industry type, deal name (for which you’re creating the lead), deal value, deal expected close date, and product.

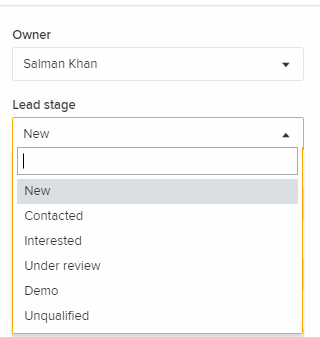
Step 3: On the right of the “Add Lead” window, you’ll be able to assign the lead owner among your sales team member, choose source, campaign, enable DnD, and set lead stage either as new, contacted, interested, under review, demo, and unqualified.
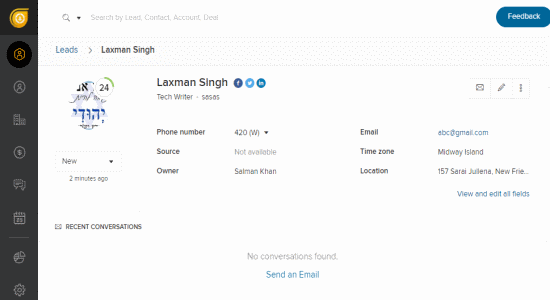
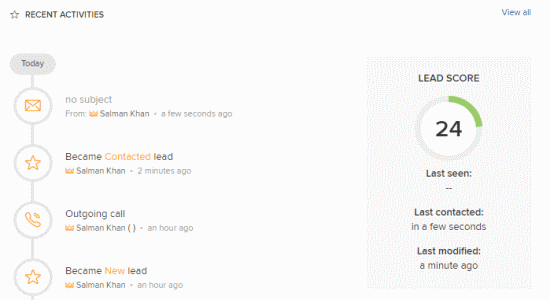
Step 4: When the lead is added, you can start sending emails, add notes related to the lead, add and assign a task to any team member related to the lead, schedule an appointment with the lead, track lead score, keep a record of recent conversations and activities, etc. For this, all you got to do is click the “Lead” icon on the left panel and select the lead to view and track the lead details.
How to Create and Manage Accounts:
Step 1: To create a new account, simply click the “Arrow” icon at the top from where you have created the lead in the above steps and select the “Account” option from the list. After that, enter the account information like name, website, phone number, annual revenue, address, and social links.
Step 2: It will also ask you to assign a team member as owner, choose industry type, business type, set the number of employees, and territory on the right of the window.
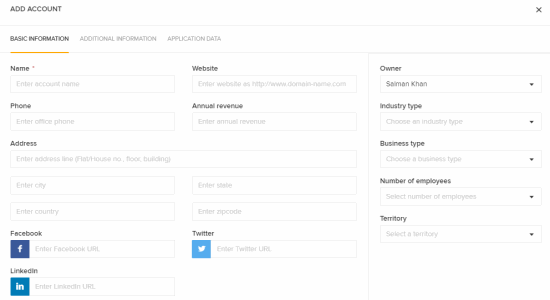
Step 3: Once the account is created, you will be able to add deals, view contacts added to the account, add tasks, schedule appointments, view contacts conversation history, track open and won deals with values, and more. You can access all your accounts by clicking the “Accounts” icon in the navigation pane.
How to Add New Contacts and Convert Leads into Contacts:
Step 1: In order to add a new contact, click the “Arrow” icon at the top and choose “Contact” to proceed and enter contact details. The basic information window will pop up where it will ask you to fill up all the contact related details like name, job title, email, department, and so on. Similar to leads and accounts, it will also ask you to choose an owner for the contact and select the source via which you’ve connected with the contact.
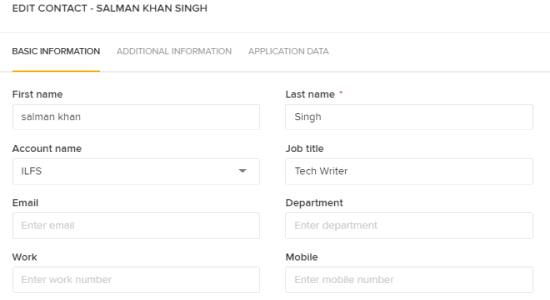
Step 2: While creating a new contact, it will ask you to assign the contact to any of your accounts which you’ve created earlier. Doing so, you will be able to track contact details from separate accounts. For example, let’s say you’ve 4 customers with same interest, then you can create a separate account and add all of the 4 customer contacts to the account in order to access them with ease.
Step 3: Similar to leads, you will also be able to track recent conversations, activities, add deals, track lead score, jot down notes, assign task related to the contact to any team member, schedule appointments with contacts, etc.
Step 4: Another great feature of this CRM software is that it allows you to directly convert leads into contacts such that you don’t have to enter all the details of the customer again. Let’s say you’ve found a lead who is very much interested in your deals and has a high lead score, then you can convert that lead into a contact in order to have a better conversation and stay tuned for the contact activities all the time.
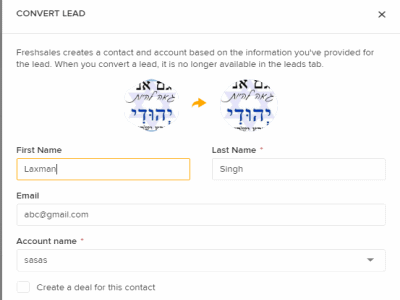
Step 5: To convert a lead into a contact, go to the Leads tab from the left panel and click on any lead. After that, you’ll see a convert button at the top-right corner of the window. Simply hit the button and the lead will be converted into a contact. It also adds an account with the lead information which you’ve just converted into a contact. Remember, converting a lead into a contact will remove the lead from the “Leads” section.
How to Create New Deals and Assign to Contacts or Leads:
Step 1: Now, the best part of this free CRM software is the deals which you can create and pitch to your leads and contacts. You can create deals separately and assign them to any account or contacts. It also has an option to directly add a deal while creating a lead. When you convert a lead into contact, the lead’s deal will also get assigned to the contact automatically.
Step 2: To create deals separately, select “Deal” after clicking the “Arrow” icon at the top. After that, enter all the basic information of a deal like the deal’s name, deal value, type (new business, existing business renewal or upgrade), expected close date, product, payment status (online or offline), and probability.
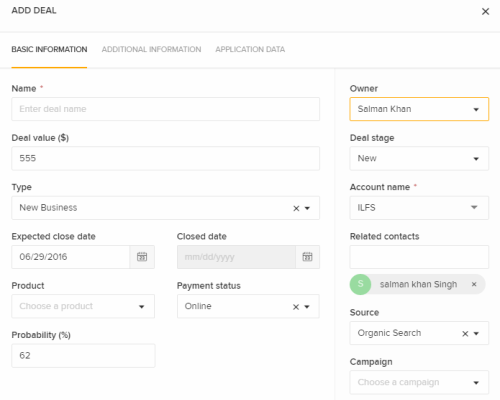
Step 3: On the right of the basic information section, you’ll be able to select an owner, deal stage (new, follow-up, under review, demo, negotiation, won, or lost), select account name, assign contacts from that account, select source, and campaign. After entering all these details, click the Save button to add your new deal. Remember, the deal stage plays a major role in lead scoring, as the score syncs automatically as per the deal stage.
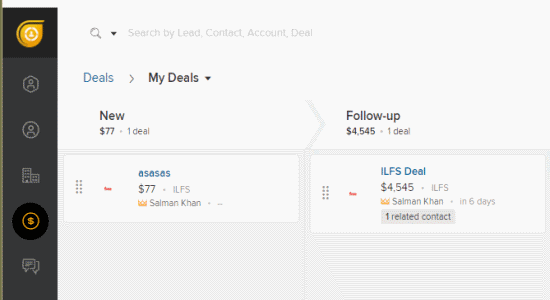
Step 4: All your added deals will be visible on the “Deals” tab which you can access by clicking the “Deals” icon on the left panel. It creates a separate column for each deal stage (new, follow-up, etc.) in order to make tracking deals much easier for you. Another useful feature is that it lets you change the deal stage by simply dragging a deal from one stage column to another.
How to Add and Assign Tasks to Team Members:
Step 1: Freshsales also allows you to add tasks related to any lead or contact and assign them to the team members of your sales team. If you want to assist the assigned team members for completing the tasks effectively, then you can also add collaborators while creating the tasks.
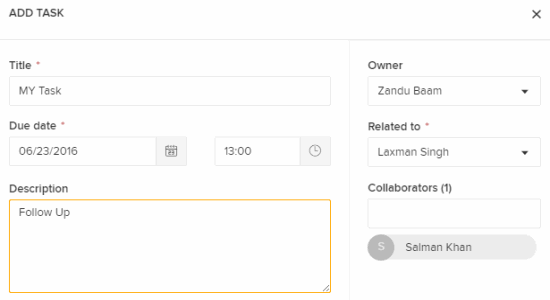
Step 2: Click the “Arrow” icon at the top of the window and pick “Task” from the list to proceed. After that, enter the task title, due date, add a description, choose task owner, select a lead or contact to whom the task is related, and add collaborators from your team members.
Step 3: You can view and track the status of all your assigned or created tasks in the “My Appointments & Tasks” tab. Click the “Calendar” icon on the left navigation pane and select the “Tasks” tab to do the same.

How to Schedule Appointments and Add Attendees:
Step 1: Freshsales also allows you to easily schedule appointments with your leads and contacts in no time. For this, all you got to do is select the option “Appointment” after clicking the “Arrow” icon. Then it will ask you to give your appointment a name, set from/to date and time, select time zone, enter the meeting location, add a description, select the lead or contact for whom you’re scheduling the appointment, and then add attendees who will be attending the meeting.
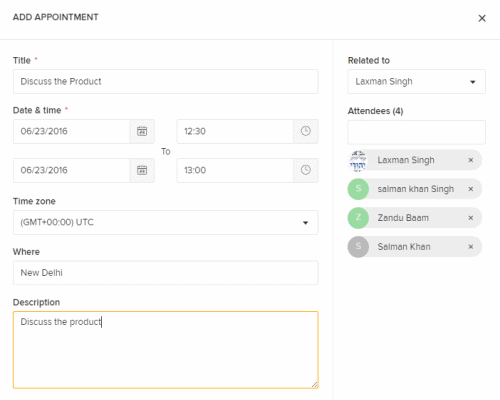
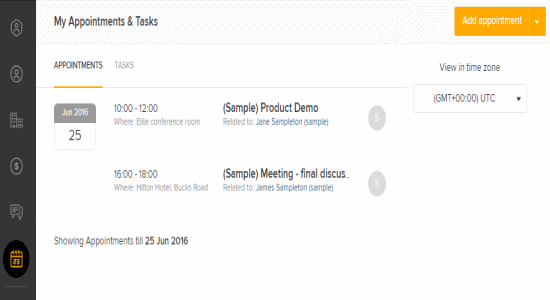
Step 2: You can assign your leads, contacts, and team members as attendees for the appointment. To view all your attended or upcoming appointments with leads or contacts, simply click the “My Appointments & Tasks” icon and select the “Appointments” tab as shown below.
How to Send Emails and Make Phone Calls from Freshsales:
Step 1: Now, the most important question which might arise in your mind is that how you can communicate with your leads or contacts. Well, Freshsales has integrated email and phone support within the software such that you won’t need multiple systems and services to communicate with your leads and contacts.
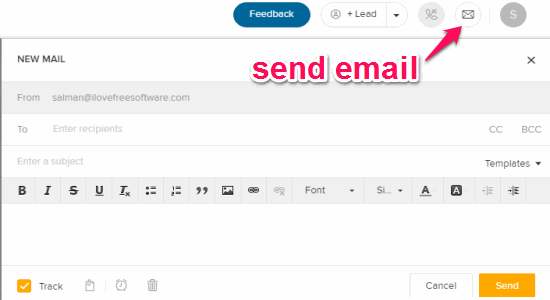
Step 2: To send an email, simply click the “Email” icon adjacent to the “Arrow” icon at the top. After that, the compose window will appear which is quite similar to Gmail. At the bottom of the compose window, you’ll also see a “Track” button which can be used to get email read alerts in the “recent Conversation” section of any contact or lead.
Step 3: The software also supports phone calls without using any third-party integration. But, the catch is that you need to buy a local or toll-free number for making and receiving calls from contacts and leads directly on Freshsales dashboard.
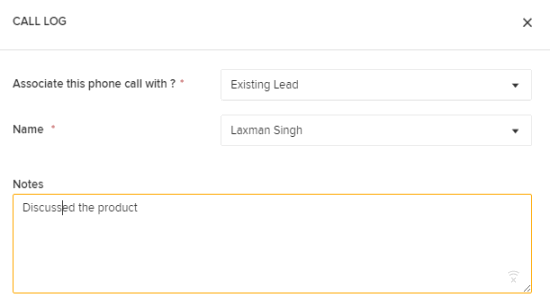
Step 4: Let’s say you’ve purchased a local or toll-free number, then you can make calls to your contacts or leads and add call logs for keeping track of your conversation. To add call logs, select “Add Call Log” from the “Arrow” icon and select the lead or contact to whom you’ve had the conversation, jot down notes, and choose the lead/contact status.
My Final Verdict:
Freshsales is definitely one of the best free online CRM software available with both free and paid plans. Using this software, you’ll be able to add leads (customers) and track their detailed information like deals won or pending, conversations, touch points and activities with your company, and the scheduled appointments & tasks.
Ultimately, Freshsales works as an all-in-one solution for your sales teams to improve productivity and keep a healthy relationship with your customers. Adding leads and pitching deals has never been easier.