This tutorial explains how to create a custom power plan in Windows 10. Being the state of the art Operating System that it is, Windows 10 is filled with enough bells and whistles to help you power through your daily tasks like a boss. In addition to that, Microsoft’s latest offering also excels in executing all standard operations that an OS is supposed to handle, such as memory management, resource allocation/de-allocation, and of course, power management.
Speaking of power management, Windows 10 handles that just fine. It even lets you specify the time after which the screen turns off, or the computer goes to sleep. But what if you don’t want to tinker with these settings every now and then, and would rather apply them with one click?
Glad you asked, as Windows 10’s custom power plan feature lets you do just that. Sounds fun? Let’s find out how you can create a custom power plan in Windows 10.
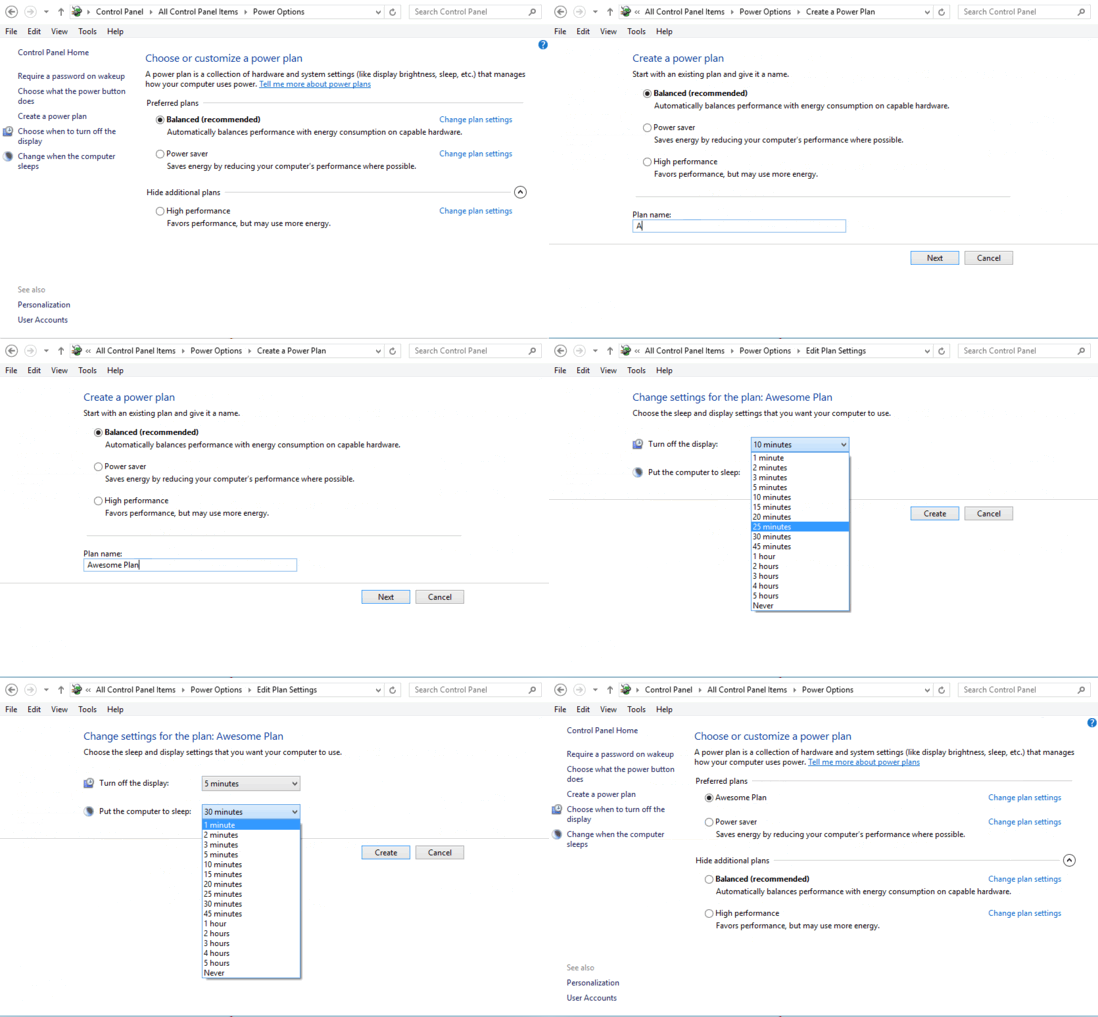
How To Create A Custom Power Plan In Windows 10?
It’s easy to create a custom power plan in Windows 10. This allows you to specify the time duration after which you want the computer’s screen to turn off, as well as the time duration after which the computer goes to sleep, and save these settings as a profile that you can select with the click of a button. Here’s a stepwise tutorial, illustrating how to do it:
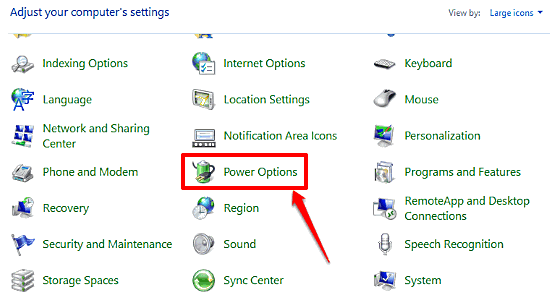
Step 1: Open up the classic Windows Control Panel, and click on (quite obviously) Power Options.
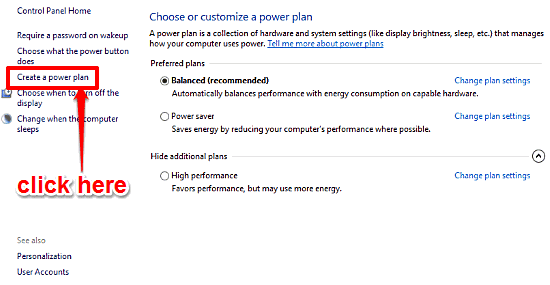
Step 2: The Power Options configuration pane should now come up, where you can tweak all of Windows’ power management features. Click on Create a power plan in the left column.
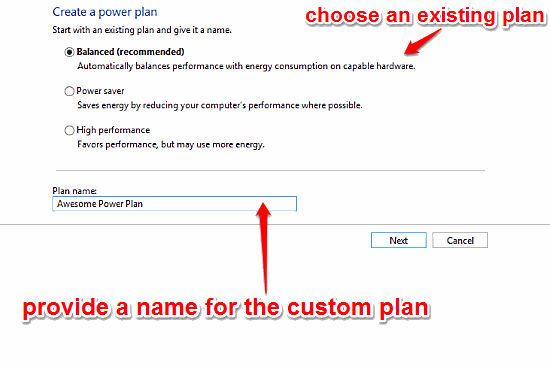
Step 3: As the first step in creating a custom power plan, you’re required to choose an existing power plan (preferably the one whose settings already match the new plan that you want to create). You can also provide a descriptive name to the plan in the name field. When done, click Next.
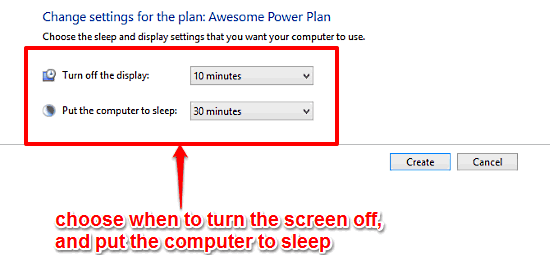
Step 4: Finally, choose the time duration after which you want to turn off the display, and put the computer to sleep on the next screen. For both of these options, you can choose from a number of presets, ranging from 1 minute to 5 hours. After specifying the options, click Create. Here’s a screenshot:
That’s it. You can now easily select this plan from the battery icon in the system tray, all with one click. How cool is that?
See Also: How To Enable Hibernate Mode In Windows 10?
Conclusion
The ability to create a custom power plan is a simple but useful feature. It lets you apply your custom power saving settings with one click, without having to jump through a number of options left and right. Try it out, and let me know what you think in the comments below.