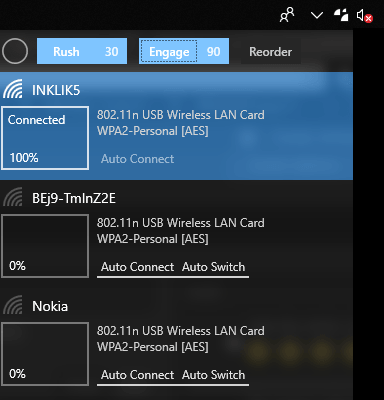
This tutorial explains how to connect to WiFi depending on signal strength. Wifinian is a free software for Windows which allows you to manage different wireless profiles in a very neat manner. You can think of this as a simple WiFi manager software to connect to WiFi networks according to their signal strength. It lets you specify a threshold value for signal strength and then keeps watching for a WiFi which has signal strength more than that and connects to it. It keeps running in the system tray and you can access it whenever you want.
Apart from automatically connecting to a WiFi, there are some other options that it offers. You can use this software to automatically switch between different WiFis when anyone is not available. Also, you can make a priority list of WiFi networks in it. And based on that list it will connect to the WiFi networks. You can even manage different WiFi profiles in it. And whenever you want, you can delete any profile that you have made.

How to Connect to WiFi Depending on Signal Strength?
Wifinian
Wifinian comes as standalone software as well as a Windows 10 app. It depends on you what you want to use. Both the versions look same and work similarly as well. When you connect to a new network, it automatically adds that in your wireless profiles and lets you set its priority.
It is pretty easy to use this software to connect to WiFi depending on signal strength. Just have a look on the following steps and then see how it works.
Step 1: You can use this link to download Wifinian and then install it. After that, open it and you will see its icon in the system tray of Window 10.

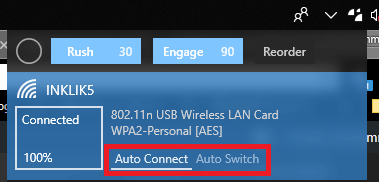
Step 2: Click on its tray icon to bring its main interface. You will see that it lists all the WiFi profiles from your PC there. You can use any of the profiles and then specify your preferences. To connect to a WiFi according to signal strength, you will have to enable auto switching option and auto connect options. Otherwise it will not work.

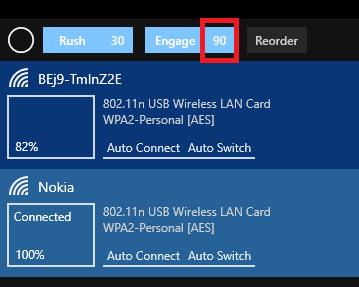
Step 3: To connect to a specific WiFi according to the WiFi strength, you can use the “Engage” option from its interface. Close to “Engage”, there is a number which is signal threshold. You can keep clicking on it to change its value. And when you have set a threshold value, you can leave the rest on this tool. Whenever a WiFi becomes available having signal strength more than the specified one, it will connect to that.

In this way, you can use this free tool to automatically connect to a WiFi according to the signal strength. All you have to do is just specify the signal strength value and then let it work on its own. This is a portable software and you can easily make it run automatically at Windows startup.
Related post: 5 Free Software To Measure WiFi Signal Strength
Final words
Wifinian is a very nice tool to manage Wireless networks in Windows 10. All you have to do is a little configuration and then you can easily configure the software to automatically connect to a WiFi having value more than the specified signal strength.