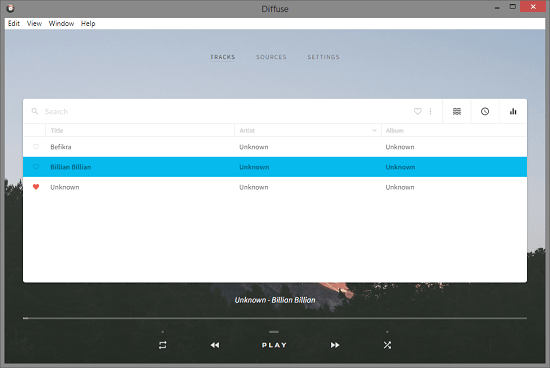
Diffuse is a free cloud music player for Windows to play songs from S3, IPFS, Dropbox. If you have your accounts on these cloud services then you can easily connect them here and import your songs that you can play. In order to fetch the songs from the cloud storage. you just have to configure them here and then you are all good to go. The music player is simple and you can import all your tracks and then play them here. The music player all the music controls and even offers you an option to create playlists and mark songs as your favorite.
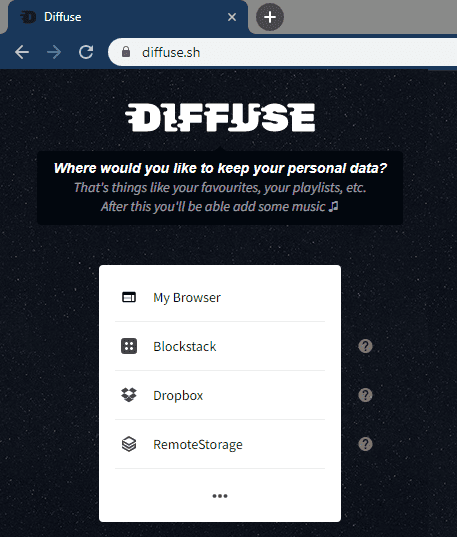
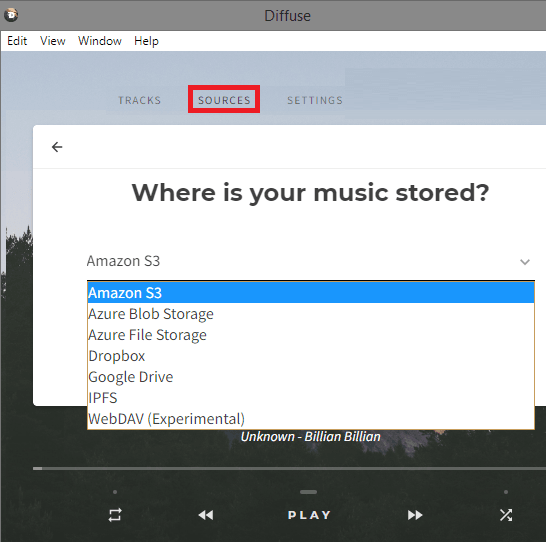
Diffuse comes as desktop app and it is hosted online as well on a decentralized platform. You can sign in there using your Block Stack account and then add the music sources. You can configure multiple music sources and then play songs after it imports them for you. Apart from aforementioned cloud storage services, it supports Google Drive, WebDAV, Azure File Storage, and Azure Blob Storage. However, to configure the S3 or IPFS like services, you will be required to have some technical knowledge.

Using this Free Cloud Music Player for Windows to play Songs from S3, IPFS, Dropbox:
Diffuse is an open source cloud media player as well and you can check out its source code on GitHub. Also, if you are interested in the online version of Diffuse then you can try that here. For this post, I will be using the desktop app. You can download Diffuse for Windows from here and then simply open it up. After that, you can start with the music importing process.
Here you are given various methods to sign in to get to the main interface. After you are there, you can start adding the music sources. I used the browser authentication method to sign in by adding a passphrase. The Block Stack method didn’t work for me in the desktop app but worked on the online version. So, after you are on the main interface of the music player, you can start adding the music sources.

Go to Source section and then add a new music source. Choose the cloud storage from the list from which you want to import the songs. Here you have to note that if you want to sue IPFS or S3 then you will have to configure CORS as well. The process of doing that is mentioned here.

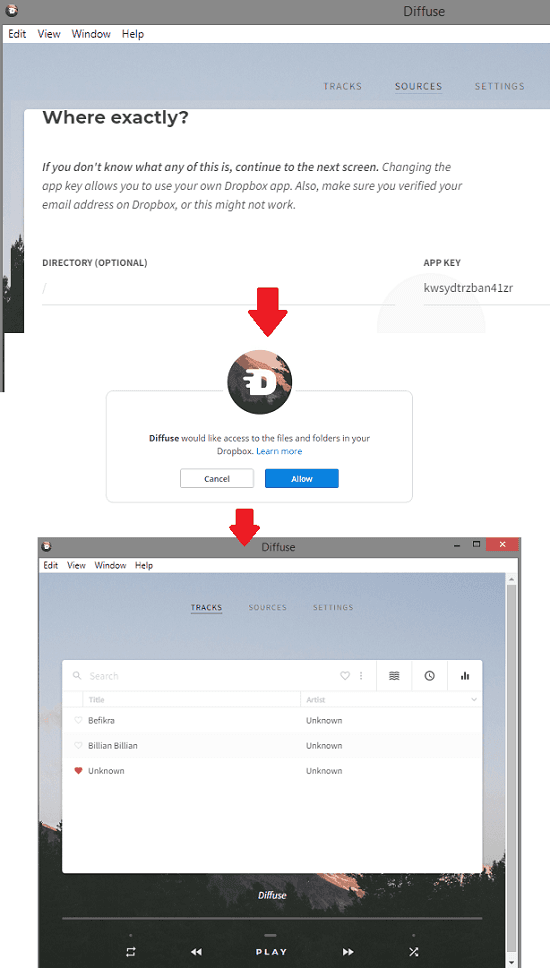
In my case, I am adding Dropbox, so I chose Dropbox from the lost. It will add a random app key there and then you can proceed by clicking on the “Next” button. It will take you the Dropbox authorization page where you have to give it access for importing songs. After the authentication completes, you can comeback to the main interface and you will see the lost of songs that you can play.

That is it. This is how you can configure this software to import songs from various cloud storage services and then play them using the provided music player. The streaming is smooth and you can use the shuffle mode or opt to repeat a song s well. Not only this but you can mark some songs as your favorite and even create a playlist. Use playlist section from the music player interface to manage the playlists.
Closing thoughts
Today people don’t really keep songs offline. They usually keep the songs online or use some music streaming services. And with the music player I have mentioned here, you can do the same. You just put your songs in a cloud storage and then play them with this simple software I have mentioned. The best part is that there is an online version as well that works in the same way. You only need to do a little bit of hard work in configuring the music sources that will be all.