Let’s see how to set data limit for WiFi and Ethernet in Windows 10. It is a new feature which is helpful when your data is low on a particular connection. You can set data limit in GBs or MBs. After that, when data limit is reached, Windows 10 will alert you about that limit. Setting the data limit won’t disconnect or stop your data connection if some data is left. Instead, it will show a notification alert that “You’ve reached your WiFi data limit“. After that, you can either change settings to edit or remove the limit or disconnect that particular connection and connect to other WiFi or cellular data.
To set the data limit for a particular WiFi connection in Windows 10, you need to open Settings and then access Data Usage page. This tutorial has covered all the steps for you. Do note, this feature to set the data limit for WiFi and Ethernet connection in Windows 10 has come with insider preview build 17063. That means you will not find this feature in your Windows 10 Fall Creators Update or earlier versions but will come in the next stable release. If you can’t wait that long, then you can simply install preview build 17063 to use this feature.
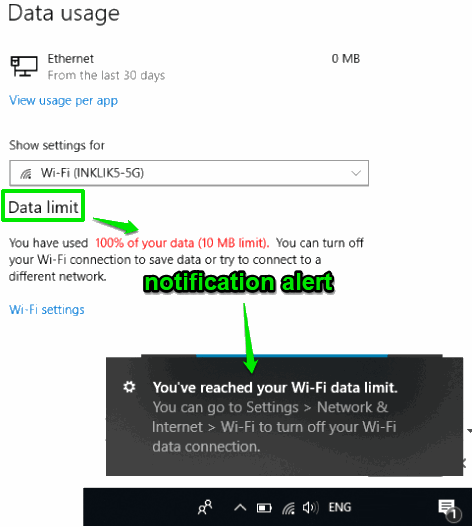
In the screenshot above, you can see that Settings window showing a warning and a notification alert is also visible related to data limit reached.
Windows 10 has already provided the feature to check data usage details, but the feature to set data limit was not present. Thankfully, now it is available.
How To Set Data Limit for WiFi and Ethernet?
Step 1: Click Settings icon available in Start menu (or Windows logo key + I hotkey) to open Windows 10 Settings.
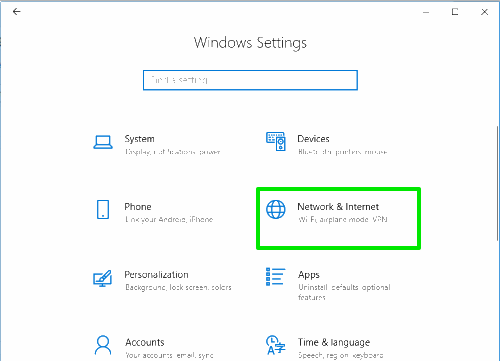
Step 2: In Windows Settings, select the “Network & Internet” option.
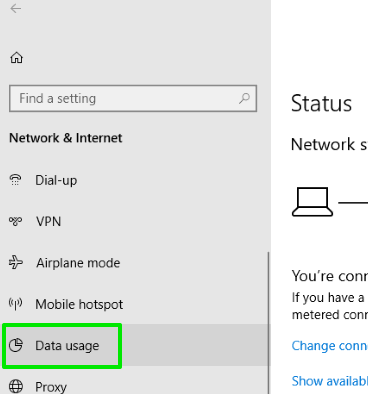
Step 3: When Network & Internet menu is opened, select the “Data usage” option visible on the left side.
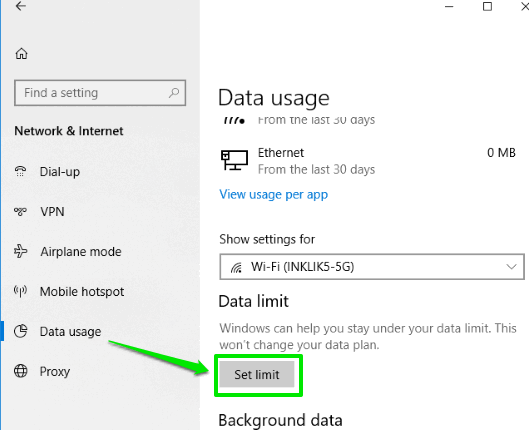
Step 4: On the right-side, you will see a new Data limit section. Under that section, there is a “Set limit” button. Select that button.
Step 5: A pop-up will open. There you will see Limit type: Monthly, One Time, and Unlimited (there will be no data limit). Select Monthly or One Time limit and then specify the data usage limit in GB/MB.
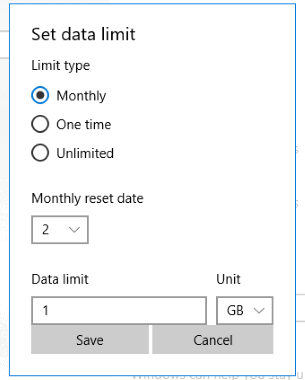
Press Save button.
That’s it! You have applied data limit for the connected WiFi/Ethernet.
You can open Settings anytime and access Data usage page to check how much you’ve consumed so far for the data limit set by you. Whenever data limit is reached, a notification alert will appear so that you can take necessary step. You will also be able to edit or remove the data limit set by you.
The Conclusion:
This is a pretty good feature of Windows 10. Earlier, Windows 10 came with features to set “set bandwidth limit to download updates and set a connection as metered connection. But, such features aren’t helpful to alert you for data limit. Now it is possible and very easy also. You can set the data limit for any WiFi and Ethernet connection in Windows 10, edit the limit, as well as remove it.