Web Solar Cloud is a free online tool that enables you to design professional solar projects easily and quickly. You can just use your browser to create accurate solar designs without the troubles of complicated installations making it a highly effective and convenient tool for homeowners as well as professionals.
Web Solar Cloud is very easy-to-use and provides a wide-ranging set of features that include roof segment configuration, solar panel placement, electrical configuration and more. After finishing the configuration, you can run a simulation to determine the shade losses, actual power output that the system generates and get reports related to your Consumption Profile and Battery Usage / Performance. All these tools and features ensure that your solar design provides the best possible energy production and optimum efficiency.
Web Solar Cloud can be used by anyone even if the person is new to solar design. Let’s see how the application works.
Working:
1. Click on this link to navigate to Web Solar Cloud and click on ‘Create New Project’.
2. Give a Name and Description to the project. Next, enter the project address to locate the place on the map and update the location by moving the map and positioning the pin precisely at the spot where you wish to design the solar installation.
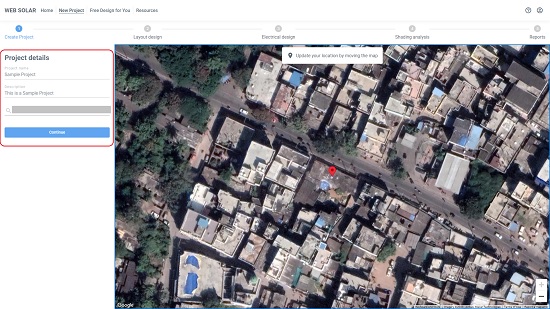
3. Click on ‘Continue’ to move to the next page where you will be able to create the Roof Segments, complete the various configurations, run Simulations and more using the vertical panel towards the left of the screen.
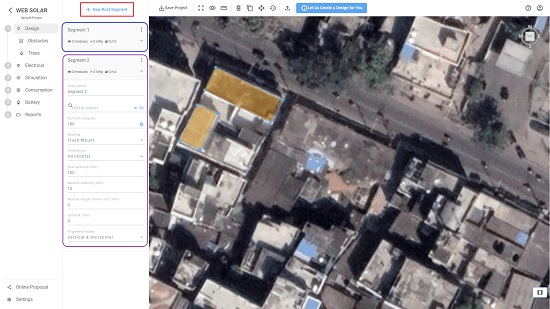
4. To create the Roof Segment at the selected location on the map, click on ‘New Roof Segment’, then click on the first point of the roof to get started and slowly mark all the required points to create the segment. You can also create multiple roof segments for large or complex installations. Use the toolbar available at the top to move modules, delete objects, 3D objects visibility and more. For a 3D view of the map, press and hold the ‘Shift’ key and left mouse button and then drag your mouse
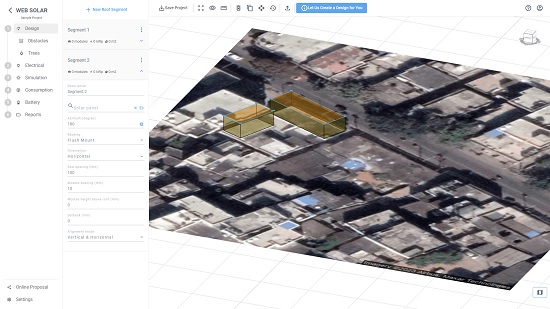
5. Click on the ‘Solar Panel’ option, browse through the list of the available Models from various manufacturers and choose the one that you wish to use. You can also click on the ‘Add panel’ button to add your custom solar panel if it is not available in the list.

6. Next, specify the type of Racking, Orientation, Alignment, Module spacing / height, and more to complete the configuration of the segment. You must complete this process for each roof segment that you have created.
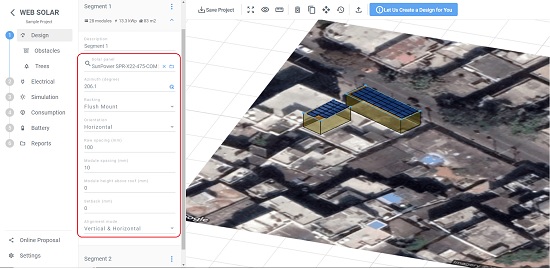
7. You can automatically detect the Azimuth for the selected location by clicking on the ‘Detect Azimuth’ icon. You can also configure the Azimuth manually by clicking on the Azimuth field, choosing the desired edge of the roof segment and then clicking & dragging the up / down arrows on the map to modify the tilt or angle of the segment.
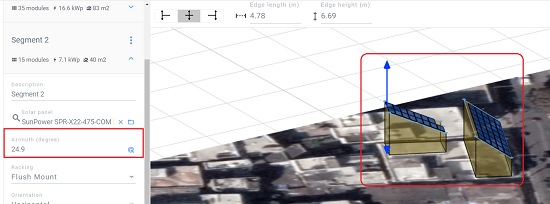
8. Click on ‘Obstacles’ and ‘Trees’ under the Design option in the left panel to add any Keepouts and Trees. Keepouts are used to prevent the solar modules from being fitted in selected sections of a roof.
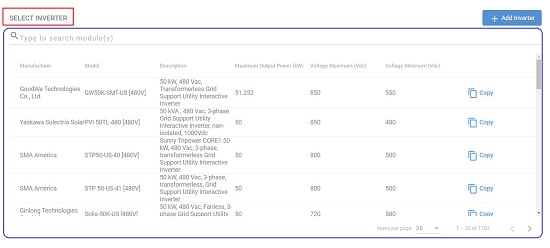
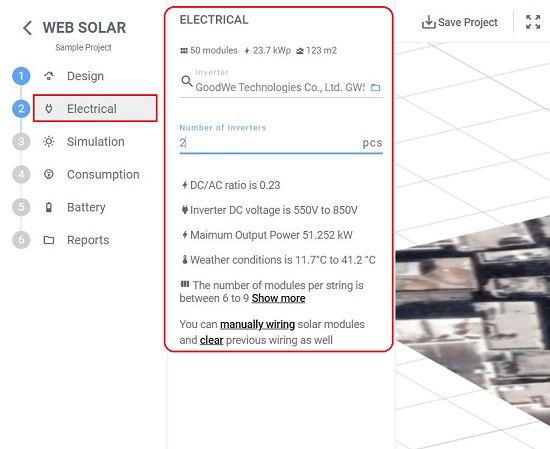
9. Now, click on the ‘Electrical’ option in the left panel, add your Inverter and specify the quantity. The inverter DC voltage, Max output power and more will instantly be displayed for your reference.
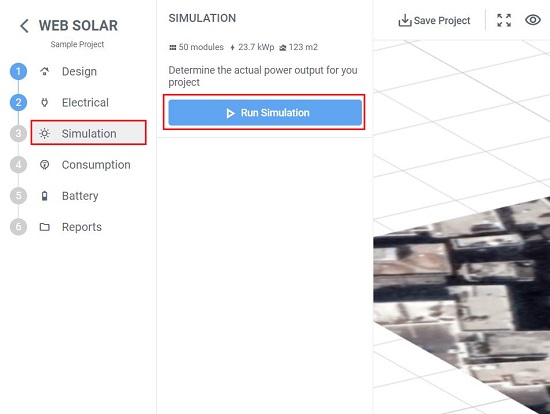
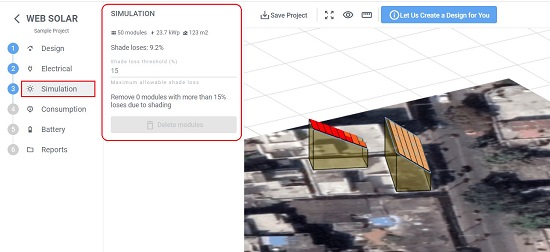
10. Next, click on ‘Simulation’ in the panel and then click on the ‘Run Simulation’ button. Wait for a few seconds while the application determines the Shade Losses and the Shade Loss threshold. You can go back and make the necessary changes in configuration to minimize the losses.
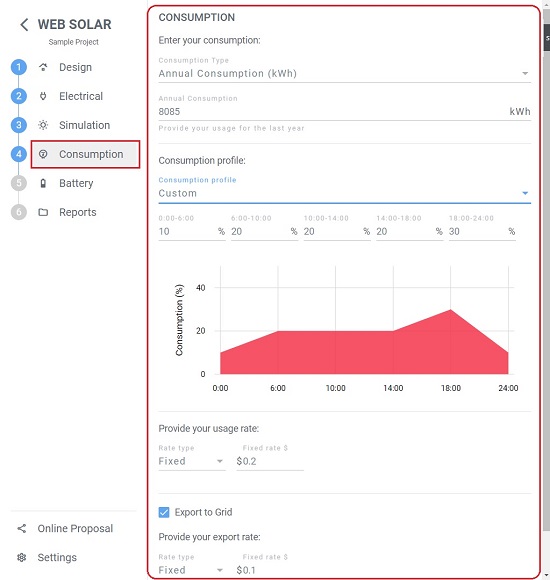
11. Click on ‘Consumption’ in the panel, choose the Consumption type (Annual / Monthly), specify your average usage, choose your Consumption profile and you will be able to view a chart depicting your Usage on a 24-hour basis. Web Solar Cloud also allows you to design your own custom profile by defining the percentage of your power usage in a 6-hour time slot.
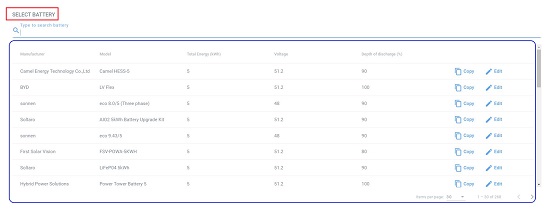
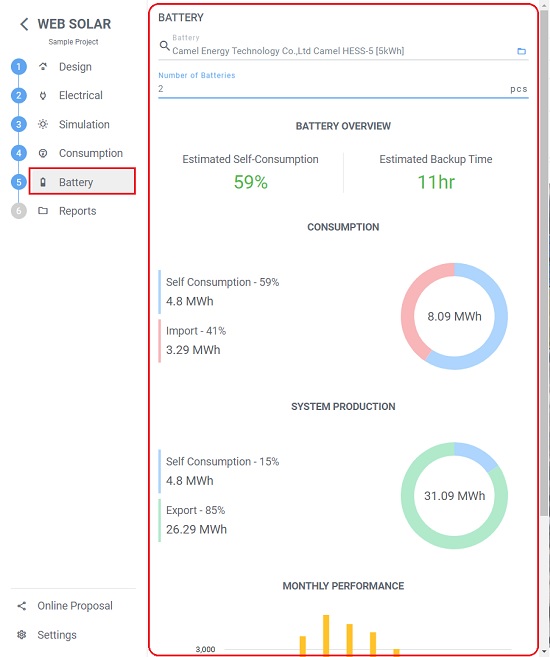
12. Now click on ‘Battery’ in the left panel and like earlier, choose the Battery and specify the number of batteries that you will be using. You will now be able to see an Overview of your Battery consumption, System production and more.
13. Click on ‘Reports’ to view the Project Summary, Bill of Material, Consumption, Monthly performance and other charts for your perusal.

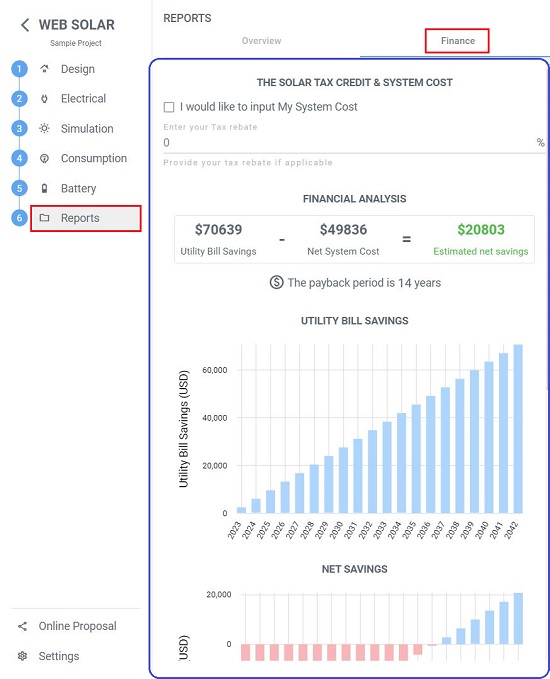
14. For reports related to the financial aspects of your solar project, click on the ‘Finance’ tab. You will be able to view your Utility Bill savings, Net system cost and a Financial analysis in this section that helps you to estimate your Net savings due to the project.
15. To export the Solar Project in the Autocad (DXF) format, click on the ‘Export’ icon in the toolbar. To save the Project, click on the ‘Save Project icon’. You must sign in to Web Solar Cloud using your Google account to Save or Export the project.
Closing Comments:
Web Solar Cloud is a free, awesome, and easy-to-use online tool for designing and configuring solar projects easily and quickly. The Simulation features and the Financial & Production Reports that it generates aid you in getting the key metrics like net cost, savings and statistics for effective evaluation and analysis of the entire project. These are very helpful in designing a solar project with system efficiency and energy production without getting into the hassles of complex installations at an early stage.
Go ahead and try out the product and let us know how it helped you. Click here to navigate to Web Solar Cloud.