This tutorial explains how to share PC screen using VLC over local network in Windows.
VLC is one of the most popular cross-platform media player out there. It packs tons of features, and one of them is sharing screen over a local network. Using VLC, you will be able to broadcast your complete PC screen to one or more PCs in local network. No extra plugin is required to do the same. Just follow the steps in this tutorial to share PC screen using VLC.

VLC Media Player has a feature to broadcast media, and I will use that feature to share PC screen using VLC. You can easily share your desktop screen without the need of any additional dedicated screen sharing software. All you need for this is, PCs with VLC installed on them. Make sure those PCs are connected to the same network. Once you start broadcasting screen from a computer, you can stream it on multiple PCs connected to that same network.
How to share PC screen using VLC Media Player:
To start the screen sharing, you need to setup up VLC stream settings on Source PC, as well as Destination PC.
How to Configure PC to Share Screen using VLC:
Open VLC media player and click on Media dialog on the top left corner. Select Stream option from the Media dialog box.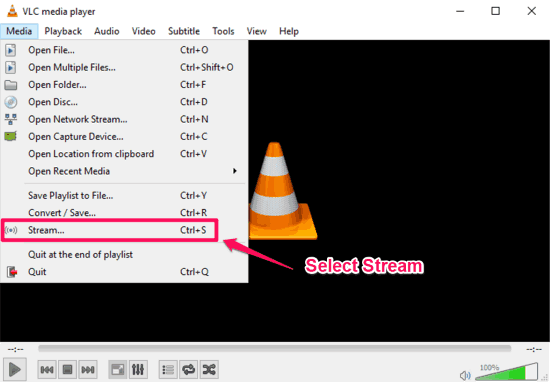
An Open Media window will pop up; go to Capture Device tab.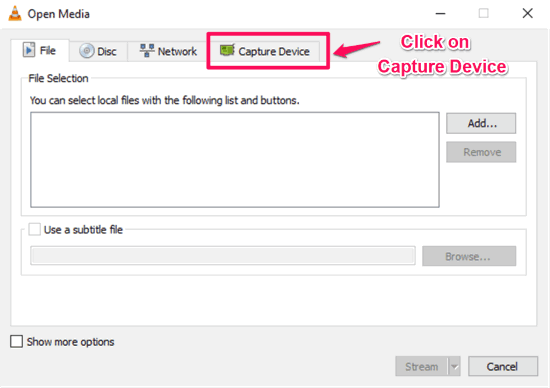
In Capture Device tab, default Capture Mode is DirectShow, change it to Desktop.
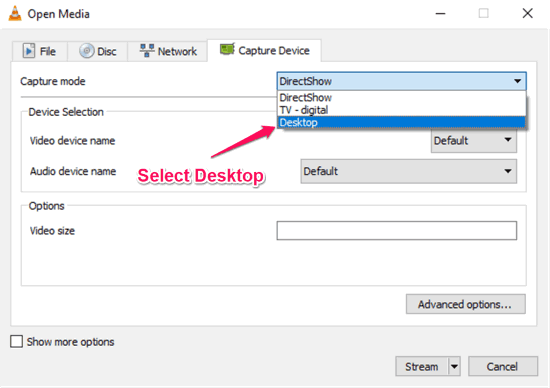
Note: You can also broadcast local media files from File tab. Select the media file you want to broadcast and rest is same.
After changing that, set the desired frame rate and click on Stream at the bottom right of the dialog.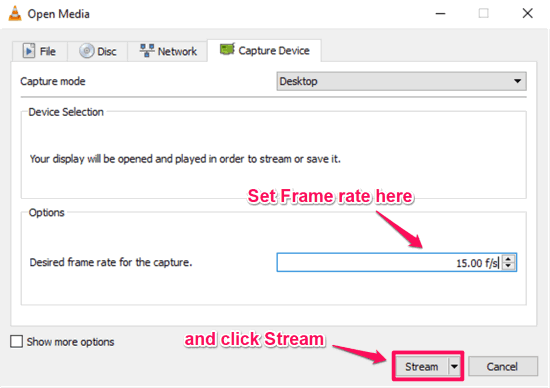
After that, a Stream Output Source dialog will pop up, click Next.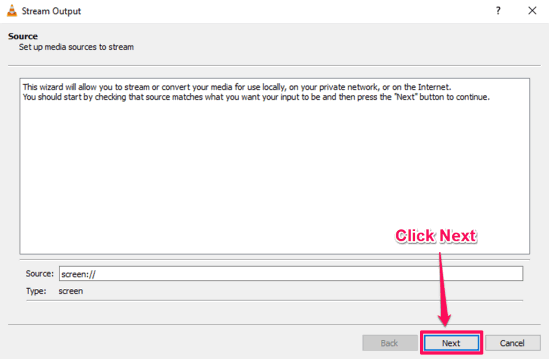
Now, it will ask you to set the destination to the stream. Under New Destination drop down, Select UDP (legacy) and check Display Locally.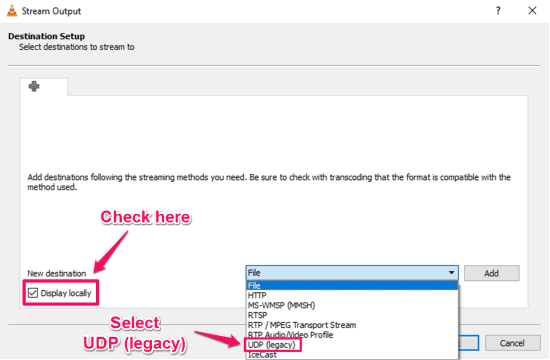
After setting New Destination as UDP (legacy), click on Add.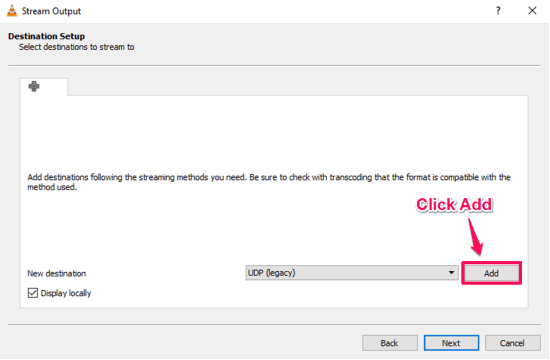
In the next dialog, set the IP address and port for the stream under UDP section, and click Next. You can set any IP that you want, but it would be better to set IP of your own PC (add local IP of your PC, and not the global IP. You can find local IP by typing “ipconfig” on the command prompt. The IP will show next to “IPv4 Address”).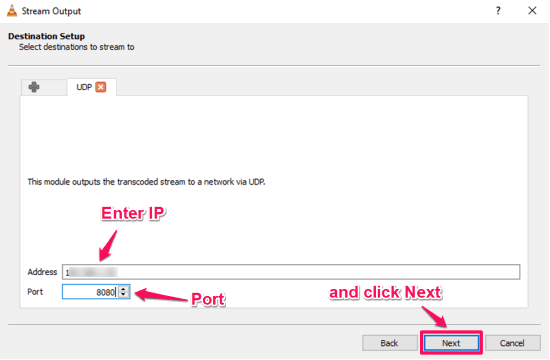
A Transcoding Options dialog will pop up. Check Active Transcoding and click Next.
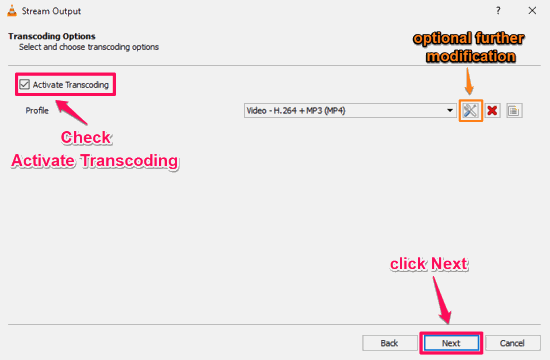
Note: You can change the Codec under Edit Profile option next to codec name.
Under the next Additional Options dialog, click on Stream.

VLC will start streaming your desktop on that IP address.
Now, it’s time to set streaming settings on the Destination PC.
How to Configure Destination PC for receiving screen sharing using VLC:
Open VLC media player on the computer you want to watch the shared screen on. Click on Media dialog on the top left corner. Under Media dialog box, click Open Network Stream option.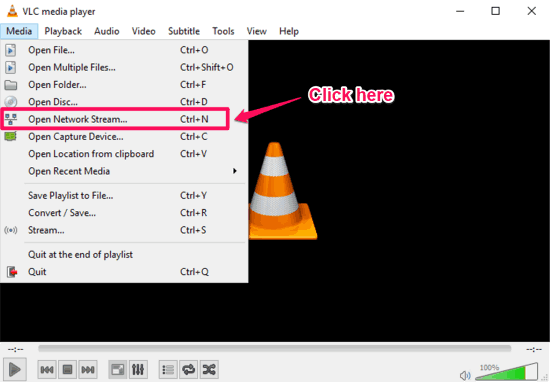
In the next dialog box, enter the IP address and Port (set earlier on Source PC) under the Network Protocol section. And click play.
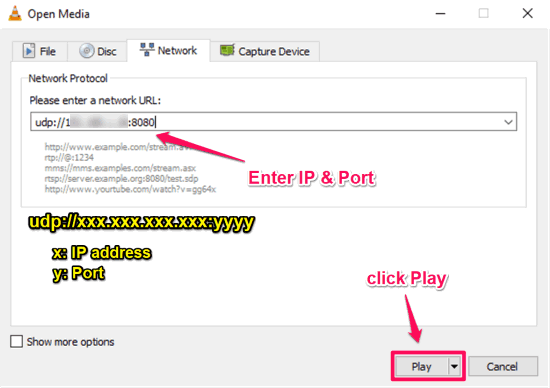
Tada! Now the Destination PC will stream the Desktop of the Source PC.
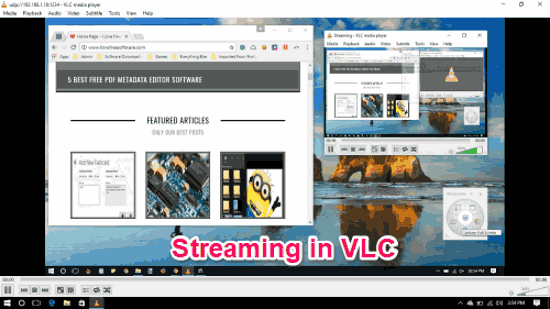
You can do the same setting on multiple PCs to see the screen being streamed from the source PC.
Drawbacks of Streaming PC Screen Using VLC:
Even though VLC makes it extremely simple to share screen of PC on local network, but it comes with its own set of drawbacks. The biggest drawback is that you do not have any control over who can see your screen. Anyone in the local network who knows which IP address you are streaming on can watch your screen. And the person who is sharing the screen won’t even know who all or even how many people are watching his screen. All that can be done is end the entire screen sharing session.
Closing Words:
As I mentioned above, VLC makes it extremely simple to share PC screen on local network. There are some drawbacks associated with it, but the fact that the screen sharing is being done in local network means you might not have to be very concerned about that.