ScreenRec is a free forever, downloadable Screen Recording application that allows you to record your Desktop in just one click and share it instantly. In addition to the plain desktop, you can also record your Webcam, your Voice or Computer audio easily and quickly. All the videos are auto-saved to a cloud account and can be downloaded in the popular MP4 format when required.
ScreenRec is available for Windows (7 and above), Linux and macOS and leaves absolutely no watermark while recording. There is no lag while recording the audio / video as ScreenRec provides a comfortable frame rate ranging from 15 to 120 FPS.
Features:
Record Desktop + Webcam: You can capture your plain Desktop as well as add a webcam overlay to record your face as well.
Audio Recording: ScreenRec allows you to capture you computer sound and / or your narration using a microphone.
Share Recordings instantly: All the recorded videos are automatically saved to your private cloud account and a sharing link is offered as soon as you stop recording. You can send this link to anyone with whom you wish to share the content. Additionally, you can also download the recorded videos to your local computer in MP4 format.
Offline Capture: In case you are offline, the captured video is saved as a local file and is uploaded to the cloud as soon as your internet connection is restored.
How it Works:
1. Download and install ScreenRec using the link that we have provided at the end of this article. Launch the application and you will observe a small vertical toolbar visible on your desktop. Sign in to Streaming Video Provider using your Facebook, Google, or Twitter account when you are prompted for it.
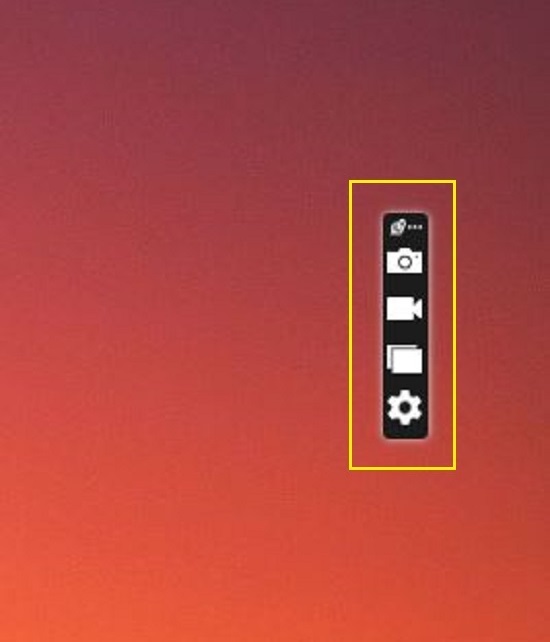
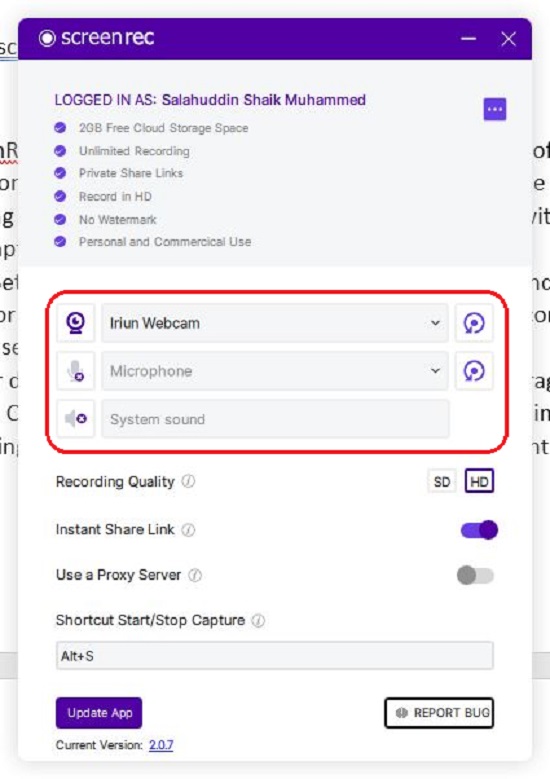
2. At the outset, click on the ‘Settings’ icon in the toolbar to choose the Webcam and Microphone and to enable or disable system sounds. Additionally, you can also configure the recording quality (SD / HD), set a shortcut key to start / stop capture and more.
3. To take a screenshot of your desktop, click on the ‘Camera’ icon, and click and drag the required area of the screen. Once the screenshot is taken, you can annotate the image by clicking on any part and typing the text in the callout box. To change the font, font size / style, color, border color, opacity etc, simply hover your cursor over the 3 dots above the callout. To change the size of the callout, use any of the required handles at its corners. You can also move the callout box wherever you require by drag and drop.
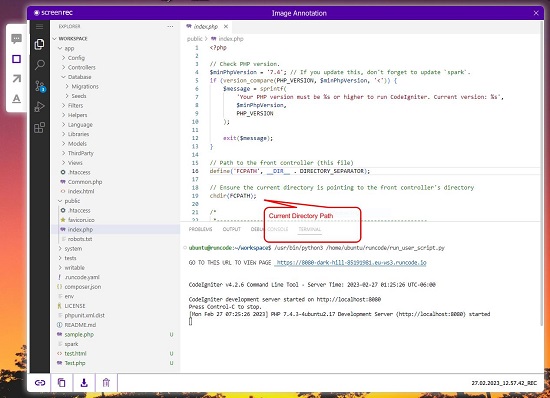

4. Once you have finished annotating the screenshot, you can click on the icons at the bottom of the screenshot window to copy the shareable link to the clipboard, copy the image to the clipboard or save the image to your local computer in the PNG format.
5. To record your screen, click on the ‘Video camera’ icon in the mini-toolbar. Next, click and drag the area of the screen that you wish to record, and the recording will commence immediately. You can click on the ‘Microphone’ icon in the toolbar at the bottom left of the recording window to control its input volume. To enable / disable the system audio, click on the ‘Volume’ icon in the toolbar. Likewise, to toggle on / off the webcam overlay, click on the ‘Webcam’ icon in the toolbar. You can move the webcam overlay wherever you desire by dragging it to the specified area.
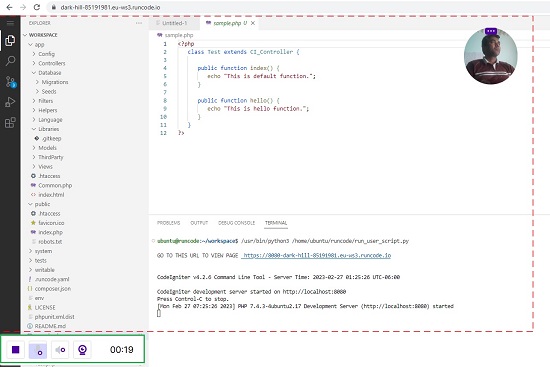
6. Once you have finished the screen recording, click on the ‘Stop’ icon at the bottom left and the recording will be automatically saved to your private cloud.
7. To view all your screenshots and screen recordings, click on the ‘Gallery’ icon (third from top) in the mini-toolbar. You can click on ‘Images’ or ‘Videos’ link at the top of the Gallery window, to view them accordingly. Additionally, you can also search them by name or sort them by date / name or size to easily locate them in the Gallery.
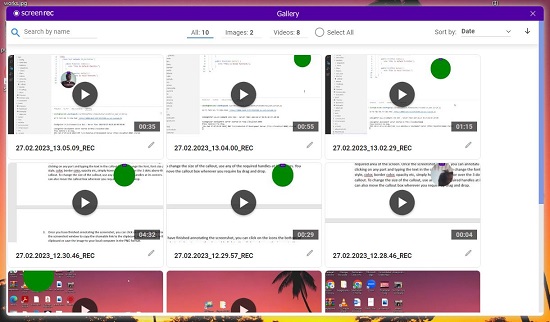
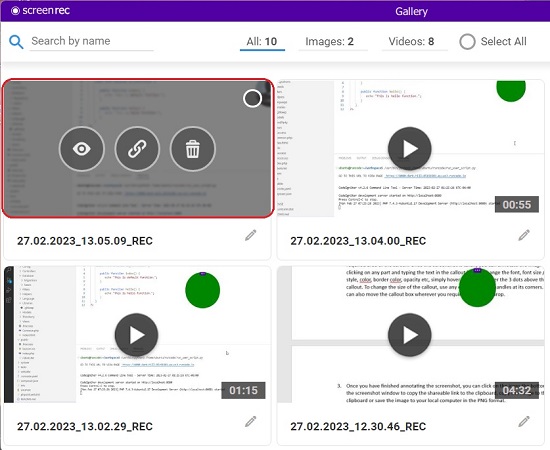
8. To preview any of your saved content in the Gallery or to download them to your local computer, simply hover your mouse cursor over its thumbnail and click on the corresponding icon.
Closing Comments:
ScreenRec is a very good screen grab as well as screen recording application that you can use to take a screenshot or record your desktop with a webcam overlay if required. ScreenRec is a free forever application and saves all your content in the private cloud from where you can share it with others or download it to your local computer. It is an extremely handy tool for people engaged in Customer support, E-Learning, Software design / development, Employee onboarding and a variety of other fields.
Click here to navigate to ScreenRec and download the application.