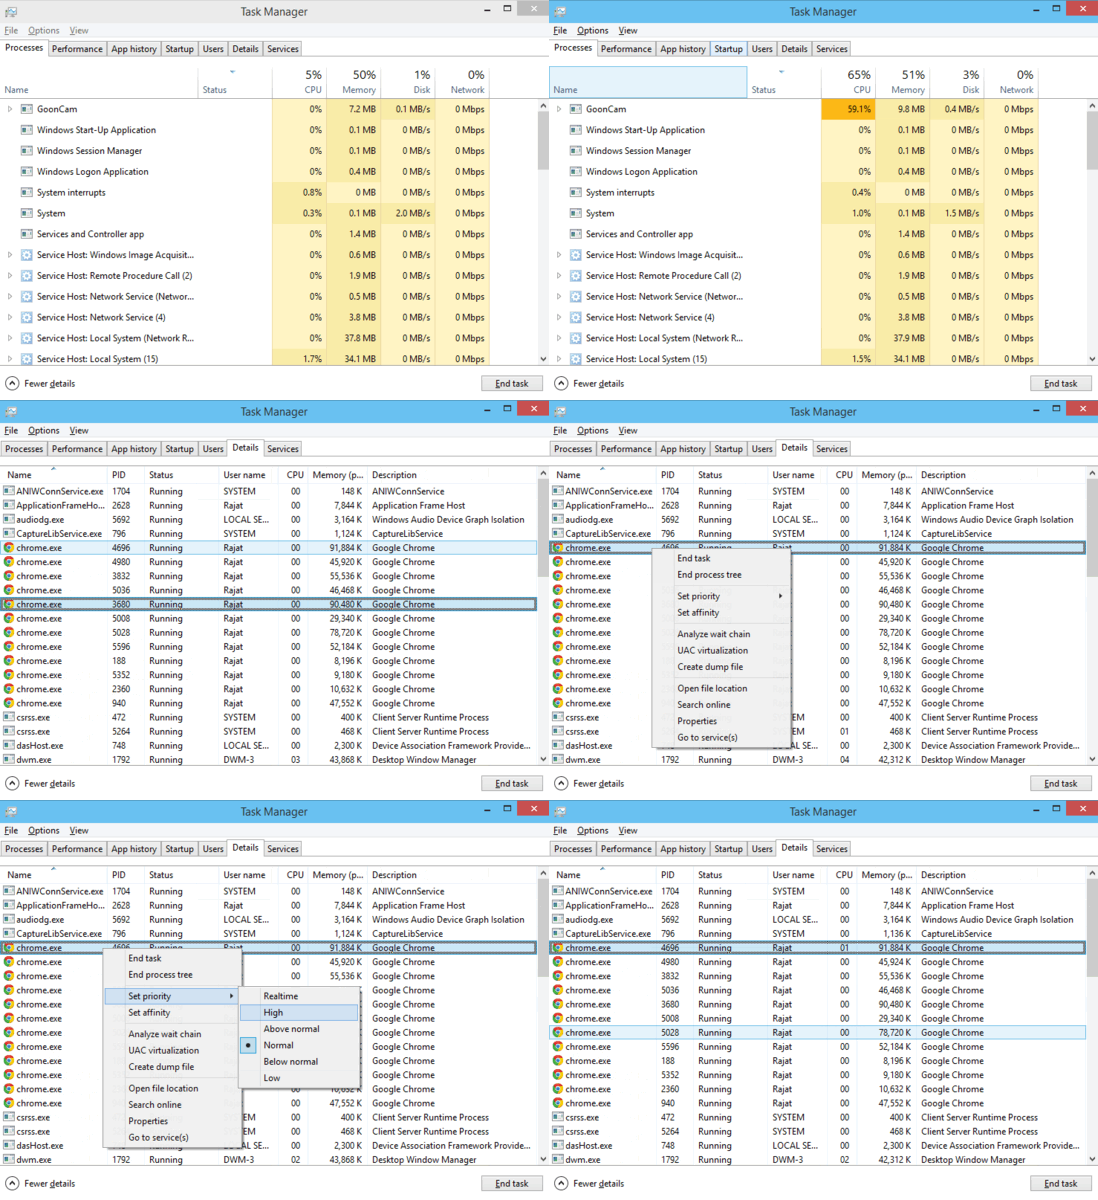
This tutorial details how to change the priority of a process in Windows 10. The Operating System is in charge of allocating the processor (and other resources) to the running programs. And being an ultra modern OS, Windows 10 handles that perfectly. For resource allocation, the OS assigns different priorities to the processes, ranging from Low to Realtime. A lower priority means lesser processor time and conversely, a higher priority means more processor time. But what if you want a specific process (e.g. a project you’re developing) to run at a higher priority than others?
You’re in luck, as Windows 10 easily lets you change the priority of a process. Sounds fun? Head past the break to see how you can change the priority of a process in Windows 10.

How To Change The Priority Of A Process In Windows 10?
Advisory: Even though changing the priority of a process is a fairly simple thing, it can cause the programs to behave erratically in some cases. For this reason, you should refrain from trying to change the priority of system processes. Furthermore, the highest priority class (Realtime) should almost never be assigned to a program, except in rare cases.
Changing the priority of a process in Windows 10 is extremely easy, especially if you know your way around the task manager. Here’s a detailed walkthrough, illustrating how it’s done:
Step 1: Launch the Windows Task Manager by right clicking on the taskbar, and selecting Task Manager from the appearing context menu (Alternatively, you can use the Ctrl+Shift+Esc hotkey combination as well).

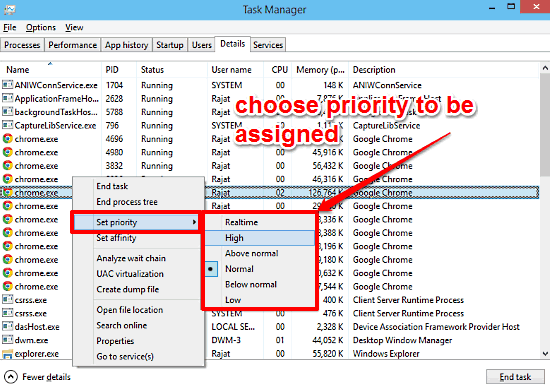
Step 2: The Windows Task Manager features a multi-tab interface. Click on the Details tab, and you’ll see a multi columnar listing of the currently active processes, along with some other important information about them. Right click on the process whose priority you want to change, and click the Set priority option. From the priorities displayed, choose the one that you want to assign to the process. That’s all there’s to it. Here’s a screenshot:

You Might Also Like: Specify The Processor Cores On Which A Program Can Run In Windows 10
Conclusion
The ability to change the priority of a process is a pretty useful feature of Windows 10. When used carefully, it can come in really handy in making certain applications perform much better on an on-demand basis. Give it a shot and let me know your thoughts in the comments section.