MiniWE is a free application launcher that also lets you browse folders. It’s a surprisingly functional software application that combines the functionalities of application launchers and file browsers into one. Using MiniWE, you can not only just instantly launch applications (as is the case with most app launchers), but also browse specific folders just as easily, without even having to navigate away from it. MiniWE is super easy to use, and conveniently sits in the middle of the bottom edge of the desktop. You can add shortcuts to it via simple drag-and-drop operations. Apart from that, you can also configure MiniWE to always display the files in a specific folder. But probably the best feature of MiniWE is that it allows you to run multiple instances of itself, with each one configured to display files stored in different folders. All of these instances can also be configured to run at the system startup. Keep reading to find out more.
How To Use This Free Application Launcher That Also Lets You Browse Folders?
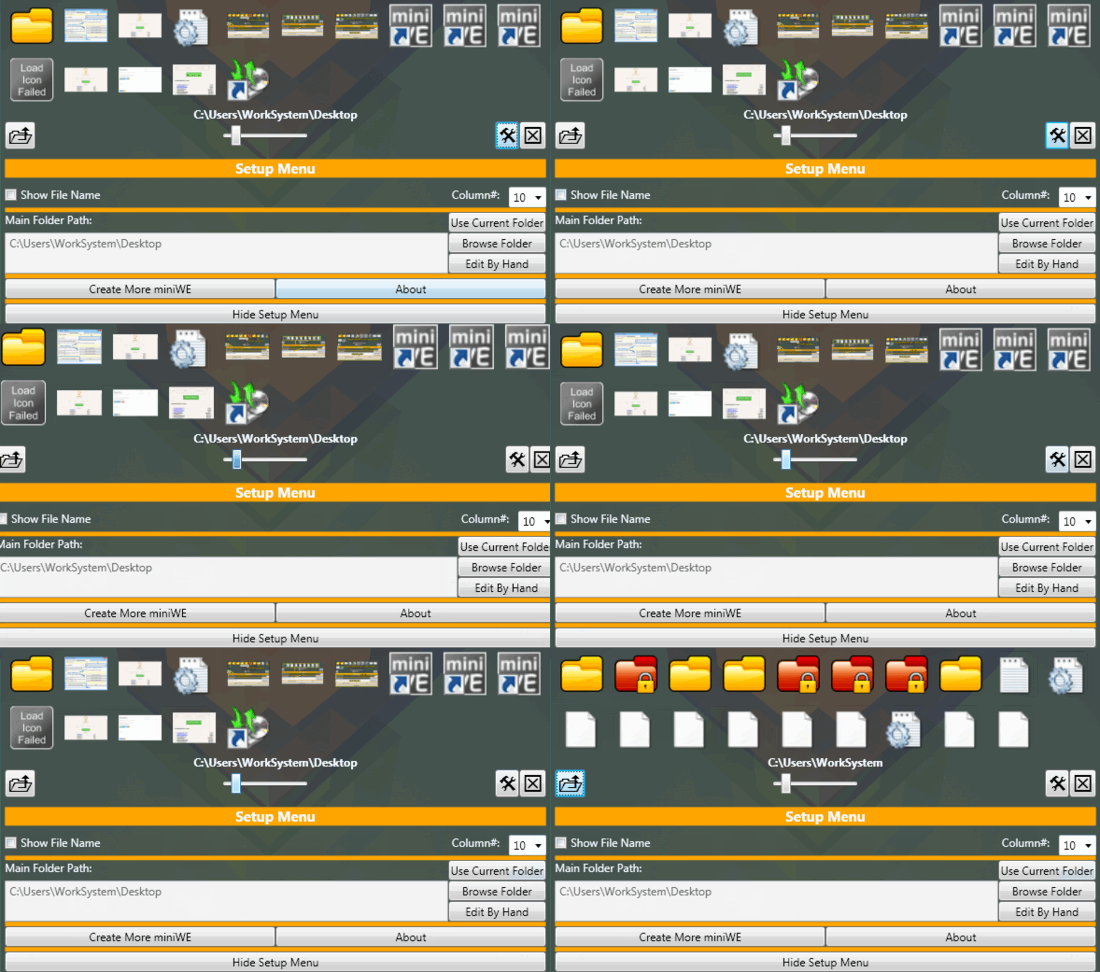
As is the case with any other software application, you have to get the standard installation procedure out of the way before getting started with MiniWE. Installation itself is fairly simple. Simply download the lightweight zipped installer, and do the needful. Here’s how MiniWE looks like, when launched for the first time after installation:
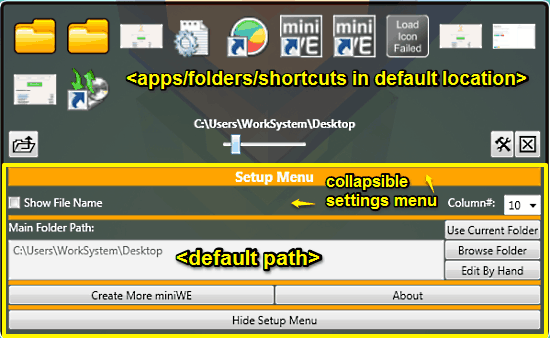
Looks cool, doesn’t it? That’s exactly how MiniWE looks when it’s running in the middle of the bottom of your desktop. As illustrated by the above screenshot, the UI is quite simple and intuitive. The top (app launcher) section contains thumbnails to the apps/folders/shortcuts in the default location (you can easily add other shortcuts by dragging them to this window). The thumbnails can be dynamically resized using the resizing bar. Apart from that, there are also buttons to go one level up, access settings, and things like that.
On the other hand, the bottom (settings) section is collapsible (hidden/shown by clicking the settings button) and lets you change the app launcher’s settings. Here, you can browse for and specify the path of the default folder whose constituent apps/files/shortcuts are shown by the app launcher. Apart from that, you can also tweak settings to alter number of thumbnail columns, display file names with thumbnails, and things like that. If you want to create multiple instances of MiniWE (discussed later), that can be done here as well.
Anyway, when it comes to using MiniWE, things get really easy. The straightforward UI itself makes things quite simple. Here’s a detailed step by step tutorial anyway, to get you started with MiniWE:
Step 1: When launched for the first time, MiniWE is by default set to display the files or shortcuts on the system folder Desktop. However, you can easily use the Browse Folder button to change this location to any custom folder of your choice. After changing the default folder, MiniWE needs to be restarted to apply the changes. Here’s a screenshot:
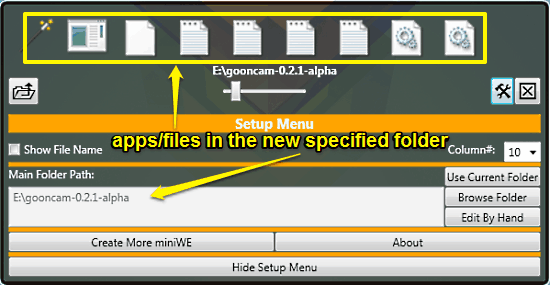
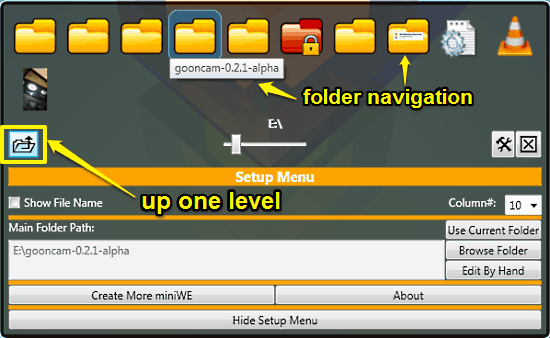
Step 2: That’s pretty much it. You can specify any folder as the default folder and MiniWE will display the files/shortcuts etc. in that folder. After that, it’s just like using any other app launcher. Clicking an app shortcut icon will fire up the application, whereas clicking a folder will display its contents in the launcher pane itself, just like a file browser. You can use the go one level up button to go back to the previous folder. As simple as that!
Creating Multiple Instances Of MiniWE With Different Target Folders
One of the most interesting features of MiniWE is that it lets you create (and of course, run) multiple instances of itself with each being configured to display the contents of different folders. This is a really handy functionality, and essentially turns the mini instances of MiniWE into a sort of “always open” browser windows. Here’s how to do it:
Step 1: Click the Create More miniWE button from the app launcher’s settings section. This should fire up the following window:
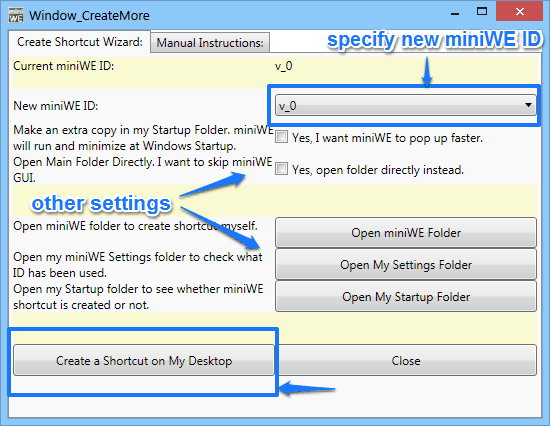
The window illustrated above lets you configure another instance of MiniWE, and create a direct desktop shortcut to the new instance. The separate instance is assigned a new MiniWE ID (in the form v_x, where x is a number used to differentiate the shortcut of one instance from that of another). By default, the first instance has the ID v_0. You can easily use the drop down menu to specify another ID for the new MiniWE instance. There are also some other settings that let you start MiniWE with system startup, directly open the target folder etc. that you can tweak. Once done, simply click the button labeled Create a Shortcut on My Desktop.
Step 2: That’s it. You can now use this desktop shortcut to directly fire up a new instance of MiniWE. And the same procedure as the one discussed in the previous section can be used to specify a different target folder for this instance. You can create multiple instances, each targeting different folders. Pretty awesome, don’t you think?
Also See: wLinker: Beautiful Free Application Launcher For Windows
Conclusion
MiniWE is a simple but versatile free application launcher that also lets you browser folders. It cleverly combines the core functionalities of an app launcher and a file browser to provide you a solid application that can perform two distinct tasks without a hitch. Add to it features like dynamically resizable application icons, drag-and-drop addition of shortcuts and most importantly, the ability to run multiple instances or the same time individual of each other, and MiniWE gets even better. Do give it a try, you’ll love it.