This tutorial covers how to force a user to change password at login in Windows 10. With this trick, a Windows 10 local user has to change the password the next time he/she logs in to Windows 10 account. Otherwise, that local user won’t be able to access that account. It is handy for security purposes and helpful for those who share their Windows 10 PC with others by creating different local accounts.
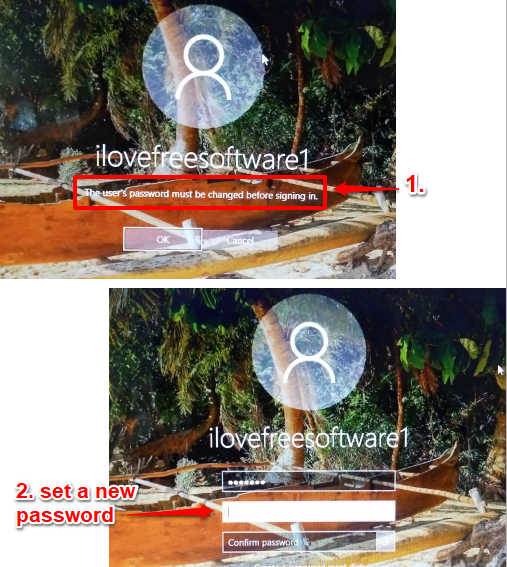
You don’t have to install some software or use Store app for this. Windows 10 has a native feature or built-in option using which you can enable password change option for any of the local accounts on your Windows 10 PC. When this option is enabled and a user tries to login or sign to his/her local account, a message is displayed that “The user’s password must be changed before signing in“. When the password is changed, then that user can sign in to access the account.

In the screenshot above, you can see that a message is displayed prompting the local user to change the password. Once the new password is set, only then the user can access that particular account.
Before you also try to do the same, do note you must be using the Administrative account to apply this trick. Also, this trick works for local accounts only and not Microsoft accounts.
How To Force A Local User To Change Password At Login In Windows 10?
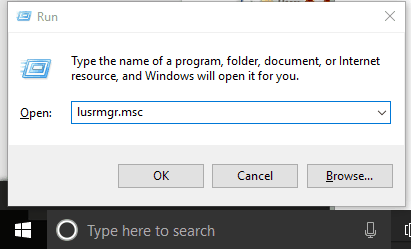
Step 1: First of all, you have to open “lusrmgr.msc” (Local Users and Groups) window. You can use Run box to open this window. Use Windows Key+R hotkey to open Run box. Type ‘lusrmgr.msc‘ in Run box and click OK.

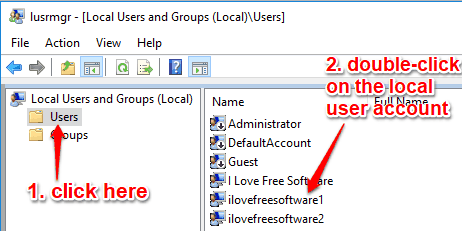
Step 2: In Local Users and Groups window, select ‘Users‘ folder. By doing this, you will be able to see all the local accounts that you have created on your Windows 10 PC. Double-click on the local account for which you want to set force password change.

Step 3: Local account’s “Properties” window will be in front of you. Here, first disable “Password never expires” option. This option is selected by default, so uncheck this option. After that, you can enable or select “User must change password at next logon” option.

Apply and save this change.
Now the next time that particular user tries to access his local account in Windows 10, a message to change the password will be visible. After that, the user needs to set a new password to access the account.
You can also learn How To Set Account Lockout Duration In Windows 10 and How to Hide User Accounts on Windows 10 Login Screen.
The Verdict:
Changing passwords regularly is a good practice, but many of us never or rarely change passwords. Thankfully, Windows 10 has a built-in feature that can force users to change the password. As an administrator of your Windows 10 PC, you will have control when a local user should be forced to change the password for his/her account. Try this simple trick.