This tutorial explains how to edit video using Photos app in Windows 10. You can add motion effect, use filters, custom text, 3D effects, and trim video using Photos app. This option to trim video was already available in Photos app, but rest of the options are added recently with updates in Photos app. There are more than 10 cool filters, 6 different text styles, and 10 motion effects available that will help you edit your video with ease.
You can also preview video while editing. So, you will get a good idea if the edited video is as per your expectations. If editing is not good, you can remove all the editing effects. When video looks good, you can save it in any of the three resolutions: 1280*720, 960*540, or 1920*1080. The output is saved in MP4 format only. You can’t select the output format.
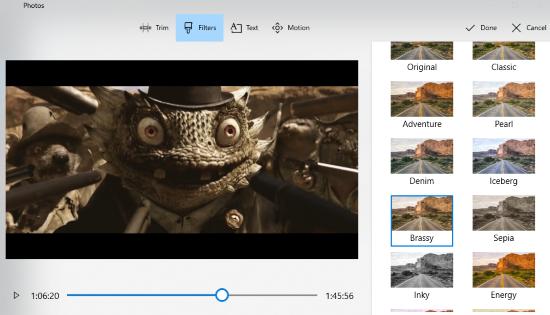
In the screenshot above, you can see video editing is in progress using Photos app. There are filters, motion effect, text, and other tools available for editing.
Note: 3D effects feature didn’t work for me while editing a video using Windows 10 Photos app. When I clicked that option, it hanged Photos app and then I had to close it forcefully. Still, you may give a try to this feature.
How To Edit A Video Using Photos App In Windows 10?
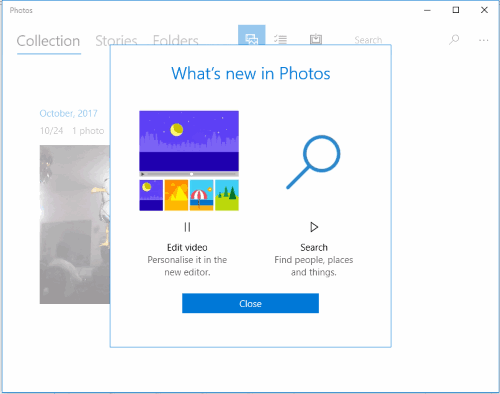
Step 1: Open Photos app and you will see a message that you can now edit videos in Photos app. This comes with new updates in Photos app. The update is delivered automatically. If you didn’t get this, you may manually check for its update and then you will get this feature.
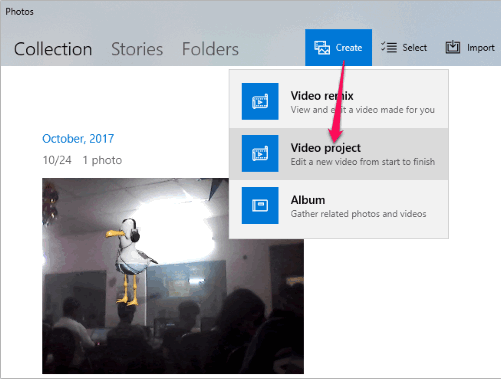
Step 2: On its main interface, you will see “Create” option. Select that option and then tap on the “Video project” option.
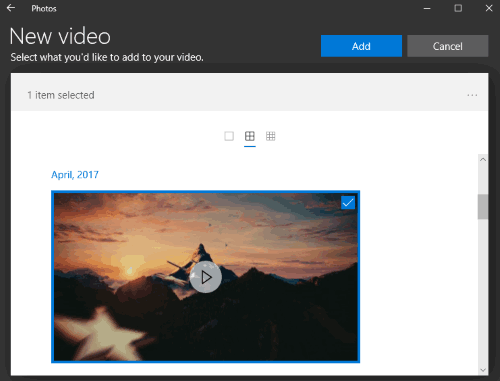
Step 3: Now you can select a video available in the Collection list of Photos app. If there is no video, you can first add a folder containing your videos and then select a particular video. When the video is selected, press Add button.
Step 4: Video editor interface will be in front of you. It is divided into three sections. The top left section shows the added video. You need to drag n drop that video to the bottom part so that you can edit that video. And the top right part shows the preview of the video.
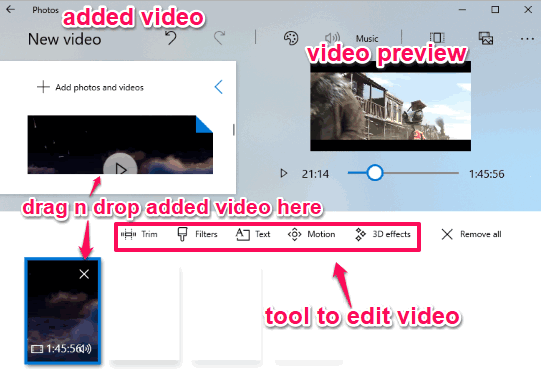
If you want, you can add more videos and photos for editing. But when you want to edit a single video, then you don’t need to do anything.
Step 5: Now the video is added, use the tools available for editing. You can use:
- Trim tool to select start and end points in a video, cut that part and then save it as separate video.
- Filters tool to add any of the available filters like Classic, Iceberg, Denim, Pearl, Inky, Joy, Loved, Energy, etc.
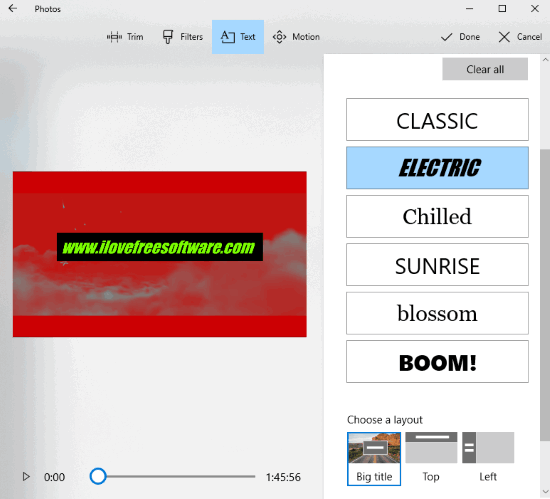
- Text tool to add a custom text in the starting of the video. You can’t select the duration to show text in the video. It is added only in the starting. There are different text styles like Classic, Chilled, Sunrise, Blossom, Boom, and Electric also available. Enter custom text, select a style and you can preview it in the video. Apart from that, text tool comes with different layouts that you can choose. Available layouts are: top, left, bottom, right, small title, and big title.
- Motion tool to use different camera motion styles. Available styles are: zoom in center, zoom out center, pan left, tilt top, pan right, zoom out left, etc.
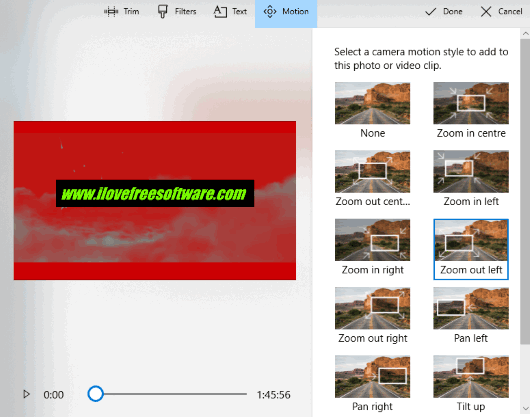
Use these tools and preview video side by side. When you have edited the video, you can press Done button to apply the changes and come back to the main editing interface.
Step 6: Now everything is done, it’s time to save the video. Use “Export or share” option present at the top right side of Photos app and then you will have three options to save the video: Quickest upload (960*540), best (1280*720), and Longest upload (1920*1080).
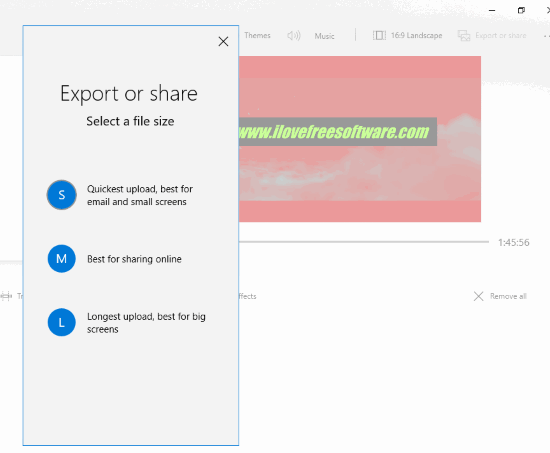
Select an option and it will prepare your video. Depending on the total size of video and selected resolution, the video processing will take time. After that, your edited video is saved to PC as MP4 format.
You may also check other Photos app related tutorials covered by us: make animation in photos using Photos app and enhance images using Photos app of Windows 10.
The Conclusion:
This is a very good feature added in Photos app of Windows 10. If you want to give some professional touch to your videos, this feature to edit videos using Photos app is handy. Though there are many feature-rich video editor software also available, editing videos using Windows 10 Photos app is interesting. It was a good experience for me and you can also give it a try.