Write protection is a very handy tool when it comes to protecting valuable data which you don’t want anyone to mistakenly delete off your device. In today’s tutorial, I will explain how to enable or disable write protection in Windows 10. We will be accomplishing this using the Windows Command Shell.
What is Write Protection?
“Write protection is any mechanism that prevents modification or erasure of valuable data on a device.” – (Source: Wikipedia.)
To put it in simple words, by Write protecting the content, we are basically ensuring that the contents on the disk can’t be erased, even when someone attempts to do so.
How to Write Protect in Windows 10:
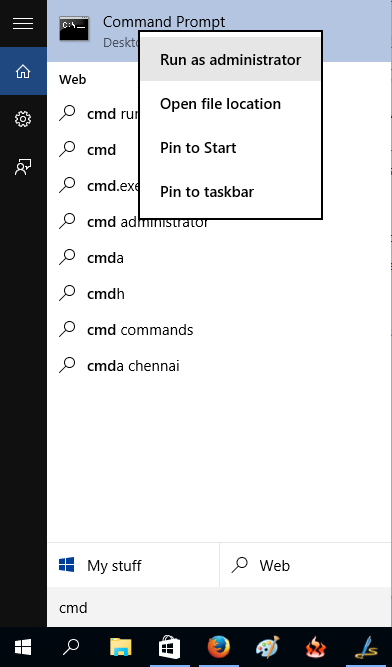
Step 1: Fire up the command prompt with elevated privileges, i.e., open it up by right clicking it, and selecting Run As Administrator.

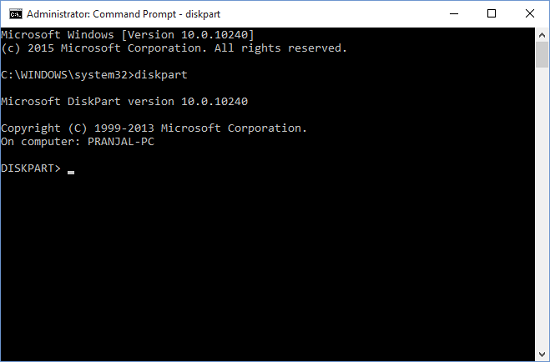
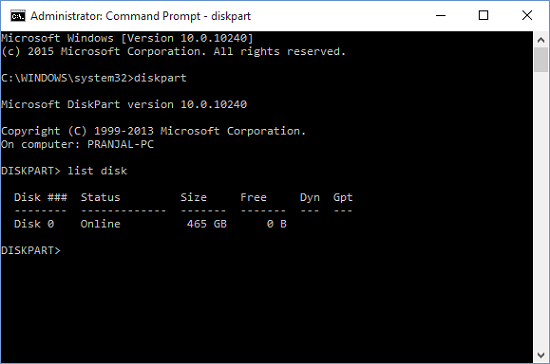
Step 2: In the command prompt window that opens up, type diskpart and press Enter. Step 3: Enter list disk in the command prompt window. Press Enter.
Step 5: Enter select disk followed by the disk number. In my case, I will enter select disk 0 . Similarly if you want to enable it for disk 2, 3, or so on, enter select disk # where # is the disk number. Step 6: Now, type attributes disk set readonly and press enter.
 Step 7: Your disk will now be write protected – i.e., accessible in readonly mode! Congrats!! If you now wish to disable write protection in future, follow all the above steps upto Step 5, and in place of step 6, type attributes disk clear readonly and press enter.
This wraps up the tutorial to toggle write protection on your Windows 10 device.
NOTE: You cannot enable Write Protection on the partition on which Windows is installed.