This tutorial explains how to save Bandwidth while browsing in Google Chrome. Computing technology has advanced by leaps and bounds over the past few years. The PCs that we use today are highly powerful machines on their own. Combine that with Internet connectivity, and the capabilities of our PCs increase manifold. Speaking of Internet connectivity, the speeds for the same have grown tremendously, and we use a whole bunch of data than we used to, only a few years back. But this massive consumption of data can cause a lot of problems for those with limited (or capped) Internet plans, right?
Not to worry pals, as you can easily save quite a chunk of those precious GBs, thanks to a nifty Chrome extension called Data Saver. Jumping with excitement already? Let’s find out how you can save Bandwidth while browsing in Google Chrome.

How To Reduce Data Consumption While Browsing In Google Chrome?
Data Saver is a pretty useful little Chrome extension that comes straight from Google, the maker of the browser itself. Ridiculously easy to use and surprisingly efficient, Data Saver helps you reduce your data usage by optimizing the websites that you access. Essentially, it works by compressing the webpages the user visits using Google’s servers, before downloading them. However, it doesn’t work on HTTPS webpages, as well as the websites accessed in Incognito more. Data Saver is largely automated and requires absolutely no configuration on the user’s part. And it works great. Here’s a step by step tutorial, illustrating the same:
Step 1: Head over to the Chrome Web Store, search for Data Saver (or click here), and hit the Add to Chrome button to install the extension (You need to be using the latest version of Chrome, in order to be able to do so). Once installed, the extension’s icon should show up alongside Chrome’s settings button.
![]()
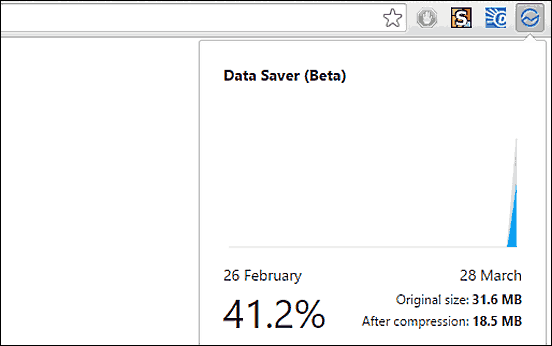
Step 2: And that’s pretty much all you need to do. Once installed, Data Saver would be automatically turned on, and start doing its thing in the background. You can click on the Data Saver icon, and a little pop-up pane will inform you of the data savings, displaying information such as original data, data actually consumed after compression, as well as a graphical representation of the same. Here’s a screenshot:

In addition to Data Saver, you can also reduce data usage and improve browsing speeds by using Data Compression Proxy, another Chrome extension that works on the proprietary SPDY protocol. Read more about it here.
Conclusion
Even though Internet connectivity speeds (and prices) have improved massively over the years, there are still a lot of users that have capped Internet plans. And for those, extensions like Data Saver can come in really handy for keeping the data usage in check. Take it for a spin, I’m sure you’ll love it.