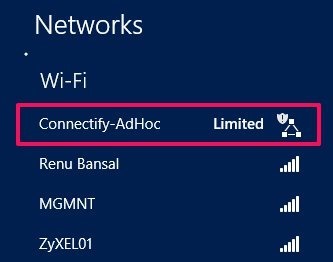
There have been lot of changes that have been introduced in Windows 8 like the new start screen. With the addition of many cool features in Windows 8, there are some basic features that are missing from this new version of Windows that includes the ability to create ad hoc network in Windows 8. The option to create ad hoc network has simply been removed from the new version of Windows which is quite disappointing to the geeks and gamers. 
Earlier in just a few steps we could create an ad hoc network in Windows 7; now there are some guys who have come up with a command line method to implement an ad hoc network in Windows 8 but this would be too complex for the average user.
So, I am going to create ad hoc network in Windows 8 using the simple software called Connectify. This free application will allow us to create an ad hoc network in Windows 8 with much ease and least efforts amongst other things, so follow this simple and short tutorial and create ad hoc network in Windows 8. If you would like to read more and know what other things can this free application do, then click on this link.
Steps to create ad hoc network in Windows 8:
- First thing that we want to do is download the application that I briefly described above. To download Connectify just click on this link which will re-direct to the webpage from where you can grab a free copy of this software.
- Now that you have downloaded the application, just click on it’s setup to initiate the installation process of Connectify in Windows 8. Once you have installed the application you will have to restart your computer to run the program.
- Now that you have restarted the computer, just search for its icon in the system tray as shown in the following screenshot. If you are not able to see the icon in the system tray, just find the application in the start screen and click on it to run it.

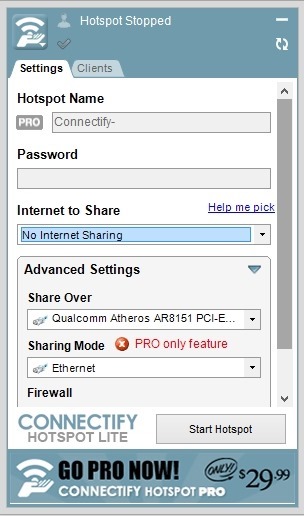
- Once you have the Connectify icon in the system tray just click on it to reveal the interface as shown in the screenshot below.

- Now just change the fields to the values as mentioned below.
- Hotspot Name = Whatever you desire
- Password = Whatever you desire
- Internet to share = No Internet Sharing
- Share Over = Wi-Fi
- Sharing Mode = Wi-Fi Ad-Hoc, Encrypted (WEP)
- After you have set up the fields as shown above just click on the Start hotspot button to start the ad hoc network in Windows 8.
In this manner you can deploy an ad hoc network in Windows 8 with relative ease and comfort.
Here are some other interesting tutorials on Windows 8:
Customize Application Switcher in Windows 8 with Alt Tab Tuner