This tutorial explains how to automatically upload Gmail attachments to Dropbox. The methods explained in this tutorial will let you automatically upload new Gmail attachments to a Dropbox folder. As there is no direct option to accomplish this task, a solution to this problem is to create an automated workflow either using Zapier or IFTTT that will automatically upload Gmail attachments to Dropbox. They also let you select which Gmail label you want to monitor for an incoming email attachment and then automatically upload it to Dropbox. This means you can choose to upload attachments from only specific senders, or emails with specific subject, or other criteria.
In this tutorial, I will explain how you can auto upload Gmail attachments to Dropbox by using both, Zapier and IFTTT. You can also use these services to get Gmail emails on Slack and Zapier to update Facebook status from Slack.
So let’s see how you can automatically save all of your Gmail attachments to Dropbox using both of these services, one by one.
How to automatically upload Gmail attachments to Dropbox using Zapier:
The first method to automatically save new Gmail attachments to Dropbox is by using Zapier. With this, we will connect Gmail and Dropbox to create an automated workflow that will check for every new email with an attachment and automatically upload it to your Dropbox account. To create this automated workflow, you need to first create a free account on Zapier from here. After creating a free account on it, you can use it to connect Gmail and Dropbox to auto upload Gmail attachments to Dropbox.
Let’s see the steps involved in a greater detail:
Step 1: Login to Zapier from here and click on Make a ZAP! button on top, which will then open up the interface to create an automated workflow. Now, select Gmail as a trigger app as it will trigger an action every time it will receive an email with attachments.

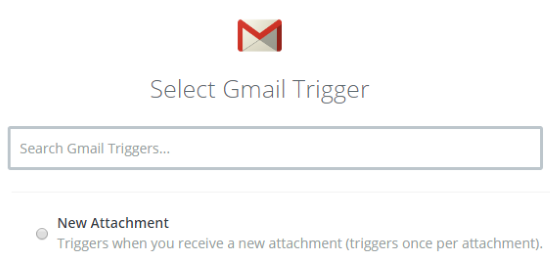
Step 2: Now select a trigger action for Gmail. In our case, its “New Attachment” and then click on Save+Continue button. It will then take you to connect a Gmail account and authorize Zapier to access to your Gmail account. After authorizing your account, click on Save+Continue button.

Step 3: Now it will ask which Gmail labels you want Zapier to monitor for an incoming email with an attachment. By default, All labels+Inbox is selected which I think is best suited for many of you, however, you can change it to monitor particular labels like Chat, Sent, Inbox, etc. After it, click on Save+Continue button to move to the next step. Before moving on to the next step, make sure you have an attachment in your Gmail mailbox as Zapier will fetch a random attachment to test this step before moving on to the next one.
Step 4: Select Dropbox as an action app and Upload a file as an action that will be executed when trigger specified in Step 2 occurs. After you have specified the Dropbox trigger action then it will take you to connect your Dropbox account. Now, click on Save+Continue button to move to the next step.

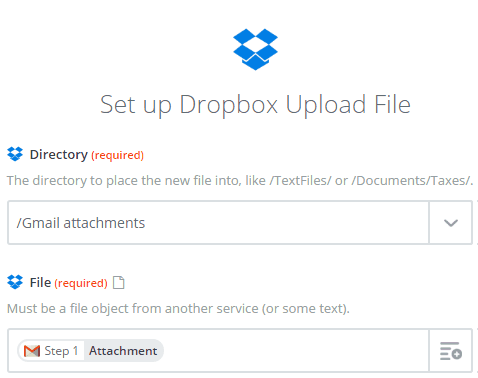
Step 5: In this step, you need to specify the folder, in which you want to automatically store Gmail attachments. You can select the Dropbox directory/folder from the drop-down list below Directory label and select Attachment in File drop-down list, and then click on Save+Continue button. It will then create an upload file from the attachment fetched from your mailbox in Step 3 and upload it to Dropbox folder specified in this step.

From now on, your every new attachment from Gmail will be automatically uploaded to your Dropbox account. The best part is that you can turn on/off this automated workflow from Zapier dashboard itself.
How to automatically upload Gmail attachments to Dropbox using IFTTT:
Another way to automatically upload Gmail attachments to Dropbox is by using IFTTT to create an automated workflow. In order to use IFTTT, you have to first create a free account on it from here. and then create a recipe to connect Gmail and Dropbox to create an automated workflow that will automatically upload Gmail attachments to Dropbox.
So let’s see the steps in creating a recipe in IFTTT to automatically store Gmail attachments to Dropbox:
Step 1: After logging in, to IFTTT, click on Create a Recipe button to get started, which will then display “if this then that”, click on “this” string which will take you to select a trigger channel.

Step 2: Select Gmail as the trigger channel and then click on Connect button to authorize IFTTT to access your Gmail mailbox. After that, select “Any new attachment in inbox” as the trigger action and click on Create Trigger button.

Step 3: Now, click on “that” string to choose an Action channel i.e. Dropbox and click on Connect button to authorize IFTTT to access your Dropbox folders. After that select “Add file from URL” as the action to be performed.

Step 4: In this step, you just have to specify the Dropbox folder where you want to automatically store Gmail attachments. Don’t alter the default values in File URL and Filename and click on Create Action button to create the action to automatically upload Gmail attachments to the Dropbox folder you specified in this step.

Step 5: Now, you just have to click on Create Recipe button and from now on your every Gmail attachment will be saved to your Dropbox account.

Verdict:
This tutorial explains how to automatically upload Gmail attachments to Dropbox account. Both methods explained in this tutorial can solve your problem to automatically store Gmail attachments to your Dropbox account. You can explore these methods more to automatically upload Gmail attachments from a specific sender or from particular label to a Dropbox folder.