This tutorial explains how to disable read and write access to all removable storage devices in Windows 10. For this, two native features of Windows 10 are covered. You can disable the read and write access to all removable storage devices at once using Registry Editor and Group Policy Editor window.
Once the protection is applied to all removable storage devices, you won’t be able to access the content of any of those devices. Whether you have connected pendrive, your phone using data cable, or some other removable device, permission is denied to view or access its content. You also won’t be able to rename the device. So pretty good protection is applied.
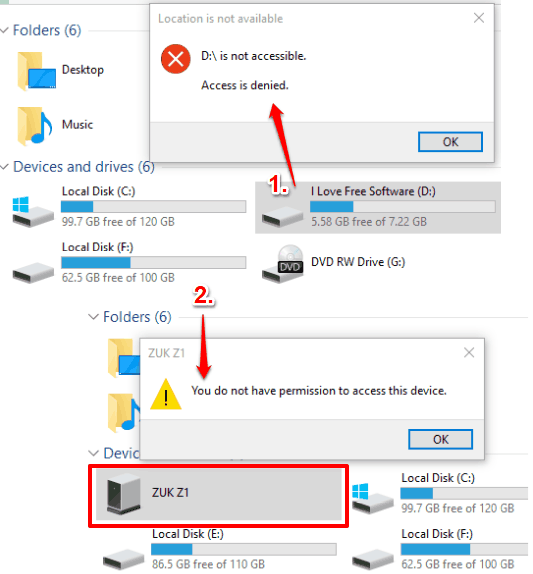
In the screenshot above, you can see errors that occur when I disabled read and write access to all removable storage devices in my Windows 10 PC and tried to access those devices.
Note: If a removable storage device is already connected to your PC/laptop, then you need to unplug and connect that device again to apply the changes for that device.
Method 1: Disable Read and Write Access to All Removable Storage devices Using Group Policy Editor In Windows 10?
Step 1: Start with Search box and type policy editor in it. This helps to start GPO (Group Policy) window.
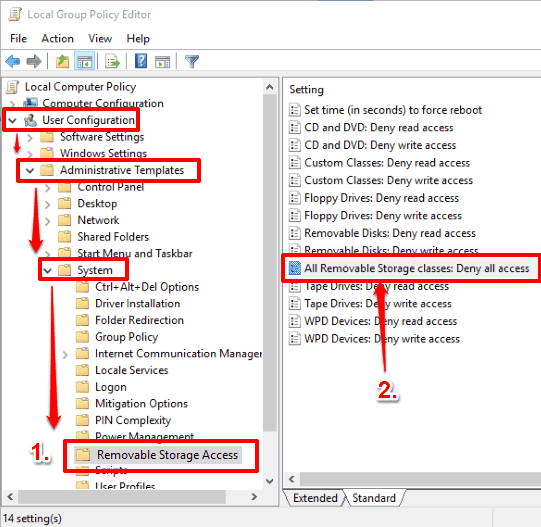
Step 2: In Local Group Policy Editor, go to “Removable Storage Access” folder. You can access this folder using this path: User Configuration menu → then folder with name ‘Administrative Templates‘ → System folder → and Removable Storage Access folder. This folder has some options that you can see in the right pane. There you will see “All Removable Storage classes: Deny all access” option. Double-click on it.
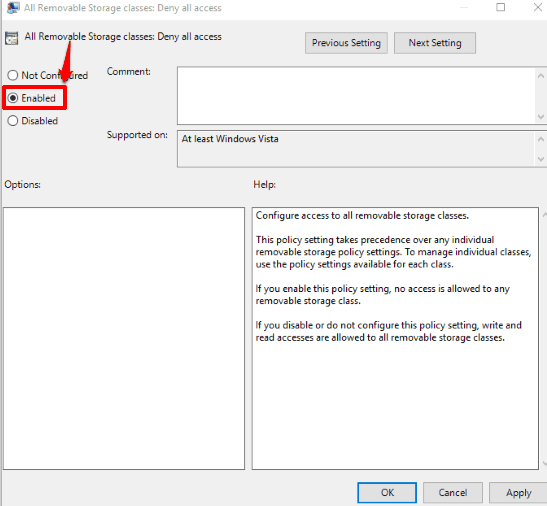
Step 3: Now a new window will be in front of you. Use Enabled option (available on the top left side) in that window, Apply this option, and tap on OK button to save this change.
You have disabled read and write access to all removable storage devices. You can connect a device and try to open it. You will receive an error.
To enable read and write access for all removable storage devices, use the same window (as mentioned in above step) and select Disabled/Not Configured option. Save it and then you can access any removable storage device on your Windows 10 PC.
Method 2: Disable Read and Write Access for All Removable Storage devices Using Registry In Windows 10?
This method is also easy.
Step 1: Use Search box to open Registry. It can be done by entering regedit in Search and using Enter key.
Step 2: Expand HKEY_LOCAL_USER main key to find “Windows” key. Here is the path: HKEY_LOCAL_USER → Software → then the Policies key → Microsoft → and finally Windows key.
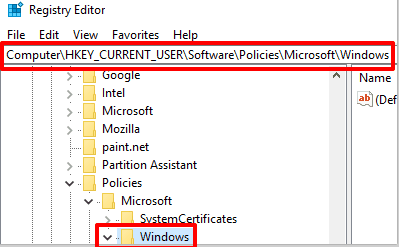
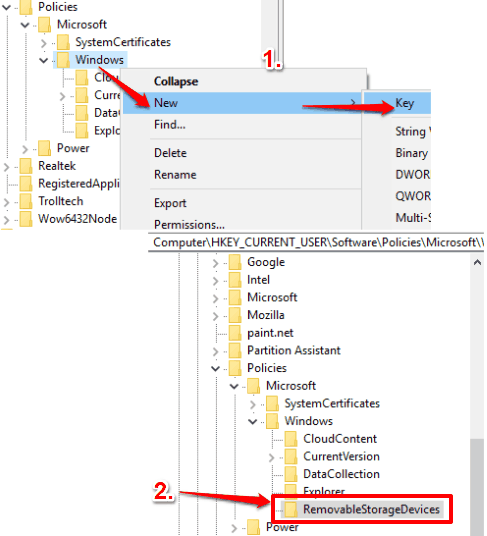
Step 3: Right-click on the Windows key, then access New option, and select Key option. New key is created. Change the name of this new key with “RemovableStorageDevices“.
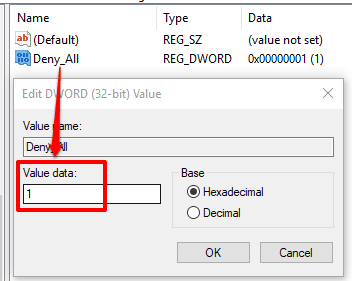
Step 4: Under RemovableStorageDevices key, create a new DWORD, and add its name “Deny_All“. This key will have ‘0’ as the value data. Double-click this DWORD and in the Value data, add “1“.
When you have done that, save it, and restart Windows 10 File Explorer. After this, changes are applied successfully and read and write access to all removable storage devices is disabled.
To re-enable read and write access for all those devices, you can add ‘0’ in Deny_All DWORD value.
The Verdict:
There are many software to make USB ports read only, but still write access is not disabled. Also, such software work for USB ports only and not the devices. So if you want to permanently/temporarily disable full access (read and write) to all removable storage devices, then you should try any of these two methods.