This tutorial explains how to send an email campaign with personalized file attachments. GMass is a Chrome extension that works with Gmail for mass mailing. It offers various amazing features and in the recent update, they have added the ability to send personalized attachments in any email campaign. And in this tutorial, I will walk you through the steps involved in doing that with ease. To use personalized attachments, you need a Google Sheet with the details of the customer/users and attachments files hosted in Google Drive or any public web server of your choice. However, you need to keep the free limit of GMass in mind that it only lets you send 50 emails a day.
In most of the email campaign managers, you don’t get the feature of separate attachments. But here in GMass, you can now do that. One simple use case of this simple tool is in sending out monthly invoices to your customers. All you need to do is just put your invoices somewhere in the drive or on storage like S3. The whole process is very simple and you can send out the email campaign in a few clicks. Here it even supports mail merge lie feels to create dynamic email content for the campaign.

How to send an email campaign with personalized file attachments?
We have covered GMass before in an article and now here I will be talking about its new feature. I am assuming you have GMass extension installed and set up. If not then you can install it from here and then just sign in using the Gmail account.
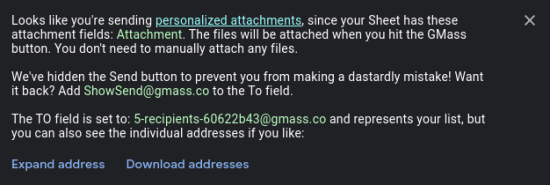
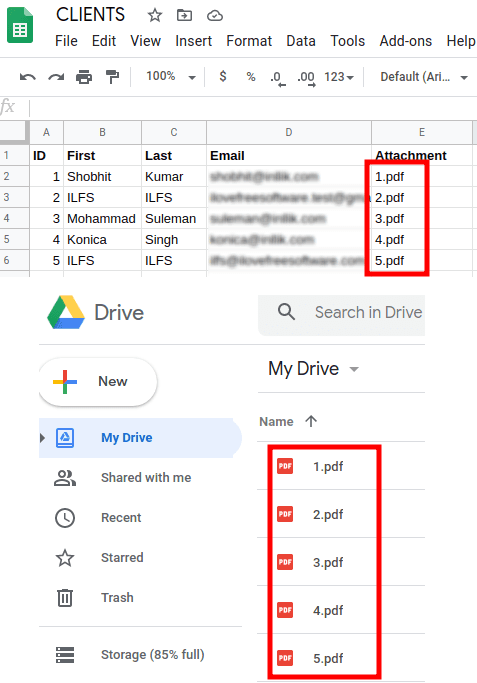
Next, you need to make a Google Sheet with your customer data including the name, email, and a column with attachment names. Do note that the attachments column must have an “Attachment” prefix in it and correct file name with extension. If you are hosting files from Google Drive then just upload files in the root of Drive and put just files names in the Sheet. And if you are hosting files somewhere else, then you will have to have included the full URL of the file in the attachment column. I am using Google Drive so see my Sheet below.

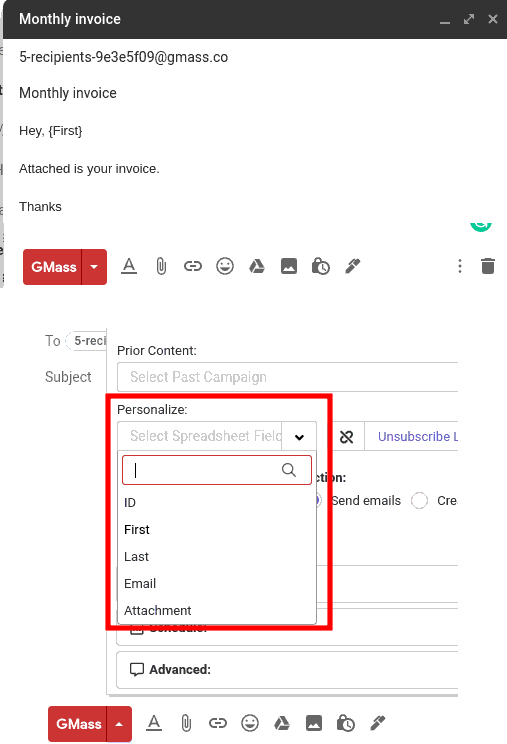
Now, the compose email window will open, and here you only need to create the email body. Write whatever email you want to write and even use the mail merge fields. Click on the GMass button and from the personalized dropdown select a sheet column. It will copy the field on the clipboard and you can paste that in the email message. See the screenshot below.

That is it. You can now just send the email and it will do the rest of the work. This is as simple as that. You can check out the sent items folder in Gmail and then simply see the personalized email with attachments. You can now use it anytime in the same way whenever you want. Just keep the limits of the free plan in mind.
Closing words:
This is one of the best free ways you can send personalized attachments in an email campaign. GMass is really a lifesaver extension you can use. You can mail merge and send an email campaign right from Gmail and it one of the best email tools I have ever used. With personalized attachments, it is more suitable for small businesses and startups. So, just go ahead and give it a try yourself.