Cal.com is a free open-source enterprise-grade calendar scheduling tool for individuals and teams that will help you focus exclusively on the meeting without bothering much about the scheduling part.
Calendar scheduling services are very vital to an individual as well as an organization’s infrastructure as they help to reduce the redundancies related to time. This will naturally improve ones efficiency because the challenges and issues like comparing schedules, duplicate bookings, rebooking appointments etc. can be eliminated to a large extent.
Cal.com can prove to be a vital scheduling infrastructure for your organization with the following set of rich features:
Connect your Calendar: Cal is compatible and connects with most of your existing calendar apps. This ensures that you are not booked twice for the same time schedule.
Set your availability: You can configure your repeating schedules for the different times of the day and week on a per-link basis along with location and duration so that people can easily book you for your services. These booking can be sent to your different calendars so that all are updated with your time schedules and availability.
Share your link: Cal.com provides you with a short, personalized link that you can share with your clients, friends and others making it very easy for them to book a meeting with you that works well for both people involved.
Workflow automation: Cal.com allows you to generate processes around your scheduled events with reminders, follow-ups and notifications automatically taken care of.
Team scheduling: Cal.com supports Round-Robin scheduling in that, calls are evenly distributed among team members. When everyone is available at a certain time schedule, the entire team can be booked too.
Precise routing of bookers: Using Routing forms and screening questions, every booker can be easily connected to the right person in the team or to an event / link.
Prevent meeting overload: You can configure a breathing space between two meetings with time buffers wherever you wish so that you are not overloaded.
How it Works:
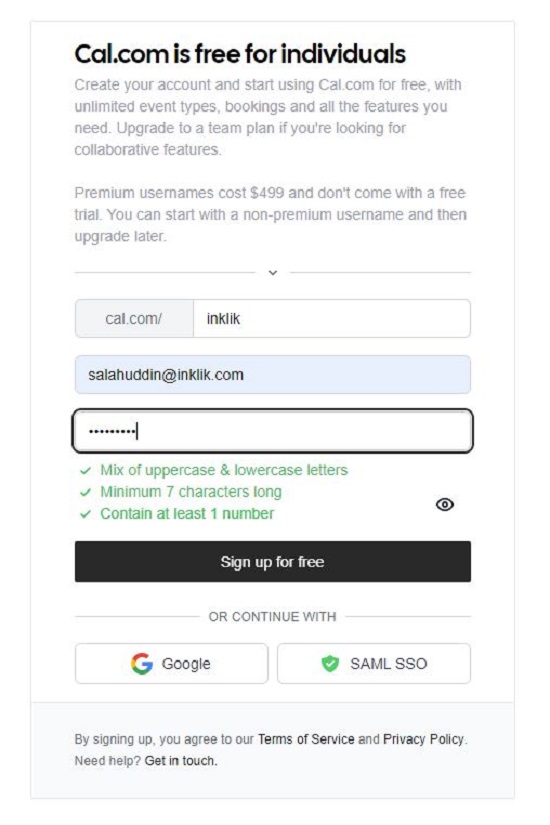
1. Click here to Navigate to Cal.com, type the name that you require after cal.com/ and click on ‘Claim Username’
2. Type your Email address and Password and sign up for a free account. Alternately, you can also sign up using your Google account.
3. Next, type your name and specify the Time Zone where you are located.
4. Connect all your Calendar services by supplying their credentials. You can also choose to connect with them later using the dashboard.
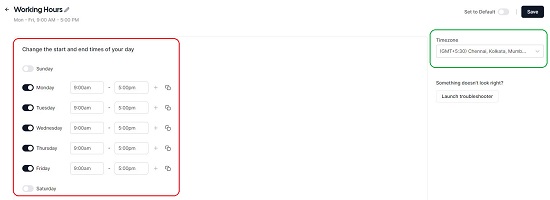
5. In the next screen, you must define the time ranges when you are available. You can specify multiple discrete time ranges in a single day by clicking on the ‘+’ icon. Additionally you can also duplicate the time range for a single day to other days to simplify your work.
6. Finally, upload a Profile Picture and write a few words about yourself and click on Finish.
7. This takes you to the Cal.com dashboard. The side bar on the left is the place from where you can Configure your Availability, Create Events for people to book, view your Bookings, Connect your Apps and more.

8. Click on Availability and configure your available time ranges if you haven’t set it up at the time of signing up. You can create multiple schedules for your availability and use it for different Events. Similarly, connect with the Calendar Apps by clicking on ‘Apps’ so that Cal.com can read your availability from all the existing calendars that you use. This is important so that you do not get booked twice for the same time slot.
9. To create Events with time slots that you can share with people to book, click on Event Types. Two events namely 15 min Meeting and 30 min Meeting are already crated by default. You can choose to use them or create a new one by clicking on the ‘New’ button at the top left. For this article we will choose to Edit / Configure the existing event.

10. Click on the 3-dots icon at the extreme right of any Event and then click on Edit. This brings up the Event Editor.
11. Click on Availability and select the Availability schedule that you want to specify for this event.
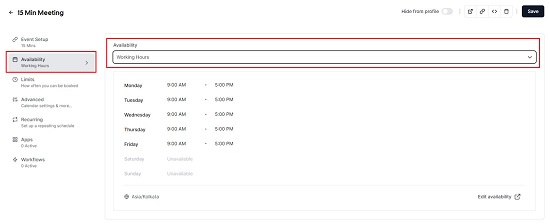
12. To specify, how far in the future people can book, configure the buffer times before and after a meeting and more click on ‘Limits’.

13. To set up a repeating schedule, click on Recurring and enable and configure the Recurring Events if any.
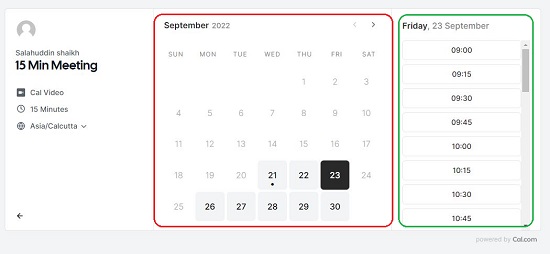
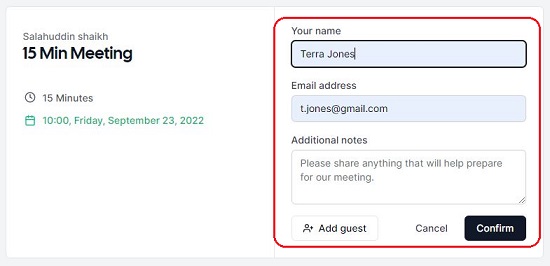
14. Click on ‘Save’ to save this Event and then click on the link icon at the top right to share the link with others to that they can book for the event that you just created. They simply must navigate to the specified link and fill up the details.
15. To create Workflows so that you can automate the notifications and reminders for the Events, click on ‘Workflows’ in the sidebar on the dashboard. Also, the create and manage Teams for collaboration, click on ‘Teams’ in the sidebar.
16. You can click on ‘Bookings’ to view all your Upcoming, Past Bookings and more.

Closing Comments:
After testing Cal.com with some events and bookings I found that it is indeed a powerful yet extremely easy scheduling tool for businesses as well as individuals. It provides everything that you will ever need in a scheduling app and boasts of very simple and easy-to-use light-weight interface screens. Since it connects with most of the calendar apps, there is hardly any chance that you can be booked twice for the same event thereby eliminating all the hassles of double booking and the problems that come with it.
Click here to navigate to Cal.com