Passpack is an online shared password manager which helps to add passwords and share stored passwords with friends. Like many similar password managers, you can use Passpack to enter login credentials for your accounts, such as: Gmail, Facebook, Twitter, etc. But the unique feature of this password manager is that you can share those login credentials with your close friends, family, or any other people (who you trust). Passpack provides AES-256 encryption security and ensure its users that their passwords remain to themselves and with shared people only.
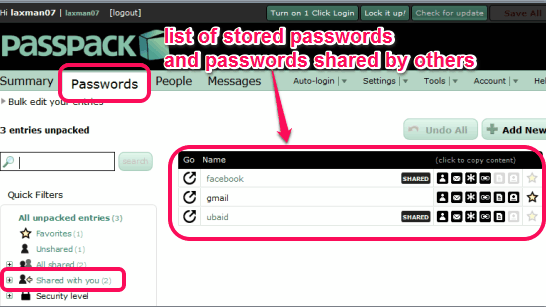
By creating a free account with Passpack, you will be able to store 100 passwords. The free account is limited to sharing passwords with only one user, and you cannot create any group for sharing the passwords. But different users can share passwords with a single user without any limit. List of all stored and shared passwords, will be available in Passwords section of your account.
There are paid plans also available to unblock all the features. Such as: store more than 100 passwords, create groups for sharing passwords, share passwords with more than one user, etc. If you find this service really beneficial, then you can think about paid subscription. Or else, you can use free plan continuously.
Check these 6 best free password managers covered by us.
How To Use This Online Shared Password Manager?
There are mainly two parts available in this online shared password manager service: Store passwords and enable sharing to share stored passwords.
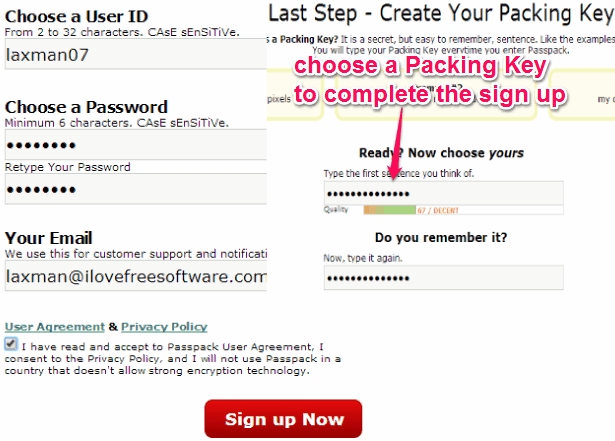
To use this shared password manager, sign up by entering a user ID, your email address, and password. In the next step, you need to enter a so-called ‘Packing Key‘, which could be anything. This packing key needs to be entered whenever you login to your Passpack account. This ensures double-protection and is quite similar to two step authentication for web services.
Once all the setup has been completed, you can store passwords, and share your password details with desired people.
Store Passwords In Your Passpack Account:
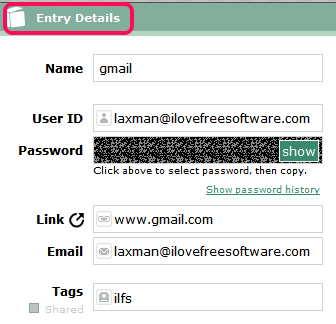
On your Passpack account, you can use Passwords section to store login details of different accounts. To store password for a particular website, use Add a new password option, and a window will open up. Using that window, you can add login details for your account. Details such as: website name, your username of that website, password, homepage link of that website, your email, etc.
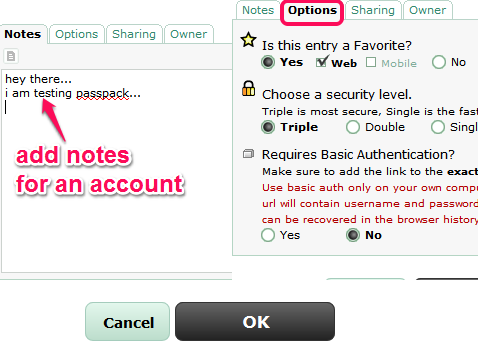
Along with entry details, you can add a note (1280 characters) for that account. Moreover, you can also mark that website account to favorite list and can select security level (single, double, and triple) as well.
Although, Sharing option is also available there, but you cannot use it until you have enabled and started sharing. So, you can simply save all the details to store password on your Passpack account. Similarly, you can add upto 100 account details.
Below you could see how you can enable sharing to share your stored passwords.
Enable Sharing and Share Stored Passwords:
These are the steps required to enable sharing and share stored passwords:
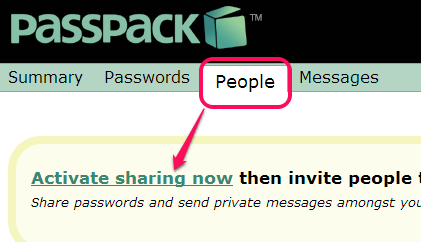
Step 1: Go to People section which is available just next to Passwords section. On this section, click on ‘Activate sharing now‘ option.
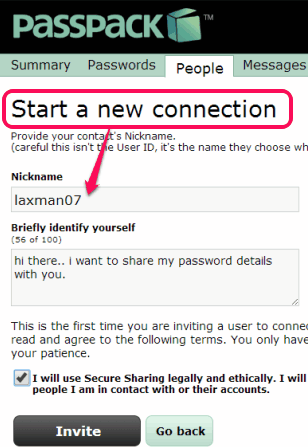
Step 2: In the next step, you need to choose your sharing nickname. This name will be used when users have to invite you for sharing their passwords and vice-versa. Not to mention that only Passpack users will be able to share passwords with each other.
Step 3: After completing first two steps, you can invite people using Invite Someone button. Enter sharing nickname of other user and add some text to let other user know about this sharing.
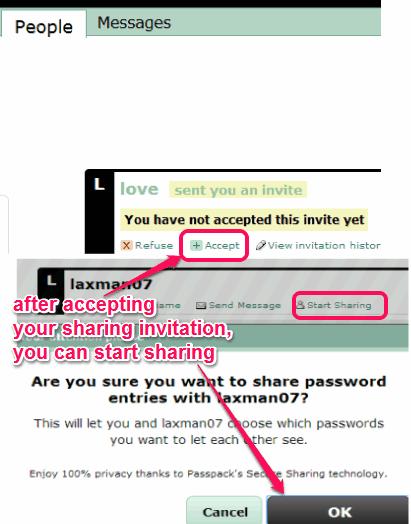
Step 4: This step requires approval of sharing invitation. Once your sharing invitation will be accepted by that person, you could start sharing using available button. The same button needs to be activated by that user, if he/she has to share his/her password details. Similarly, you can invite more people, and activate the sharing.
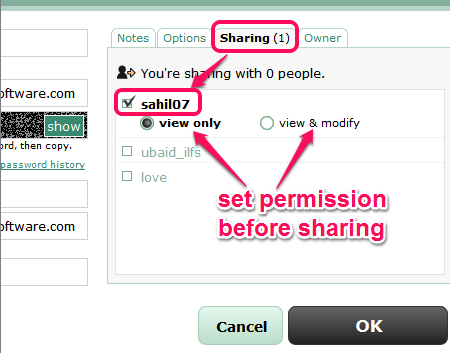
Once sharing has been activated, go to Passwords section, and access any password created by you. In entry details, access Sharing option. Now, you will find total number of users with who you have activated sharing. Here, simply select required for those users to start sharing your password details. Inspite of just sharing password details, you can also set permission: whether that person can only view password details or can modify them too.
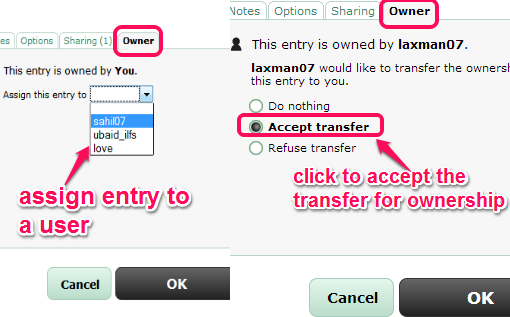
Just next to Sharing option, you can find Owner option. This option is used to give ownership of a particular password details to any other user. For this, same invitation process is required. Once the invitation will be accepted by the user, that user will become the owner of that detail.
It is completely your choice whether you need to use Sharing and Owner option for same entry or for different entries. Use these options wisely and click OK button to finish sharing process.
Conclusion:
Passpack brings a good idea and could be helpful to share passwords with family members, with fiance, or with trusted people. But one cannot deny the misuse of this service, if an unauthorized person succeeds to access your Passpack account. However, packing key increases security level, so it won’t be an easy task for intruder to access your account. Final judgement is yours, if you want to go for this service or not.
Try Passpack free.
