This tutorial explains how to set wait time before killing apps during shut down in Windows 10. By default, there is 20 seconds time to let applications save the data and 5 seconds time to wait for running services and then Windows closes the applications and Windows Services. However, you can change this time limit to speed up Windows 10 shut down. You can do this by some Registry tweaks. This tutorial covers all those steps using which you can set wait time before forcibly killing applications in Windows 10.
You will be able to set wait time between 1 to 20 seconds. However, for better results, keep the time limit between 5 to 10 seconds. It is so because some desktop applications and Windows services need time before Windows closes them. Otherwise, you might lose some data or there can be some other trouble.
How To Set Wait Time Before Forcibly Killing Apps During Shut Down In Windows 10?
You can set wait time by accessing four different registry keys:
- WaitToKillAppTimeout.
- AutoEndTasks.
- HungAppTimeout.
- WaitToKillServiceTimeout.
The first three keys are used to set wait time for running applications (say Notepad or other application). And the last key is used to set wait time to kill Windows services.
Step 1: Open Registry Editor and find WaitToKillAppTimeout String value. It will be located at: HKEY_CURRENT_USER\Control Panel\Desktop. If this value is not available, you can create it by right-clicking on Desktop → New → String Value. After that, rename the new value as ‘WaitToKillAppTimeout’.
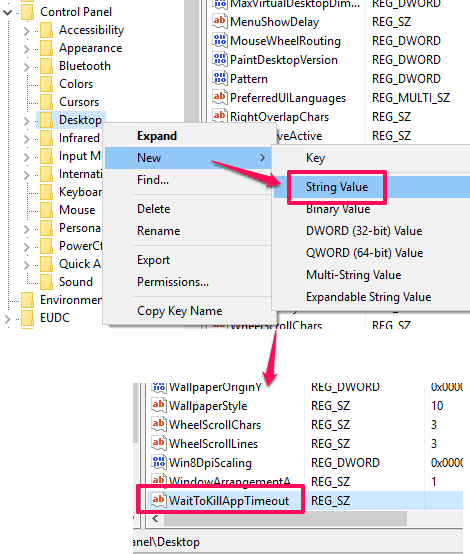
Step 2: Now double-click that String value and set time between 1000 to 20000 (where 1000 indicates 1 second).
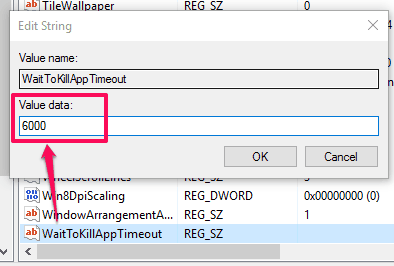
Press OK to save the changes.
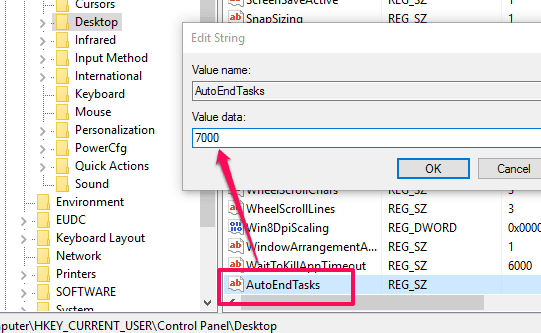
Step 3: Find AutoEndTasks String value under Desktop key and set its value data between 1000 to 20000. Again, if this value is not available you can create it and then set value data.
Step 4: Now it’s the time to find HungAppTimeout String value under Desktop key. Create this String value if it is not available. After that, set the value data of that.
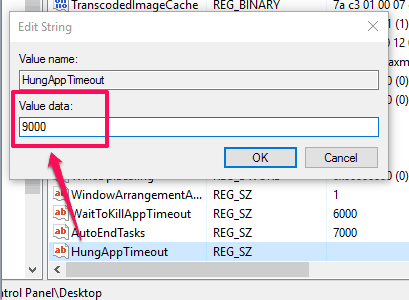
Press OK to save changes.
Step 5: All the above steps are helpful to set wait time for desktop and other applications installed on your PC. Now it’s the time to set wait time for Windows services. Access Control registry key. You can access it: HKEY_LOCAL_MACHINE\SYSTEM\CurrentControlSet\Control.
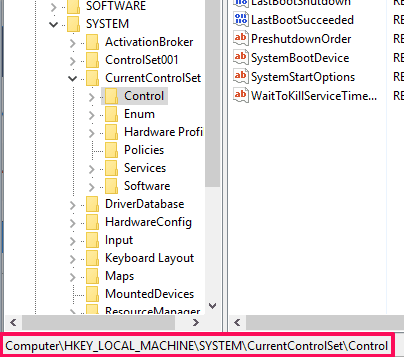
Step 6: Under Control key, you need to find WaitToKillServiceTimeout string value. You probably won’t have to create this String value because it is already available there. If not, you can create it. The default value of WaitToKillServiceTimeout is ‘5000’. You can change its Value data in between 1000 to 20000.
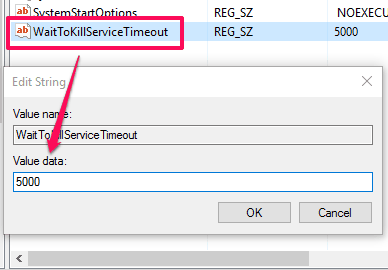
Here again, do not set the value too low because Windows services need time and setting the time lower than what Windows services actually need to close properly can cause trouble. Set the value data and save the changes.
The Verdict:
There are many auto shut down software for Windows 10 available, but no such software come with the feature to set how long Windows 10 should wait before closing the applications. If you think the default wait time for closing the applications during shut down in Windows 10 is not as per your expectations, then this tutorial will help you to set the wait time as per the needs. Just make sure you follow all the steps carefully and do not set the wait time too low.