This tutorial explains how to use Windows 10 Problem Steps Recorder tool to record steps to replicate an error. This Problem Steps recorder (also known as psr.exe) is the native feature/tool of Windows 10 (8.1 and 7 also) using which you can record PC screen and save all the steps of recording as MHTML document. Here, recording is done in a different manner. That means, instead of recording the desktop as a video, which other screen recorder software do, it captures desktop screen and saves all the captured images in a single file. Whenever you do mouse click, access context menu, open a new window etc., the desktop screen is captured by this tool.
Along with capturing the desktop screen in steps, it also adds date and time and text related to each individual capture. For example, if you have done a left click. It will capture desktop screen and write text like “user left click on the desktop or somewhere else” in that particular steps. Apart from that, you can also add a comment to the specific part of the desktop screen. The output file (MHTML) can be opened with any modern browser or other application built to open MHTML files.
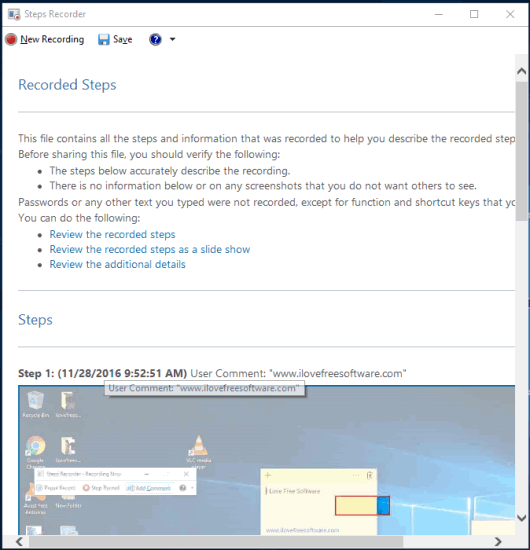
Before saving the recording, you can also preview whatever is recorded. The screenshot above shows the same preview window where steps and screenshots will visible to you.
How To Use Windows 10 Problem Steps Recorder Tool?
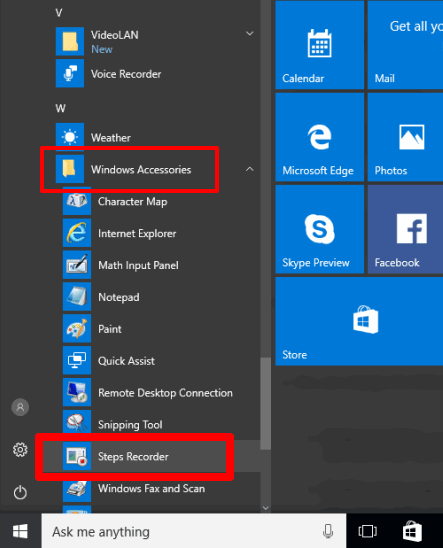
Step 1: Click the Start button to open Start menu. In that menu, you need to scroll down the list of programs to find Windows Accessories. Under that, you will find “Steps Recorder” option. Click that option.
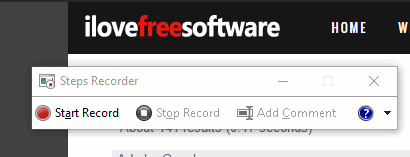
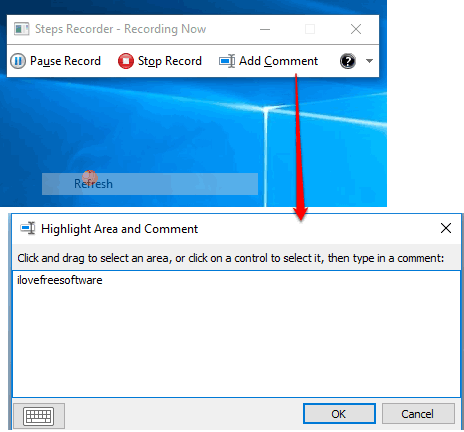
Step 2: Now the small interface of Problem Steps Recorder will open. The interface has only three main options: Start Record, Stop Record, and Add Comment. You must have understood what these options do. However, before using these options, you should first access Settings.
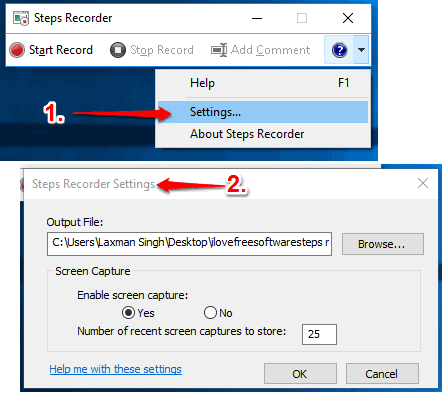
Step 3: Using the drop down icon, you can find and access Settings. A new window will open. Using Settings window, you can:
- Set the output file location. If you have selected the output location, preview window won’t open before saving the recording.
- Enable or disable screen capture. If screen capture is disabled, then only the steps are saved as written text. Desktop screen is not captured. So, I will suggest you keep the screen capture option enabled.
- Set number of recent screen captures to store. The default number is 25, but you can extend this limit also.
Step 4: So, these are the options available under Settings. Now finally, you can click Start Record button. Now whenever you will do like mouse clicks, type a word, etc., it will record desktop screen in steps. It won’t capture your password and characters typed in real-time (there are other keyloggers available for that), only the full desktop screen is captured when you do some activity. You can also use Add Comment button to select a particular part of the desktop screen and add the comment.
Step 5: You can pause the recording also. When the recording is completed, press the Stop Record button. After that, a preview window will open using which you can see the steps and desktop screen captured by this tool. If everything is good, you can save the recording. The recording is saved in a zip file and the output is saved as MHTML file.
The Verdict:
This Problem Steps Recorder can be handy when you are having an issue or facing problem in accessing a particular application or program or something else on your Windows 10 PC. You can replicate the error with step by step procedure and share the output with some expert for assistance.