GenyMotion is a free android emulator that can be installed on Windows, Linux or Mac Operating Systems. GenyMotion gives you the best Virtual environment possible and is best for demonstration and development. GenyMotion installation requires VirtualBox however the setup files includes VirtualBox. So, user does not have to install VirtualBox separately. Eclipse (IDE) Plugin for GenyMontion connect Eclipse and GenyMotion. Developers can run the application written for Android OS, directly in GenyMotion.
GenyMotion is a full-fledged free Android emulator and when I say full-fledged, it actually is. You have everything when it comes to setting up a virtual environment for Android Development. You can use this amazing software to simply look at the features before you actually buy an Android based phone or tablet. You can use it to develop applications (which i am looking forward to; nah…i am just kidding) in your computer using Eclipse IDE and integrate it with GenyMotion just by installing a plugin that’s available on their website. Though you can use other IDEs available for Android development however Eclipse is natively supported by GenyMontion.
How do I get started?
The start always starts with the word “Installation”. When we talk about installation, we also have to look for the System Requirements. Well, we would not go deep into that because that’s already available on the website.
Click here to know the System Requirements
GenyMotion can run on Windows, Linux and Mac so you don’t have to worry about compatibility but if you’re using Windows XP (sp3) or anything higher than that then this software is a must for you.
Steps to install
- Visit the website and click on “Get GenyMotion” button. You need to sign up with them with your email address.
- Once we click on the button, we need to choose the Free Licensed version.
- We are now supposed to install the version that has VirtualBox with it – Windows 32/64 bits (with VirtualBox). However, if you have VirtualBox installed in your computer, you can go for the version that’s without Virtual Box.
- We’re almost done here. We just have to run the setup file. You need to login with your account your created on the website with GenyMotion.
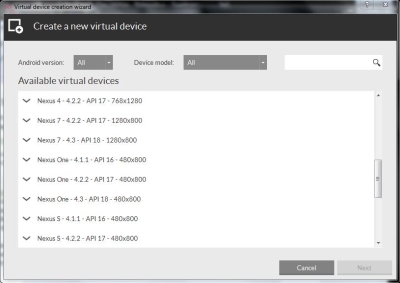
- Once we’re done with the installation part, we will get a list of devices from which we can choose the one we want to run.

- GenyMotion will download the files related to the device and automatically set the memory and disk space requirements for you.
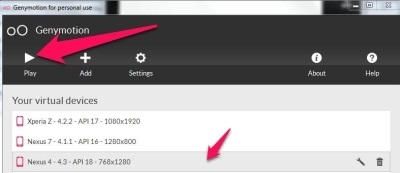
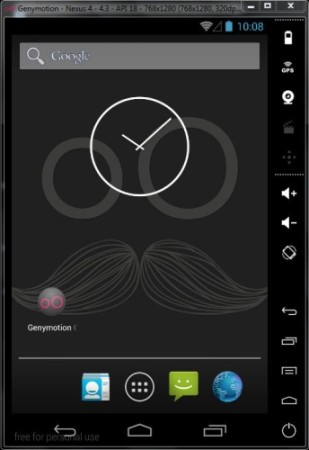
- We just have to choose the device installed and click on play to emulate the device just downloaded. This will bring up the device interface in a window with the Android version for that device running in virtual environment.

What else can I do with it?
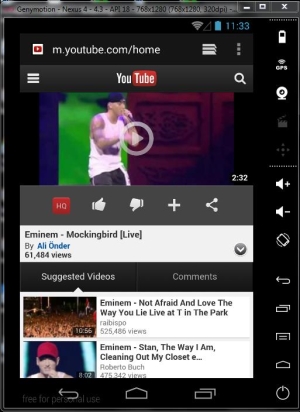
Ask me what can you “NOT” do with it. Every application that you could use on your real device can work in this virtual environment. You can check your email by opening the browser and signing in to your email or maybe it’s a video you want to watch within the Virtual Environment. This free Android Emulator can do it all for you. You can go through each and every button available there and it will emulate the effects that’s available on the physical device. You might ask, “Is it really emulating it?”. I would say “No”. It is actually running the Android Operating System within your computer in a Virtual Environment.
What’s up with ADB?
ADB stands for Android Debug Bridge and it’s a tool that lets you talk to the Virtual Environment you’re running. It should not bother you much if you’re just trying to get a view of how the things work inside the emulator or just showing a demonstration of the device to your friend. If you’re looking for development and want to be conducive to the Android community, then this might be something useful to you. This will let you connect to Eclipse (your favorite IDE; maybe not so favorite). You can test the application written with the IDE. Best part is that you can simple drag and drop the app files to the Virtual environment.
Settings
GenyMotion lets you change the Network Setting and gives you option to use proxies. You can also change the default path from where GenyMotion picks up the Virtual Devices. You can also configure the path to ADB (Android Debug Bridge). GenyMotion can dump the screenshots to a specific folder of your choice.
Conclusion
GenyMotion is one of the best Android emulator for Windows. You can use it for demonstration and development purposes. Integration with Eclipse is one of the features that a developer would love to go for and use GenyMotion. For users, it can give a real and live experience of Android without actually owning an Android based phone. GenyMotion automatically chooses the system configuration that’s best for the device. This makes it simple for users who are new to GenyMotion. I love GenyMotion and hope the experience will be the same for you.

