Here we go to learn steps to schedule email on Android. Scheduling an email on Android is not possible with its pre-installed email app or official Gmail app.
Yesterday I was sitting and doing my office work from home. While doing my office work I created an email which was very urgent to be sent to my boss. But the problem was that, I had to send that email to my boss at 2:00 am at night or very early morning. At that particular point of time, I searched for and found a way to schedule my email on my Android phone. And seriously I have to say, it worked and sent the email automatically at sharp 2:00 am at night. So below are the steps to schedule email on Android phone.
Steps To Schedule Email On Android:
Step 1: Sign-in to Google Play Store.
Step 2: Search for “Send Scheduled Email Free” app in Google Play Store.
Step 3: Install “Send Scheduled Email Free” app on your Android phone.
Step 4: Launch the app on your Android phone.
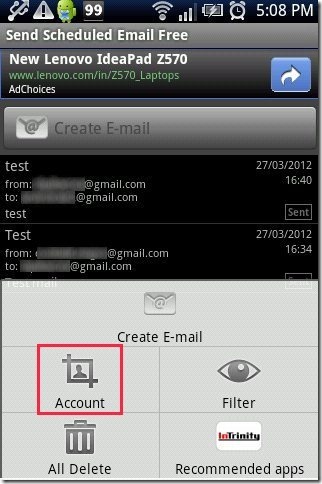
Step 5: Tap on options menu button on your Android phone. Then tap on “Accounts” option or “Create Email” option in the app.
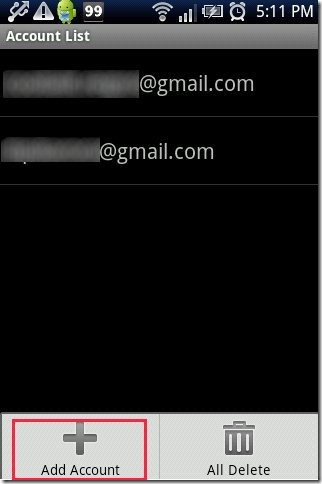
Step 6: Tap on “add account” option and enter your mail id and password from which you want to send email.
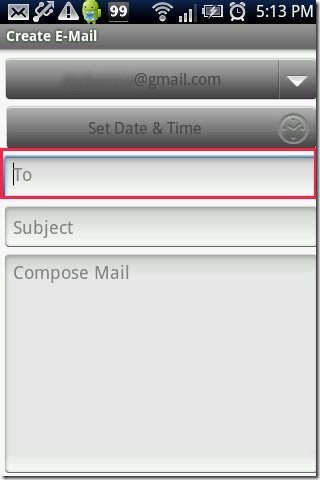
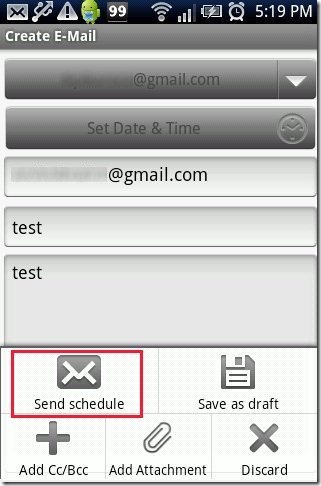
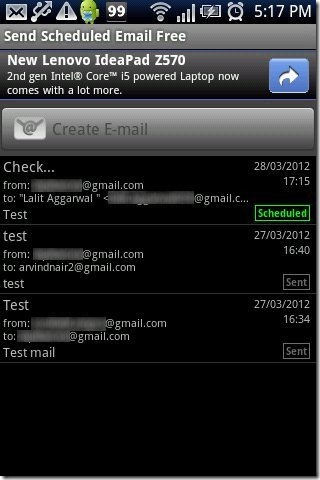
Step 7: Then tap on “create email” option to create and schedule a new mail.
Step 8: Enter the mail id on which you want to send the mail and then create a new email.
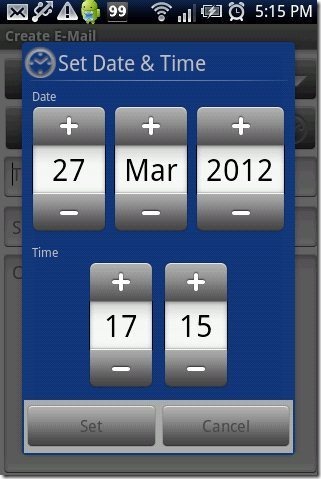
Step 9: Schedule the email by setting date and time on which you want to send email.
Step 10: Tap on options menu and then tap on “send scheduled” option.
Step 10: Your email will be scheduled and the app will automatically send the email at the preferred date and time.
Take a look on how to schedule SMS on Android reviewed by us.
The app really works smartly on Android phone. Also, the app is easy and comfortable to manage on Android. The appreciating part of this Android email app is its multiple account adding option. The app allows you to add multiple email accounts from which you can select any email account and schedule the mail via that email account on your Android phone.

